Monday, February 23, 2015

Pink Lemonade " So Sweet" Card

Good Morning!
It has been sooooooo cold here in New York.  I think just about everyone has been feeling the cold this winter.  Spring cannot come soon enough for me!!!
Today's card reminds me of warmer days!  I made a Thank You card using Lemonade 2 Drink stamp set  and die set from The Stamps of Life.

 I used card stock for the background color of the glass and then stamped the outline on some vellum.  I cut along the front upper edge with an exacto knife in order to slip in the straw and the slice of lemon.
 I have way too many paper straws hanging around my craft area.  These cards were the perfect way to use some of them up!

My Supplies:
Lemonade 2 Drink stamp set and Lemonade dies  -  The Stamps of Life
Sentiment, Signature Greetings stamp set  -  Papertrey Ink
Patterned Paper  -  Echo Park
Hibiscus Burst and White card stock  -  Papertrey Ink
Vellum and Paper Straws  -  Recollections
Scallop Punch  -  Fiskars
Copic Markers
Stazon Ink

Thank you for stopping by again today!  Have a good one!

Thursday, February 19, 2015

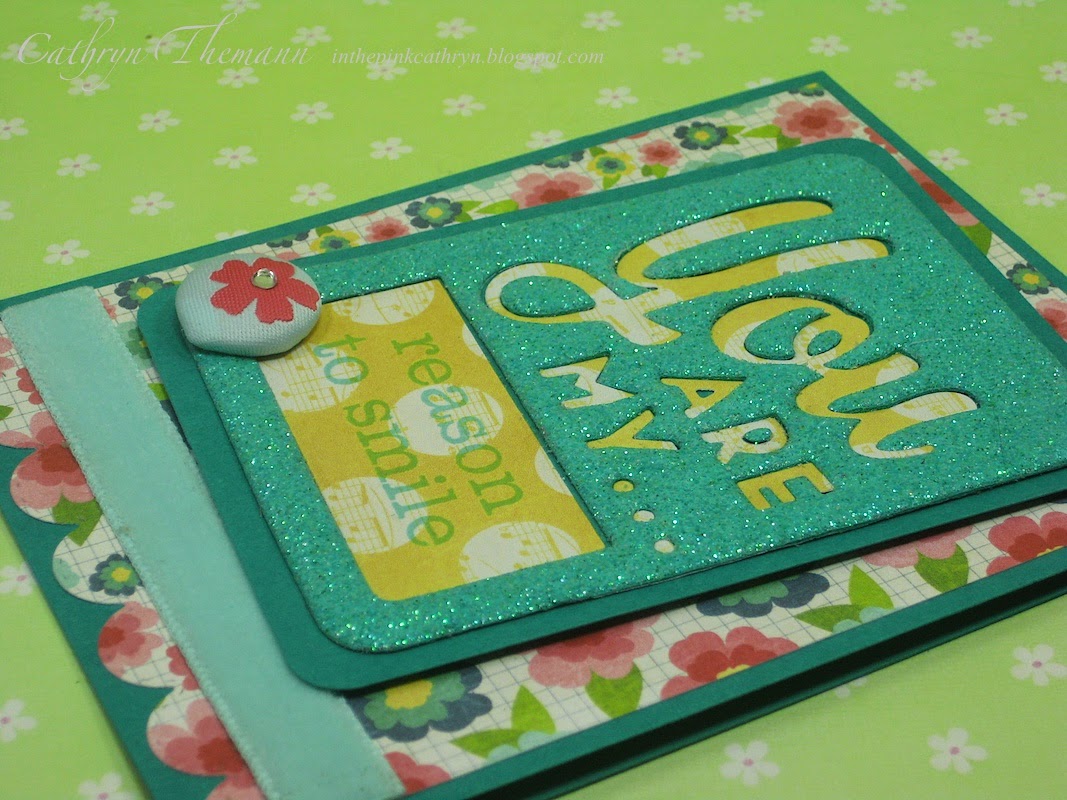
You Are My Happy Place/Reason to Smile Cards

Hello to Everyone!
For Today's project I have some girlie versions of the card I posted Yesterday.
 This time I used some adhesive backed foam on the cards.  I love how it gave them extra "sparkly" dimension.
 I used the negative of the foam die cut to make this version.
My Supplies:
Phrase Play #1 die and stamp sets  -  Papertrey Ink
Beautiful Life 6x6 Paper Pad  -  Echo Park
Confetti 6x6 Paper Pad  -  Kaisercraft
Tropical Teal and Hawaiian Shores card stock  -  Papertrey Ink
Brads  -  Martha Stewart Crafts
Trims  -  Recollections
Adhesive Backed Foam

Have a great day!  See you soon!

Wednesday, February 18, 2015

You Are My Moon and Stars Card

Hello!  Today I have a card I made for my son with the Phrase Play #1 die and stamp sets.  I LOVE to use the flair that has been available lately!
 I cut the Phrase Play die in two patterned papers and added the green letters to contrast the dark blue.  The edge of the dark blue patterned paper was cut with Fun Stitched Edges die set from My Creative Time.
I stamped the grid pattern on the light blue paper with Distressed Backgrounds from Glitz 

 My Supplies:
Blast Off Collection 6x6 paper pad  -  Bo Bunny
Phrase Play #1 die and stamp sets  -  Papertrey Ink
Distress Backgrounds stamp set  -  Glitz
Fun Stitched Edges die  -  My Creative Time
Simply Chartreuse, Spring Rain and Orange Zest Card Stock  -  Papertrey Ink
Enchanted Evening and Blueberry Sky Inks  -  Papertrey Ink
Flair  -  Studio Calico

I hope you enjoyed my project today!  Have a good one!

Tuesday, February 17, 2015

`No Strings Attached Happy Birthday

Good Morning!
Today's post is 2 Birthday cards I made with the No Strings Attached and Wet Paint stamp sets from PTI.
 The background on this card I made with Polka Dot Basics stamp set.
 The happy is a die cut from the Wet Paint dies and the Birthday is from the Wet Paint stamp set.
 For this card I used patterned paper and the happy is stamped instead of die cut.

My Supplies:
Wet Paint stamp and die sets  -  Papertrey Ink
Polka Dot Basics stamp set  -  PTI
Bitty Dots Basics paper  -  PTI
Hawaiian Shores Ink  -  PTI
Hibiscus Burst and White card stock  -  PTI
Enamel dots
Tuxedo Black Ink  -  Memento

Have a great day!

Friday, February 13, 2015

Paper Airplane Gift Bag and Tag

Hello! It's FRIDAY!!!!
I actually posted a Valentine Project every day this week, yeah me!!!  I hope you enjoyed my posts and I hope to be posting more regularly in the future.
My final project for this week is based on some adorable Paper Airplane push pins I found to give my husband as a gift.  I Had the perfect stamp set and paper to go along with the pins.

 I made the bag out of the Goodie Bag die from Lawn Fawn and added a circle hole in the front.  I packaged the push pins in a cello bag and placed them inside.

 Aren't these push pins just the cutest!!!
 The paper airplane die and stamp sets are from Lawn Fawn and are called Flying By.
 I couldn't resist making a matching tag with the adorable paper.  The heart "trail" is from a different Lawn Fawn set called Bugs and Kisses.

My Supplies:
Goodie Bag die  -  Lawn Fawn
Flying By stamp and die sets  -  Lawn Fawn
Hedgehugs stamp set (for little heart)  -  Lawn Fawn
Paper Plane push pins  -  Bed, Bath and Beyond
1 3/4 circle punch
Hawaiian Shores Card Stock  -  Papertrey Ink
Twine, enamel dots and heart sticker

Thank you for stopping by this week.
Have a HAPPY VALENTINE'S DAY!!!

Thursday, February 12, 2015

Valentine Candy Jars Tags and Mini Treat Bags

Good morning and Happy Thursday!
For my First Valentine's Day project today I made some little tags for candy Jars I put together for my family.  This is a quick project that I had the supplies already on hand.
I got these cute jars from Ikea and I decided I would fill them with candy for the kids. (If they land up laying around when they are empty you KNOW I will snatch them up for use in my craft room, heeheehee).
I used the jar die and stamp from the Bugs and Kisses sets and made a small tag.

I attached stretchy cord through the eyelets so I could snap the tags easily on the mouth of the jar.

Supplies:
Bugs and Kisses stamp and die sets  -  Lawn Fawn
White card stock and Button Twine  -  Papertrey Ink
Small Jars  -  Ikea
Copic Markers, eyelets and stretch cording

Thanks again for visiting my blog!  Have a lovely day.
I will be back tomorrow with another project.

For my second project of the day I made some Mini Treat Bags to dress up packages of gum to give.  I originally got this idea from something similar on Pinterest from pink bling crafter.


 I also made the cute heart paperclips from directions I also saw on pinterest.

My Supplies:
 Spiral Notebook die, Circle Scribble stamp set, Tremendous Treats: Valentines and Raspberry Fizz card stock  -  Papertrey Ink
Bag  -  Recollections
Layering Heart dies  -  My Creative Time
Paperclip

Thanks again for visiting my blog!  Have a lovely day.
I will be back tomorrow with another project.

Wednesday, February 11, 2015

Valentine Treat Holder "Tags"

Hello and Happy Wednesday!
My Valentine' Day projects for today are some treat holders I made out of tags.
I saw a tutorial on craftsunleashed.com recently which inspired me to make these to put some chocolate squares into.


I cut out 2 tags and scored them at 1" from the bottom.  Then glued the tags together at the bottom only.
I cut two pieces of paper 2"x1" and scored both ends at 1/2".  Folded  them and glued them to both tags on the bottom.


My Supplies:
Stitched Tag die  -  Papertrey Ink
Bugs and Kisses stamp and die sets  -  Lawn Fawn
6x6 Paper Pad  -  My Minds Eye
Copic Markers, eyelets,  pink and red twine
Black Enamel Accents  -  Inkssentials
Pop Dots

I hope you enjoy your day!
See you tomorrow for another Valentine project!

Tuesday, February 10, 2015

Whale You Be Mine? Valentine's Day Card

Good Morning on this Tuesday before Valentine's Day!
My second project this week is a card for my hubby. I used some non-traditional colors and I LOVE it!
I will have a project for you every day this week in celebration of Valentine's Day!!!
 The wave paper I received in my order from Lawn Fawn.  Included in the package was a gift of a few sheets of 6x6 paper and everything was beautifully wrapped in a few yards of bakers twine!!!
 To make my version of a "nautical knot" I actually used some cotton kitchen twine.  I tied 3 strands of twine together (I made 2 of them).  Then I looped the 2 pieces through each other and pulled tight.
I attached the whales and bling to a piece of vellum to set them apart from the patterned paper.  To attach the vellum neatly I put my glue behind the whales and heart where you couldn't see it.

Supplies:
Whale You Be Mine? stamp and die sets  -  Lawn Fawn
Stitched Party Banners die set  -  Lawn Fawn
Yellow paper  -  Nautical, Fancy Pants
Vellum, Copic Markers, adhesive gems
Hawaiian Shores card stock  -  Papertrey Ink
Kitchen Twine

Have a great day!
I will see you tomorrow with another Valentine!

Monday, February 9, 2015

Valentine's Day Cookie Tags

Good Morning and welcome to a new week!  It's Valentine's Day this Saturday so I am going to give you a project every day this week!
For today I made some tags to put on some cookies I packaged up.
 I put these in my children's lunch bags on Friday for a little treat.  I hope to put something in their bags every day this week leading up to Valentine's Day.  It's so icy and cold so I want to brighten up their days.
I love how this paper matched the cookies, so cute!!!

 Supplies:
Bugs and Kisses stamp and die sets  -  Lawn Fawn
Tag You're It Dies  -  Lawn Fawn
Birthday Tags stamp set  -  Lawn Fawn
We Go Together 6x6 paper pad  -  Pebbles
Copic Markers
Red and Aqua Baker's Twine, Stickles
Cello bags and twist ties  -  Gifts International
Cookies  -  Target

Thank you for visiting my blog.  I hope you enjoy your day!
 

Wednesday, February 4, 2015

Wedding Wishes Card

Hello!  For the first time in quite a while I have a card to share.
I made a few Wedding  cards to have on hand.  I originally saw this in the Papertrey Ink gallery.  I changed up a few things and this is my version.
I love the look of vellum but it is very hard for me to attach without unsightly glue marks.  Here are some pics of how I was able to hide the glue dots I used to attach the vellum.
  First I embossed my circle scribbles image onto the vellum.  Then on the front I attached my leaves with some glue dots.
Next, I flipped the vellum over and attached glue dots onto the back in the same exact spots as on the front.  I attached the vellum to the card base.   Finally, I added sequins on the top to hide the two layers of glue dots.
I hand cut the banner and attached it to the card with pop dots.  In subsequent versions I made of this card I added one more layer of colored card stock to give it more depth.  I'm sorry I don't have any pictures of them.
 Supplies:
Circle Scribbles stamp set  -  Paperytrey Ink
Turning a New Leaf dies  -  Papertrey Ink
 Encore Gold Ink and Embossing Powder
Sequins, Square Cards and Envelopes, Vellum  -  Michaels

 I hope you enjoyed my card today.  Have a good one!