Hi Friends!
My project today is a Window Treat Box that measures 2 1/2 x 3 1/2 x 1 1/4". I used the Excellent Eggs stamp set & dies bundle, Stylish Shapes dies, Lighter Than Air Designer Series Paper and Rainbow Dots.

I started with a piece of Bubble Bath Cardstock sized
8 x 5 1/2"
I scored the 8" side at:
1/2, 3, 4 1/4 and 6 3/4"
I scored the 5 1/2" side at:
1 1/4, 4 and 4 3/4"
To cut and put the box together you can watch my Video Tutorial Here.
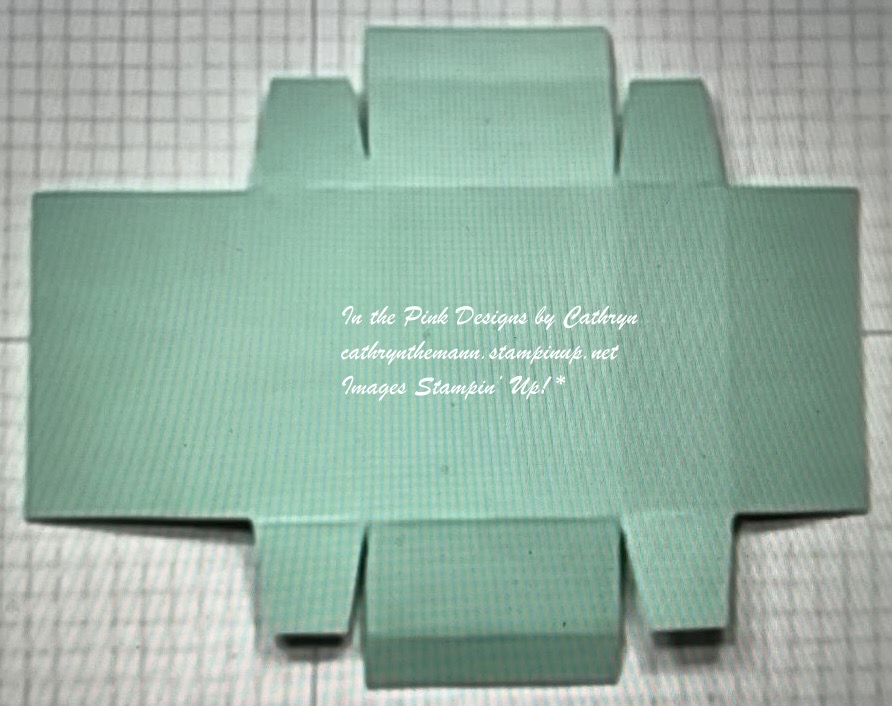
Below is a picture of how your Cardstock should look after scoring and cutting.

Before putting the box together I added the window.
I attached one of the pieces of the Lighter Than Air DSP (2 1/4 x 2 1/4") to the front part of the box.
I cut a 1 5/8" circle in the panel using the Stylish Shapes dies.
I attached a Window Sheet on the inside of the box, sized 2 1/4 x 2 1/4", with Liquid Glue.

Once I put the box together I attached the other 2 pieces of Lighter Than Air Designer Series Paper to the box.
(1) 2 1/4 x 2 1/2" back 2 total including the front
(1) 1/2 x 2 1/4" top/front
I attached the DSP to the box with Liquid Glue.

I stamped the Bunny image, from Excellent Eggs stamp set, onto Basic White Carstock with Tuxedo Black Ink.
I cut the image out using the Excellent Eggs dies.

I used Stampin' Blends to add a little color to the Bunny.
Light Bubble Bath - Nose and Cheek
Light Smokey Slate - Shadow Areas

I cut 2 Zigzag pieces from Bubble Bath Cardstock using the Excellent Eggs dies.
I attached them to the front of the box, at the bottom of the Window, with Liquid Glue.
I attached the Bunny on top of the ZigZags with Dimensionals and Mini Dimensionals.

I closed the box using a small binder clip.
I tied Bubble Bath Sheer Ribbon around the prongs and made a bow at the front.

For the final touch I added 2 Bubble Bath Rainbow Dots to the upper left of the Window.

Supplies:
Excellent Eggs stamp set & dies Bundle
Stylish Shapes dies
Lighter Than Air Designer Series Paper
Bubble Bath Cardstock
Basic White Cardstock
Window Sheets
Tuxedo Black Ink
Stampin' Blends
Sheer Ribbon Combo Pack
Rainbow Dots
Tear & Tape
Liquid Glue
Dimensionals
Mini Dimensionals
Simply Scored
Take Your Pick Tool
Mini Binder Clip - Walmart
Thank you for visiting my Blog today. I hope you enjoyed my Easter Project.
See you next time!
Love & Hugs,
Cathryn