Friday, May 29, 2020

Forever Fern Friend Card with Stampin' Up

Hi Friends!
My project today is a card using Forever Fern stamp set, Forever Flourishing die set and Forever Greenery Designer Series Paper from Stampin' Up.


I used two pieces of Forever Greenery Designer Series Paper.
1 piece -  1  1/2  x  5  1/4"
1 piece -  4  x  5  1/4"
I attached them to the card base as shown below.


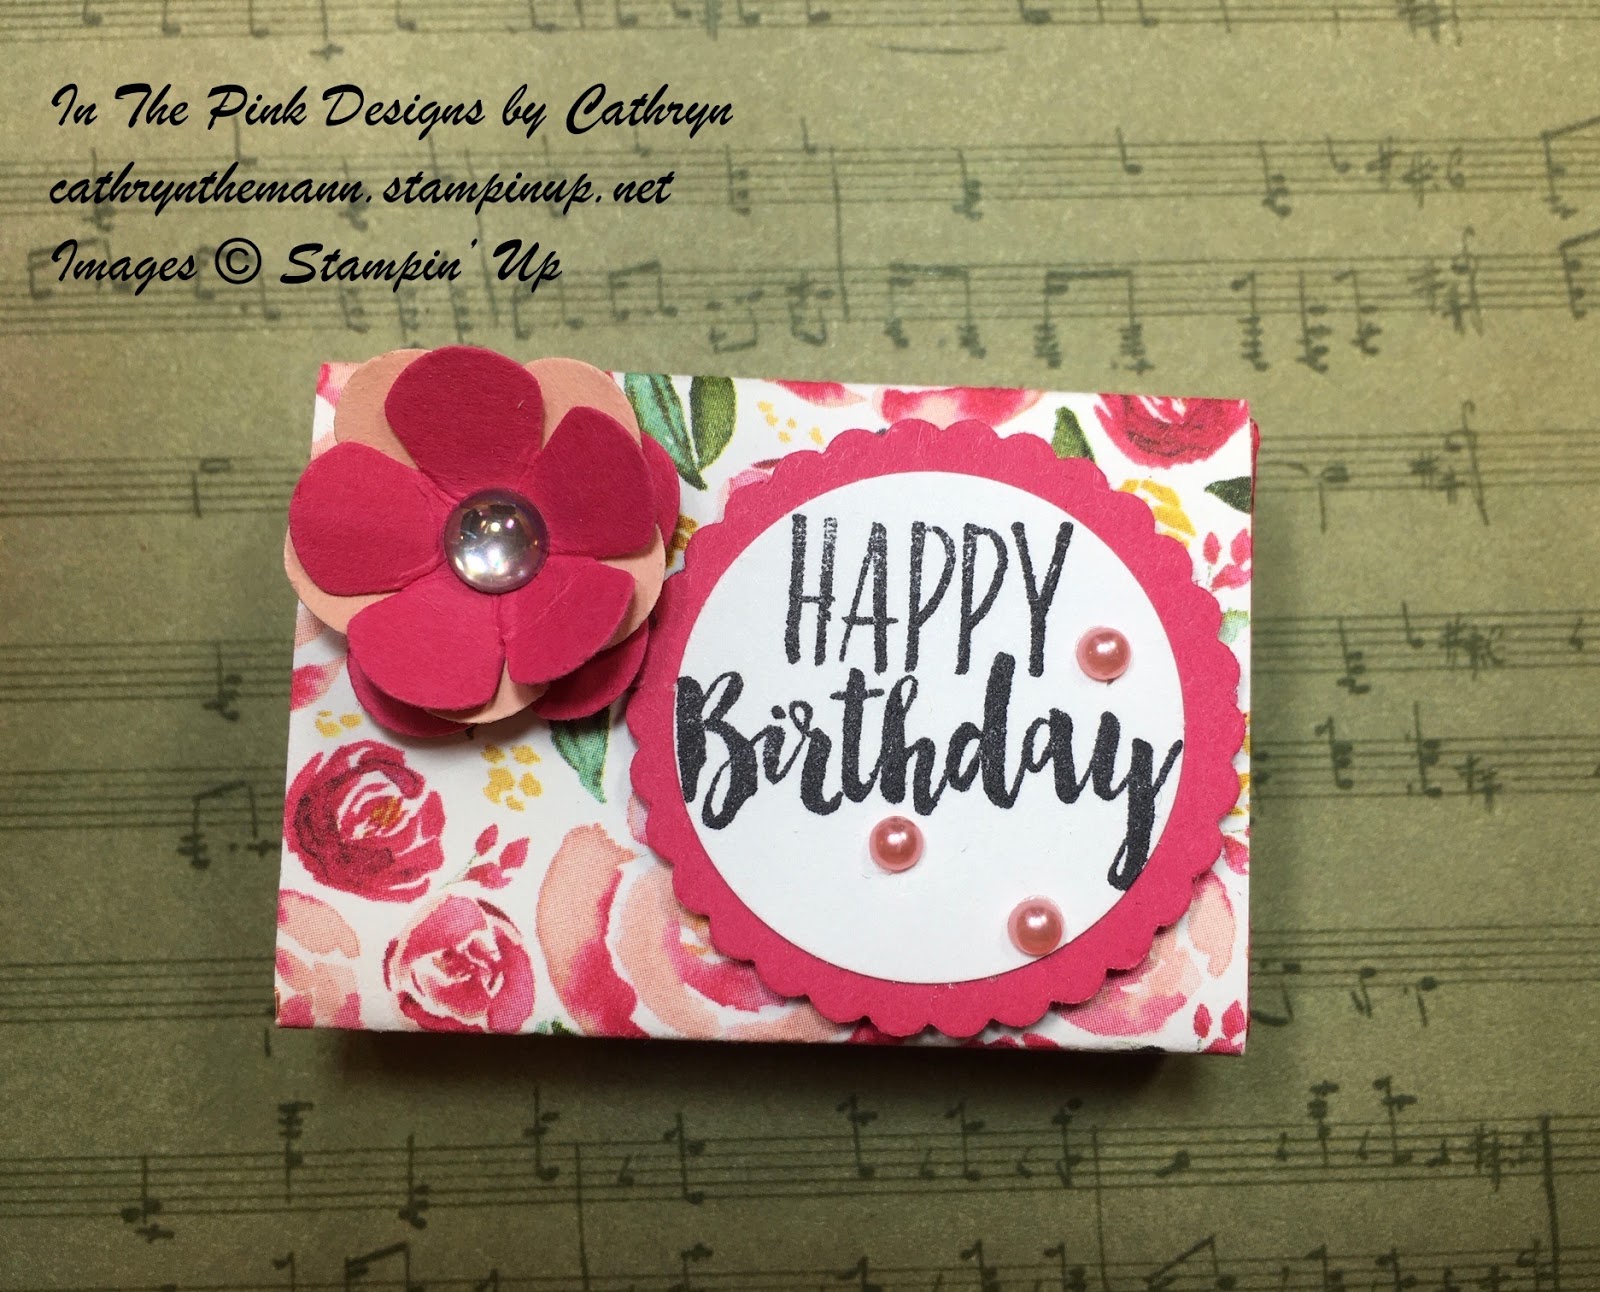
I stamped the sentiment from Forever Fern stamp set on a 2  1/4" circle.  Then I attached the sentiment to a 2  1/2" circle of Garden Green Cardstock with Dimensionals.


I stamped and die cut 3 leaf pieces with the Forever Flourishing Dies and attached them, with liquid glue, to the left side of the Sentiment piece.  I made a bow with Silver Thread from the Forever Greenery Combo Ribbon Pack and attached it with a dab of liquid glue.


I attached the entire circle piece to the card with Dimensionals.


Stampin' Up Supplies:
Forever Fern stamp set
Forever Flourishing dies
Forever Greenery Designer Series Paper
2  1/2"  Circle Punch or die
2  1/4"  Circle Punch or die
Whisper White Cardstock
Garden Green Cardstock
Forever Greenery Combo Ribbon Pack
Metallic Pearls
Dimensions
Liquid Glue

I hope you enjoyed my Card today.
See you next time!

Wednesday, May 27, 2020

Birds and Branches Bag - New Stampin' Up 2020 set

Hi Friends!
My post for today is a small bag using Birds and Branches stamp set which is NEW from Stampin' UP.  The stamp set will be available for purchase on June 3, 2020.


To make the bag I used a  8 1/2  x  6"  piece of Highland Heather Cardstock.
I scored the 8 1/2" side at:
1,  4,  5,  8"
I scored the 6" side at:
1/2  and  5"
I Burnished the score lines and cut the box shape.  You can watch my video tutorial here.

I stamped the birds with Daffodil Delight Ink, then used a Blender Pen to add a little bit of lighter Daffodil Delight to the Belly and Upper Wing on the Birds.
I stamped the nest with Crumb Cake Ink and used Early Espresso Ink to add some depth to the branches.  I attached them with Dimentionals.

I used the Lovely You Stamp set and Lovely Label Pick-a-Punch for the sentiment using a  2  3/4  x  1"  piece of Highland Heather Cardstock and Early Espresso Ink.  I attached the label to the box with Dimensionals and added some rhinestones from the Nobel Peacock Rhinestone Pack.
I used the Small Bloom Punch for the flower using a scrap of Highland Heather Cardstock. I attached it with liquid glue and added another rhinestone.

You can shop with Me Here!

Stampin' Up Supplies
Birds and Branches stamp set
Lovely You stamp set
Lovely Labels Pick-a-Punch
Small Bloom Punch
Whisper White Cardstock
Highland Heather Cardstock
Daffodil Delight Stampin' Pad
Early Espresso Stampin' Pad
Crumb Cake Stampin' Pad
Best Dressed 6 x 6 Designer Series Paper
Blender Pen
Flowers For Ever Ribbon Combo Pack
Nobel Peacock Rhinestones
Tear and Tape
Dimensionals
Liquid Adhesive
Snail Adhesive

I hope you enjoyed my post and video today.
See you next time!

Monday, May 25, 2020

Jar of Flowers Shaker Card with NEW Stampin' Up 2020

Hi Friends!
My project for today is a Shaker Card with the new Jar of Flowers stamp set and Jar Punch.  These items will be available for purchase from Stampin' Up on June 3 when the New Catalog goes live!

You Can See My Video Tutorial HERE!

I started with a card base and a  4  x  5 1/4" piece of Regals Designer Series Paper in Old Olive Gingham.
I stamped the flower Image 3 times on Whisper White Cardstock.  I colored the pink flowers with Rococo Rose Stampin' Blends.  I colored the blue flowers with a Blender Pen and Balmy Blue Stampin' Pad.  I colored the leaves with a Blender Pen and Old Olive and Pear Pizzazz Stampin' Pads.
I colored and cut the 2 bottom pink flowers the same and cut them out in order to pop them up on Dimensionals.


 I used a 3   x  4 1/2" piece of Old Olive to punch with the Jar Punch.  You can see my Video Tutorial HERE to see how to make the shaker.
I stamped the Jar with Memento Tuxedo Black and the Stems with Old Olive.  I colored in the stems with a plain Blender Pen, letting the ink from stamping move into the stem pieces.


I used Flowers For Every Season Gems on the inside of the shaker.  I popped the 2 extra flowers I fussy cut up on dimemtionals to add some more height to the flowers.
I added Wink of Stella to all the flowers.
Finally I tied a bow with Polka Dot Tulle Ribbon and attached it to the top of the Shaker Dome with glue dots.


You Can Shop Stampin' Up with me here

Stampin Up Supplies:
Jar of Flowers stamp set
Jar Punch
Regals Designer Series Paper  -  4  x  5 1/4"
Old Olive Cardstock  -  3  x  4 1/2"
Shaker Domes
Flowers For Every Season Gems
Rococo Rose Stampin' Blends
Pool Party Light Stampin' Blend
Pear Pizzazz Stampin' Pad
Balmy Blue Stampin' Pad
Old Olive Stampin' Pad
Memento Tuxedo Black Ink
Polka Dot Tulle Ribbon
Wink of Stella
Dimensionals
Liquid Glue
Glue Dots

Thank you for stopping by today!
See you next time!!!

Friday, May 22, 2020

Forever Fern Fold Over Box with NEW 2020 Stamping' Up Products!

Hello Friends!
Today I am excited to show you some NEW products from the Stampin' Up June 2020 Catalog!
I made a  3  x  4 1/2"  Fold Over Box with the New:

Forever Fern stamp set
Forever Flourishing Die set
Forever Greenery Designer Series Paper
Lovely You stamp set
Lovely Labels Pick-a-Punch

When UPS came yesterday I was so excited to make something to show you all!


I started with a  9  x  6 1/2"  piece of Seafoam Cardstock.

I Scored the 9" side at:
1,  4,  5 and  8"
I Scored the  6 1/2" side at:
1  and  5 1/2"

I burnished and cut the score lines into the shape of the box.  You can see my Video Tutorial Here.


 I attached a  2 3/4  x  4 1/4" piece of Forever Greenery Designer Series Paper to the top of the box.  Next, I tied a ribbon from the Flowers For Every Season Ribbon Combo Pack around the side of the box.
I punched a piece of 2 x 3 3/4" Seafoam Cardstock on one end with the Delightful Tag Topper Punch and with the Detailed Trio Punch on the other end.  I attached it to the top of the box being careful to leave space for the ribbon to move.


I stamped 2 of the Images from the Forever Greenery stamp set on a piece of Whisper White using Pear Pizzaz Ink.  I used the Forever Flourishing Dies to cut them out.  I attached the bottom image with liquid glue making sure to cover the hole on the tag top.  I put Dimentionals on the top pieces of the other stamped images and glue on the stems, then attached it to the box.


I punched a  2 1/2  x  1"  piece of Whisper White Cardstock with the Lovely Labels Pick-a-Punch Punch on both of the 1" ends.
I stamped a sentiment from the Lovely You stamp set onto the punched out label.  I attached it with Dimentionals to the bottom of the Greenery pieces.  I added some rhinestones from the Nobel Peacock Rhinestone pack to the label.  Finally for some shimmer I added Wink of Stella to the leaves.

If you would like to make the project I made today you can shop through my sight.  It would help me to keep bringing you more projects!

You Can Shop Stampin' Up with Me HERE.


Stampin' Up Supplies:
Forever Fern stamp set
Forever Flourishing die set
Lovely You stamp set
Lovely Labels Pick-a-Punch
Forever Greenery Designer Series Paper
Detailed Trio Punch
Flowers For Every Season Ribbon Combo Pack
Whisper White Cardstock
Seafoam Cardstock
Pear Pizzaz Stampin' Pad
Memento Tuxedo Black Ink Pad
Noble Peacock Rhinestones
Dimensionals
Tear and Tape
Liquid Adhesive

I hope you liked my project for today!
See you next time.

Wednesday, May 20, 2020

Thank you Gift Card Holder with Best Dressed DSP from Stampin' Up

Hi Friends,
For today's post I made a Gift Card Holder with Best Dressed Designer Series Paper and the Medium Daisy Punch.  I also used the Layered with Kindness and Free as a Bird stamp sets.


I made my sample with a paper bag I had in my stash.  It was a bit thin so I figured out how to make a Cardstock one myself.


 I started with a piece of 5 1/2 x 5" Whisper White Cardstock.
I Scored the 5" side at:
3/4  and  4 1/4"
I Scored the 5 1/2" side at:
1 1/2  and  4"

 I cut and put the gift card together using Tear and Tape.  You can see my video tutorial Here.


I attached  (2)   2 1/4  x 3 1/4"  pieces of the Best Dressed DSP to the front and back of the gift card.
I cut a 1 3/4" circle out of Whisper White.
Using the Free as a Bird stamp set I stamped the words Thank you on the top of the circle.
I stamped the leaves from Layered with Kindness stamp set onto the side of the circle and then attached it to the gift card at an angle with dimentionals.


I cut 2 flowers out of the Medium Daisy Punch with Melon Mambo Cardstock.  I glued them to each other, offsetting the petals.  I attached the flower to the bottom of the circle with liquid glue and added a rhinestone in the middle.
I used some Polka Dot Tulle Ribbon to make a bow and attached it above the circle with glue dots.
Finally, I added a clip to the top flap to close the gift card holder.


Stampin' Up Supplies:
Best Dressed Designer Series Paper
Medium Daisy Punch
1 3/4" Circle Punch
Free as a Bird Stamp Set
Layered with Kindness Stamp Set
Whisper White Cardstock
Melon Mambo Cardstock
Polka Dot Tulle Ribbon
Snail Adhesive
Liquid Glue
Tear and Tape
Rhinestones
Glue Dots

For the Sample I used:
Pressed Petals DSP
Very Vanilla Cardstock
So Saffron Cardstock
3/8" Denim Ribbon

I hope you enjoyed my project today!
See you next time.

Monday, May 18, 2020

Birthday Candle Matchbox with Best Dressed

Hi Friends!
I am so excited about the project I have for today.  I made a Birthday Matchbox complete with a candle to blow out!  I used the Best Dressed 6 x 6 Designer Series Paper, Small Bloom Punch and 1 3/8" Scallop Circle punch, all from Stampin' Up.

You Can See My Video Tutorial HERE.

I used an actual small matchbox for the inside box and made a sleeve to dress it up a bit.


I stamped the "Birthday Wishes" Sentiment from A Wish for Everything stamp set on a piece of  2 1/16  x  1 3/8"  Best Dressed DSP.
I attached the piece to the top of the matchbox.  I attached another of the same size to the bottom.  I covered the inside bottom of the box with a piece of   2  x  1 1/4" Petal Pink Cardstock.


 I used an Eyelet as a holder for the candle.  In order to make the Birthday Candle fit I cut the candle to the length of the box and shaved the bottom so it would fit snuggly in the eyelet.
I punched a hole in the top left part of the box top for the candle and eyelet to fit in.


To make the sleeve a used a  2 1/8  x  4 1/2"  piece of the Best Dressed DSP.  I gently folded it around the box making sure to bend around the corners.  I took it off and folded the corners straightly.  I wrapped it around and attached it to itself with Snail.


I stamped a piece of Whisper White Cardstock with the "Happy Birthday" sentiment from the Witty-Cisms stamp set.  I punched it out with a 1 1/8" circle punch and attached it to a piece of Melon Mambo Cardstock that I cut out with the 1 3/8" Scallop Circle Punch.  I attached the piece to the box with Dimensionals.


 For the final touch I cut flowers with the Small Bloom Punch  (2 flowers out of Melon Mambo and 1 out of Petal Pink).  I attached them together with glue dots and then to the box with a bit of glue.  I added an Epoxy droplet on the flower and some pink pearls on the sentiment.


You Can Shop for these supplies With Me Here.

Stampin' Up Supplies:
A Wish For Everything Stamp Set
Witty-Cisms Stamp Set
Best Dressed 6 x 6" Designer Series Paper
1 3/8" Scallop Circle Punch
1 1/8" Circle Punch
Small Bloom Punch
Melon Mambo Stampin' Pad
Memento Tuxedo Black Pad
Melon Mambo Cardstock
Petal Pink Cardstock
Whisper White Cardstock
Snail Adhesive
Glue Dots
Liquid Adhesive
Dimentionals

Matchboxes from Dollar Tree
Eyelets from my stash
Birthday Candles

I hope you like my project today.  I especially enjoyed making this one!
See you Soon.

Friday, May 15, 2020

Tasseled Box using Bird Ballad

Hi Friends!
My project for today is a Box that pinches at the top.  I used Bird Ballad Designer Series Paper from Stamping' Up and my own home made tassel.


I Started with a piece of Bird Ballad DSP measuring  7 x 7 3/4". 

I Scored the 7" side at:
2,  3 1/4,  5 1/4  and  6 1/2

I Scored the 7 3/4" side at:
1 1/4  and  5 3/4"

Then I Burnished the scores and cut out the shape of the box.  You can see my video tutorial here.
I assembled the box using snail.


To make the tassel I wound Whisper White Solid Baker's Twine around a 1 1/2" piece of cardboard 15 times.
I tied a piece of the twine around the top and cut the bottom.
Next I tied another piece of twine about 1/4" down  from the top.


I used the  1 3/8"  Scallop Circle Punch to punch a piece of Pool Party.
Then used a 1 1/8" Circle punch to punch a piece of Petal Pink and attached it (with Dimensions) to the Scallop Circle.
I punched two flowers out of Pool Party cardstock with the Small Bloom Punch, attached them together with glue dots.
I attached the flowers to the middle of the Scallop and Circle piece.
I placed the string of the tassel on the back of the Scallop piece with dimentionals.  I then attached it onto the front flap of the box.


I attached Adhesive Velcro on the inside flap and front of the box for a closure.


Stampin' Up Supplies
Bird Ballad Designer Series Paper
Pool Party Cardstock
Petal Pink Cardstock
1 3/8" Scallop Circle Punch
1 1/8" Circle Punch
Small Bloom Punch
Whisper White Solid Bakers Twine
Simply Score
Snail Adhesive
Glue Dots
Dimensionals

I hope you liked my project today!  See you next time.

Wednesday, May 13, 2020

Painted Poppies Hello Card

Hi Friends,
My Project today is a card made with the Painted Poppies stamp set and Peaceful Poppies Designer Series Paper.  I also used the Free as a Bird stamp set for the "Hello" Sentiment.


I attached a  4  x  5 1/4" piece of Peaceful Poppies Designer Series Paper to my card base.
I stamped the image from the Painted Poppies stamp set onto a piece of   3 3/4  x  2"  Whisper White Cardstock using Memento Tuxedo Black Ink.
I colored the image with a Blender Pen, Real Red Stampin' Pad and Pear Pizzazz Stampin' Pad.  You can watch me color on my video here.


I attached the colored image onto a  3 3/4  x  2 1/4"  piece of Real Red Cardstock with Dimentionals.  Then I attached it to the card with Snail Adhesive.
I stamped the "Hello" sentiment from the Free as a Bird stamp set on a 1 1/8" circle.  I glued the sentiment circle onto a piece of Real Red Cardstock punched with the 1 3/8" Scallop Circle Punch.   I attached the circle to the card with a Dimensional and glue.


I added some Metallic Pearls to the sentiment and Flower panel.  For the final touch I added some Wink of Stella to the Flower Petals.


Stampin' Up Supplies:
Painted Poppies stamp set
Peaceful Poppies Designer Series Paper
Free as a Bird stamp set
Whisper White Cardstock
Real Red Cardstock
1 1/8" Circle Punch (you can use a 1" too)
1 3/8" Scallop Circle Punch
Blender Pen
Real Red Stampin' Pad
Pear Pizzazz Stampin' Pad
Dimentionals
Liquid Adhesive
Snail Adhesive
Metallic Pearls
Wink of Stella

I hope you liked my card today.  I appreciate you coming to see me today!
See you next time.

Monday, May 11, 2020

Double Flip Card Box for A2 Cards

Hello Friends,
My Project for today is a Double Flip Top box that I sized to hold A2 cards and envelopes.  I used Highland Heather Cardstock with Best Dressed Designer Series Paper.


I used 3 pieces of Highland Heather Cardstock sized:
1 piece   8  x  6 1/2"
2 pieces  6 1/2  x  7 1/2"

I scored the  8  x  6 1/2"  piece
Long Side - 1 and 7
Short Side - 1 and 5 1/2"

I scored the (2)  7 1/2  x  6 1/2"  pieces
Long Side - 3 and 4"
Short Side - 1 and 5 1/2"

Please watch my Video Here to see how I cut the Cardstock pieces.


The Sentiment I used is from the Thoughtful Blooms stamp set.  I stamped the sentiment of Whisper White, cut it out with the Label Me Lovely Punch and used Dimensionals to lift it up.
I used Blackberry Bliss Cardstock for the Mat on top and Flowers.  I used the Medium Daisy Punch and Small Bloom Punch.  For the leaves I used the Leaf Punch and Garden Green Cardstock.
The Best Dressed DSP sizes are"
(4) 3 1/4  x 4 1/4"
(4)  3  1/4  x  3/4"
(2)  4 1/4  x  3/4"


I designed this box to fit A2 cards and Envelopes.  You can fit 5 to 6 cards inside.   I placed magnets on either side of the lid pieces under the DSP so the box will stay closed.  I used Neodymium N48 magnets from Total Element LLC.


Stampin Up! Supplies:
Highland Heather Cardstock
Blackberry Bliss Cardstock
Whisper White Cardstock
Garden Green Cardstock
Best Dressed Designer Series Paper
Medium Daisy Punch
Small Bloom Punch
Label Me Lovely Punch
Thoughtful Blooms stamp set
Simply Score
Glue Dots
Snail Adhesive
Liquid Adhesive
Tear and Tape Adhesive
Rhinestones
Magnets

I'm glad you visited today!  Have a great day!

Friday, May 8, 2020

Daisy Slider Box with Stampin' Up

Hi Friends!
My project for today is a Daisy Slider Box I made with the Medium Daisy Punch and some Best Dressed Designer Series Paper.


I started with a piece of  6  x  3 3/4"  Highland Heather.
I scored the Long side at:
1 and 5"
I Scored the Short side at:
1 and 2 3/4"


I burnished the score lines and cut out the shape of the box.  You can watch my video tutorial HERE

I used a piece of  6  x  4 1/8"  Best Dressed Designer Series Paper for the Wrap.
I bent it around the box with my hands for the size.
 I burnished the lines I loosely bent on the box
 I assembled the Wrap piece by putting Score and Tape on the edge of the back.


Once the box was assembled I punched out 2 Daisys with the Medium Daisy Punch and 2 Leaf pieces from the Leaf Punch.
I glued the leaves on the box first then attached the Daisys with a dimentional.


For the Sentiment I used "A Wish for Everything" stamp set.
I stamped the sentiment on a  3/4  x  1 1/2" piece of Whisper White with Gorgeous Grape Ink.
 I attached the Whisper White piece onto a  7/8  x 1 5/8"  piece of Daffodil Delight.
I attached it to the box with glue and a dimensional.
Finally I added a yellow rhinestone to the middle of the Daisy.


Stampin' Up! Supplies:
Medium Daisy Punch
Leaf Punch
Best Dressed Designer Series Paper
Highland Heather Cardstock
Daffodil Delight Cardstock
Whisper White Cardstock
Simply Score
Tear and Tape Adhesive
Liquid Adhesive
Gorgeous Grape Stampin' Pad
Dimensionals
Rhinestone
Small Circle Punch

Thank you for visiting today!  I would love to see your version of my project.  If you have any questions or would like to see me do a particular project please let me know!  Have a great day.