Monday, June 29, 2020

Tasteful Touches Simple Envelope - Stampin' Up!

Hi Friends!
My project today is very simple Envelope to make and some Simple Stamping to do.

 I started with a 9 1/2 x 9" piece of the In Good taste Designer Series Paper.

I Scored the 9 1/2" side @
2 1/2 and 7"

I Scored the 9" side @
1 and 7 "


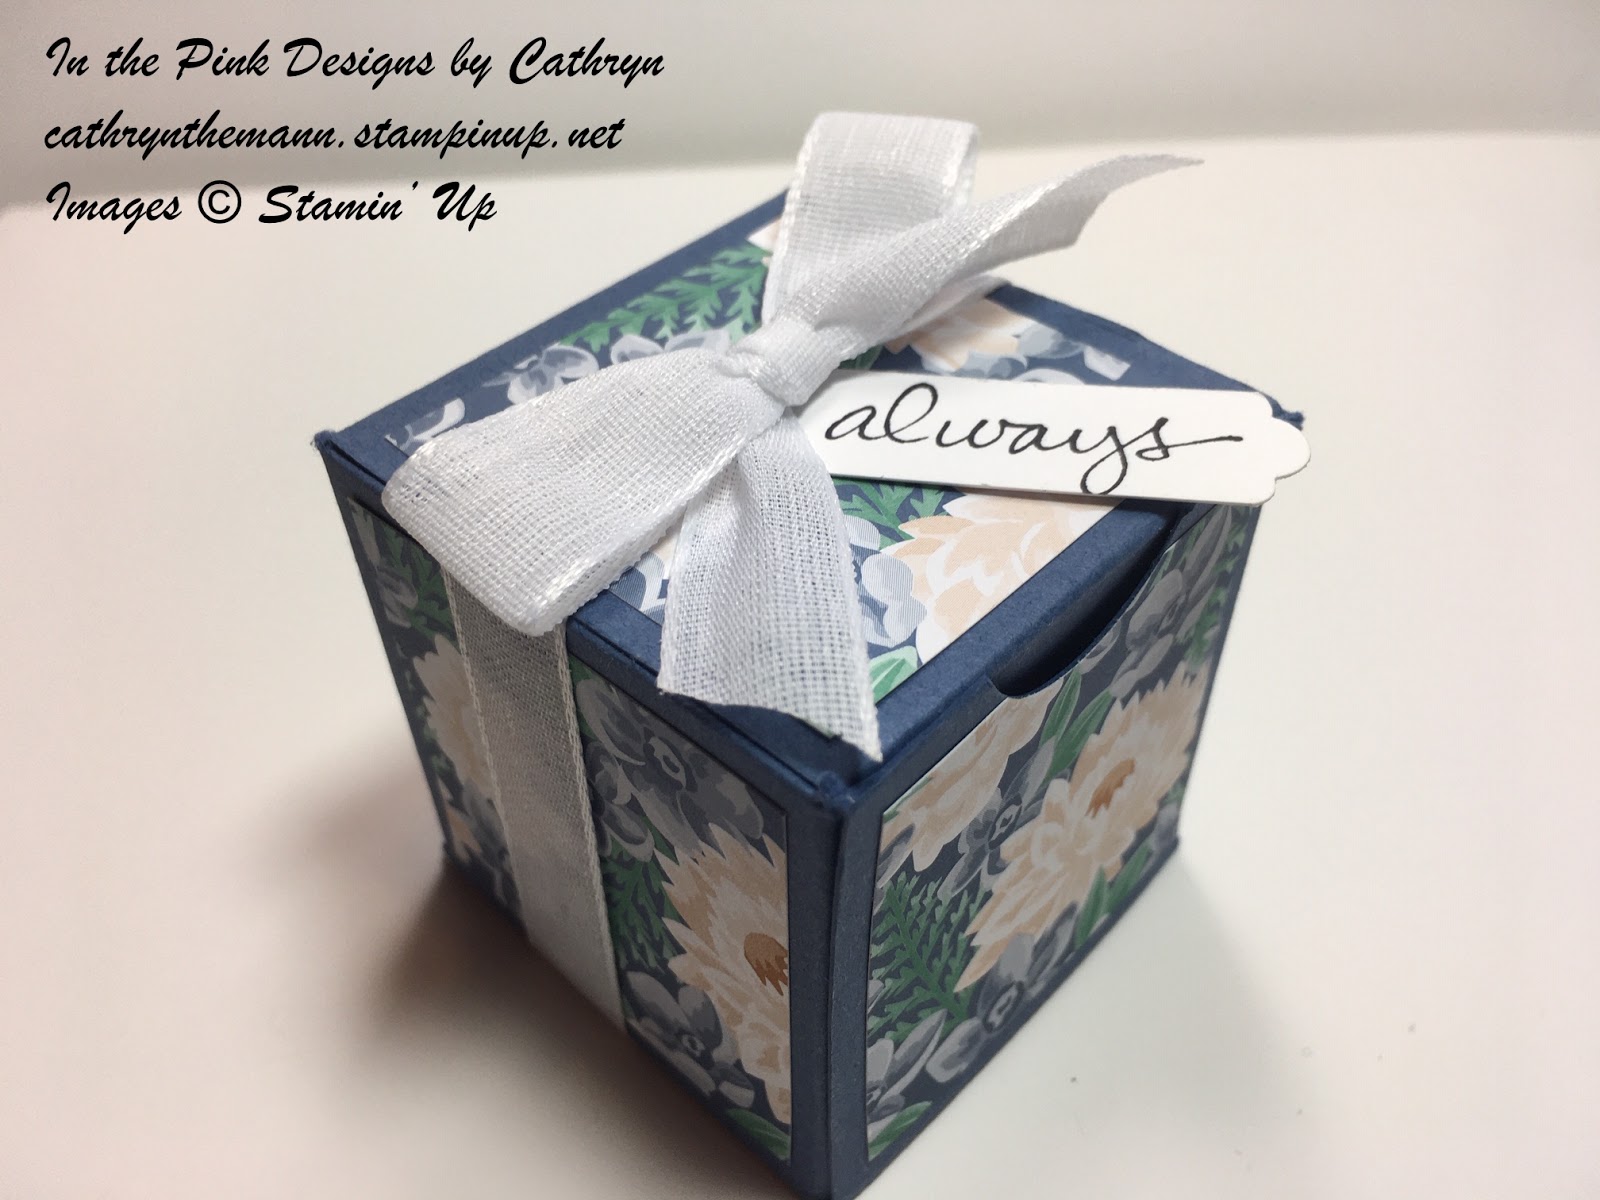
 I used the Tasteful Labels dies to cut the label out of Whisper White Cardstock.
I stamped the Sentiment in Tuxedo Black Ink and the Leaves in Pear Pizzazz Ink.
I stamped the flower on a piece of the extra DSP, from cutting the envelope, with Crumb Cake Ink.

I wrapped Linen Thread around the envelope and tied a bow.  I attached the label with dimentionals and the Flower with a Dimensional and Liquid Adhesive.


Supplies
In Good Taste Designer Series Paper
Tasteful Touches stamp set
Tasteful Label Dies
Linen Thread
Pear Pizzazz Stampin' Pad
Crumb Cake Stampin' Pad
Tuxedo Black Ink Pad
Dimentionals
Wink of Stella
Detail Trio Punch

I hope you enjoyed my project today.
See you next time!

Friday, June 26, 2020

Whale of a Time Folding Double Box - Stampin' Up!

Hi Friends!
My project today is a Double Box that folds together using Whale of a Time Designer Series Paper, Tasteful Label Dies, Tasteful Touches stamp set and the Detail Trio Punch.


Measurements:
Pretty Peacock Cardstock  -  9 1/2  x  7"

Score 9 1/2" side at:
1/4,  3/4,  2 1/4,  2 3/4.  4 1/4,  5 1/4,  6 3/4,  7 1/4,  8 3/4,  9 1/4"

Score 7" side at:
1/2,  6,  6 1/2"

Whale of a Time Designer Series Paper
(4)  1 3/8  x  5 1/4"


Stampin' Up! Supplies
Pretty Peacock Cardstock
Whale of a Time 6 x 6 Designer Series Paper
Tasteful Label Dies
Tasteful Touches stamp set
Pool Party Sheer Ribbon
Versamark Ink
White Stampin' Emboss Powder
Detail Trio Punch
Noble Peacock Rhinestones
Tear and Tape
Seal Adhesive
Simply Score Tool

I hope you like my box tutorial today.
See you next time!

Thursday, June 25, 2020

Delightful Tag Topper Treat Bag - Stampin' Up!

Hi Friends!
My Project today is a Treat Bag I made with the Delightful Tag Topper Punch, Flowers For Every Season Designer Series Paper, Label Me Lovely Punch, Medium Daisy Punch, Lovely You stamp set and Forever Flourishing dies.


I started with a 6 x 6 piece of Flowers for Every Season DSP.
Score one side at:
3/4,  2 3/4,  3 1/2,  5 1/2
Turn the Paper to the right and Score at:
3/4"  AND
Make score marks on the 3 small rectangle pieces ONLY at  5"

To cut the box to shape you can see my Video Tutorial Here.
I assembled the box with NEW Seal adhesive.  I put my treat inside the box and tied a piece of Just Jade Gingham Ribbon through the top holes.
 I punched a piece of 3/4  x  3" Blushing Bride Cardstock with the Lovely Label Pick a Punch.  I stamped the sentiment from Lovely You stamp set to the right of the punched side of the label.  I cut the label down to 1 1/2" and attached it to the right top area of the box and attached 3 rhinestones.
I punched 2 daisies out of Whisper White with the Medium Daisy Punch and attached them together with a glue dot.
I die cut some greenery out of Just Jade Cardstock using the Forever Flourishing die set.
I attached them both to the bag with Liquid Adhesive.


Stampin' Up! Supplies:
Delightful Tag Topper Punch
Lovely Label Pick a Punch
Medium Daisy Punch
Forever Flourshing dies
Flowers for Every Season Designer Series Paper
Blushing Bride Cardstock
Whisper White Cardstock
Just Jade Cardstock
Just Jade Gingham Ribbon
Rhinestones

I hope you enjoy me project today!
See you next time.

Monday, June 22, 2020

Tasteful Touches Front Flap Box - Stampin' Up!

Hi Friends,
My project for today is a 3 x 3 x 2" square box that has a front flap secured by a ribbon.  I used Tasteful Touches stamp set, Forever Flourishing dies and Subtles 6x6 Designer Series Paper.


I started with a 11 x 7" piece of Highland Heather.
Score the 11" side @
1, 4, 6, 9"
Score the 7" side @
2 and 5"

To cut the box to shape you can see my Video Tutorial Here.


 I used the Subtles DSP in Highland Heather.
I attached
(1) 2 3/4  x  2 3/4"
(4) 1 3/4  x  2 3/4"
(1) 3/4  x  2 3/4


I stamped the flower image from Tasteful Touches stamp set with Gorgeous Grape Ink and spread the ink using Wink of Stella
I cut the leaves out of Pear Pizzazz Cardstock with Forever Flourishing dies.


I attached the leaves with liquid adhesive and the flower with Dimentionals and added some Mettalic Pearls.


 I punched 1 hole in the flap and 1 in the body of the box that corresponds to it.  Then I punched another in the box a bit lower.
I ran Metallic Edge Whisper White ribbon through and tied a bow.


You can shop your Stampin' Up! supplies with me Here.

Stampin' Up! Supplies:
Metallic Edge Whisper White Ribbon
Highland Heather Cardstock
Whisper White Cardstock
Pear Pizzazz Cardstock
Metallic Pearls
Gorgeous Grape Ink
Wink of Stella

I hope you enjoyed my project today.
See you next time.


Friday, June 19, 2020

Zany Zebras No Cut Box - Stampin' Up!

Hi Friends!
Today my product is a No Cut box made with Zany Zebras stamp set and Artistry Blooms Designer Series Paper.


I started with an 8 1/2  x  11" piece of Melon Mambo.

I scored the 11" side at:
3/4,  4 1/2,  6 1/2,  10 1/4"
On BOTH of the 11" sides of the paper make marks only at the top at:
2  5/8,  5  1/2,  8  3/8"

I scored the 8 1/2" side at:
2 and 6 1/2"
To Score and fold the box together you can see my Video Tutorial Here.
I stamped the Zebra image on Whisper White Cardstock and cut it out with a 2 1/4" Circle Punch.  I traced around the outside of the Image with a Light Pool Party Stampin' Blend.  I cut a circle out of Melon Mambo Cardstock with a 2 1/2" Circle punch.  I then mounted the image on the Melon Mambo Circle with Dimensionals and to the box with Dimentionals also.
I stamped the Birthday Hat and Sentiment on a 3/4  x  2 1/4" piece of Whisper White Cardstock.  I colored the Party Hat with Melon Mambo Light and Dark Stampin' Blends and the Pompom on Daffodil Delight light Stampin' Blend.  I attached it to the box with Dimentionals.
I punched holes and attached Eyelets to the top of the box.  Then I ran some Daffodil Delight Ruched Ribbon through the holes and tied a bow.


Stampin' Up! Supplies:
2 1/2" Circle Punch
Whisper White Cardstock
Melon Mambo Cardstock
Daffodil Delight Ruched Ribbon
Dimentionals
Seal Adhesive
Seal+ Adhesive


Wednesday, June 17, 2020

A Good Man Father's Day Card - Stampin' Up!

Hi Friends,
Today's project is a Father's Day card I made for my daughter to give my hubby.  I used A Good Man stamp set, Tasteful Touches stamp set and Lovely Labels Pick a Punch.


I stamped the image from A Good Man stamp set on a  3 7/8  x  2 1/8"  piece of Whisper White with Tuxedo Black Ink.
I colored the image with Light and Dark Stampin' Blends:
Daffodil Delight
Mossy Meadow
Crumb Cake
I did not have but you can use:
Balmy Blue for the little girls jeans
Petal Pink for the skin


 I stamped the corners of the Whisper White piece with a stamp from the Tasteful Touches stamp set so it looks like Photo corners.
I matted the Image piece on a  4  x  2 1/4" piece of Mossy Meadow.  I also attached a piece of Mossy Meadow on the card base sized  5 1/4  x  4".  On top of the Mossy Meadow I added a 5 1/8  x  3 7/8"  piece of Subtle Designer Series Paper in Pear Pizzazz.


I punched a piece of  1  1/4  x  2  1/4" Crumb Cake Cardstock with the Lovely Label Pick a Punch.  I stamped the sentiment from A Good Man stamp set and stamped over the label with an image from Tasteful Touches stamp set and Crumb Cake Ink.
I punched an oval hole at the top middle with the Detail Trio Punch and tied a  bow with a piece of Linen Thread.  I attached the label to the card with a dab of glue on the left side and Dimensionals on the right.


Stampin' Up! Supplies
A Good Man stamp set
Tasteful Touches stamp set
Lovely Label Pick a Punch
Whisper White Cardstock
Mossy Meadow Cardstock
Crumb Cake Cardstock
Memento Tuxedo Black Ink
Crumb Cake Ink
Stampin' Blends:
Crumb Cake, Mossy Meadow, Daffodil Delight, Balmy Blue, Petal Pink
Dimensionals
Seal Adhesive

Thank You for stopping by my blog today.  I hope you enjoyed my tutorial.
See you next time!

Monday, June 15, 2020

Pampered Pets Tent Box - New 2020 Stampin' Up!

Hi Friends!
My project for the day is a Tent Box I made with the Pampered Pets stamp set, Pet Dies and Playful Pets Designer Series Paper.


 I started with a  11  x  4 1/2"  Real Red Cardstock.

I scored the 11" side at:
3 1/2,   5 1/4,   8 3/4,   10 1/2"
I made a small mark ONLY at  4 3/8  and  9 5/8"

I turned the marked side of the paper to the right and
Scored on the 4 1/2" side at:
1 1/4"

I cut the box to shape, burnished the score lines and added Seal Adhesive.


I cut a  9  x  3  5/8" piece of  the Playful Pets Designer Series Paper.
I wound the paper around the inside box I made out of Real Red, paying attention to mark the folds.
I played the paper flat and reinforced the folds with a bone folder.
I then attached it to itself in the area of the bottom of the box.


I stamped one of the Dog Images and the bowl.
I colored them with Stampin' Blend Markers Real Red,  and Smokey Slate.
I cut the Dog out with the Pet Dies and I fussy cut the dog bowl


I used the Lovely Label Pick a Punch to make the label.  I started with a piece of Real Red Cardstock 3/4  x 3".
I cut one end with the punch, stamped the sentiment and hearts from Pampered Pets stamp set and cut the entire label down to 1 3/4".
I attached some of the Red Ribbon from the Playful Pets Trim Combo Pack onto the back of the label with Seal Adhesive.


I attached it to the upper right hand corner of the box sleeve.  Then I also attached the Dog and Bowl to the sleeve with Dimensionals.


Stampin' Up! Supplies
Pampered Pets stamp set
Pet Dies
Playful Pets Designer Series Paper
Playful Pets Ribbon Combo Pack
Lovely Label Pick a Punch
Real Red Cardstock
Whisper White Cardstock
Memento Tuxedo Black Ink
Real Red Stampin' Blends
Smokey Slate Stampin' Blends
Stampin' Seal+
Stampin' Seal
Dimenstionals

Thank you for visiting me today.  I hope you enjoyed my Tent Box.
See you next time!

Friday, June 12, 2020

Flowers for Every Season Fold Over Flap Box - Stampin' Up

Hi Friends!
My project today is a Box I made with a fold over flap.  I used Flowers for Every Season Designer Series Paper and Just Jade Cardstock.

You can see my Video Tutorial Here.


I started with a piece of Just Jade sized  8 1/2  x  7"

Score the 8 1/2" side at:
1,  4,  5,  8 1/2"

Score the 7" side at:
1 and 5"

I scored and cut the box to shape.
You can see my Video Tutorial here for instructions.


I attached 3 pieces of the Flowers for Every Season DSP:
2   -   2 3/4  x  3 3/4"
1   -   2 3/4  x  1 3/4"


I took a 10" piece of the Just Jade Gingham Ribbon from the Flowers for Every Season Ribbon combo Pack.
I folded it in half and made a knot at the bend.
I punched a small hole in the flap where I wanted the bow to sit, closed the flap and put a pencil through the hole to make a mark on the box in the same position.
I opened the flap and punched another small hole on the mark.  I pulled the loose ends of the ribbon from inside the box to the outside through the hole.  I pulled the ribbon from the back to the front on the flap, folded it closed and tied a bow.


Stampin' Up Supplies:
Flowers for Every Season Designer Series Paper
Just Jade Cardstock
Flowers for Every Season Combo Ribbon Pack - Just Jade Gingham
Detail Trio Punch
Simply Score

I hope you enjoyed my project today.
See you next time!

Wednesday, June 10, 2020

Flowers for Every Season Cube Box - Stampin' Up

Hi Friends!
My Project today is a 2" Cube Box made with Misty Moonlight Cardstock and Flowers for Every Season Designer Series Paper.  I also used the Lovely Label Pick a Punch, Lovely You stamp set  and the Detail Trio Punch.


I used a piece of Misty Moonlight Cardstock
8 1/2  x  6 1/2"

I scored the 8 1/2" side:
2, 4, 6 and 8"

I scored the 6 1/2" side:
2, 4 and 6"


I cut and put the box together.  You can see my Video Tutorial Here for the instructions.


I used Flowers for Every Season Designer Series Paper on each side of the cube.
I cut 6 pieces, 2 3/4  x  2 3/4" each and adhered them on each side with Snail.
I used a small circle punch to put a finger hole in the front of the cube.


I wrapped White Linen Ribbon around the cube from the Flowers for Every Season Ribbon Combo Pack.
To make the label I started with a  3 x 1/2" piece of Whisper White Cardstock.
I cut one end with the Lovely Label Pick a Punch.  I stamped the sentiment from the Lovely You stamp set to the right of the label.
I cut the label down to 1 1/2".  Finally I attached the label end under the ribbon with a glue dot.


Stampin' Up Supplies:
Misty Moonlight Cardstock
Whisper White Cardstock
Flowers for Every Season 6x6 Designer Series Paper
Lovely You stamp set
Lovely Labels Pick a Punch
Detail Trio Punch
Tuxedo Black Ink
Flowers for Every Season Ribbon Combo Pack
Glue Dots

I hope you enjoyed my project today.
See you next time!