Friday, July 31, 2020

Twisted Bag for Kisses with Freezin' Friends - Stampin' Up!

Hi Friends!
My post today is a bag that has a square bottom and a flat top!  I call it a twisted bag.  This is the perfect project for your 6x6" papers.  I made this bag to fit some Hershey Kisses.
I used the new Freezin' Fun stamp set, Freezin' Friends dies and Trimming the Town Designer Series Paper.  These supplies are available for purchase on August 4.


I started with a piece of Trimming the Town DSP that was  5 1/2  x  4  3/4"
I scored the  5 1/2" side at:
2 1/2  and  5"
Turn the paper a quarter turn to the 4 3/4" side,
I scored the 4 3/4" side at:
1 1/4"
Turn the paper another quarter turn:
Score ONLY to the 1st scoreline at:
1 3/4 and 4 1/4"
To cut and put the box together you can watch my video tutorial here.


I stamped the Penguin and Snow Board image from Freezin' Fun stamp set with Tuxedo Black Ink.
I colored the image with Stampin' Blends:
Mossy Meadow - light and dark
Real Red - light and dark
Smokey - Slate dark
Night of Navy - light and dark
Pumpkin - Pie dark
Daffodil Delight - dark


I attached both pieces to the bag with Dimensionals.
I added some Wink of Stella to the hat and scarf.
I punched an oval hole in the top of the bag with the Detail Trio Punch.
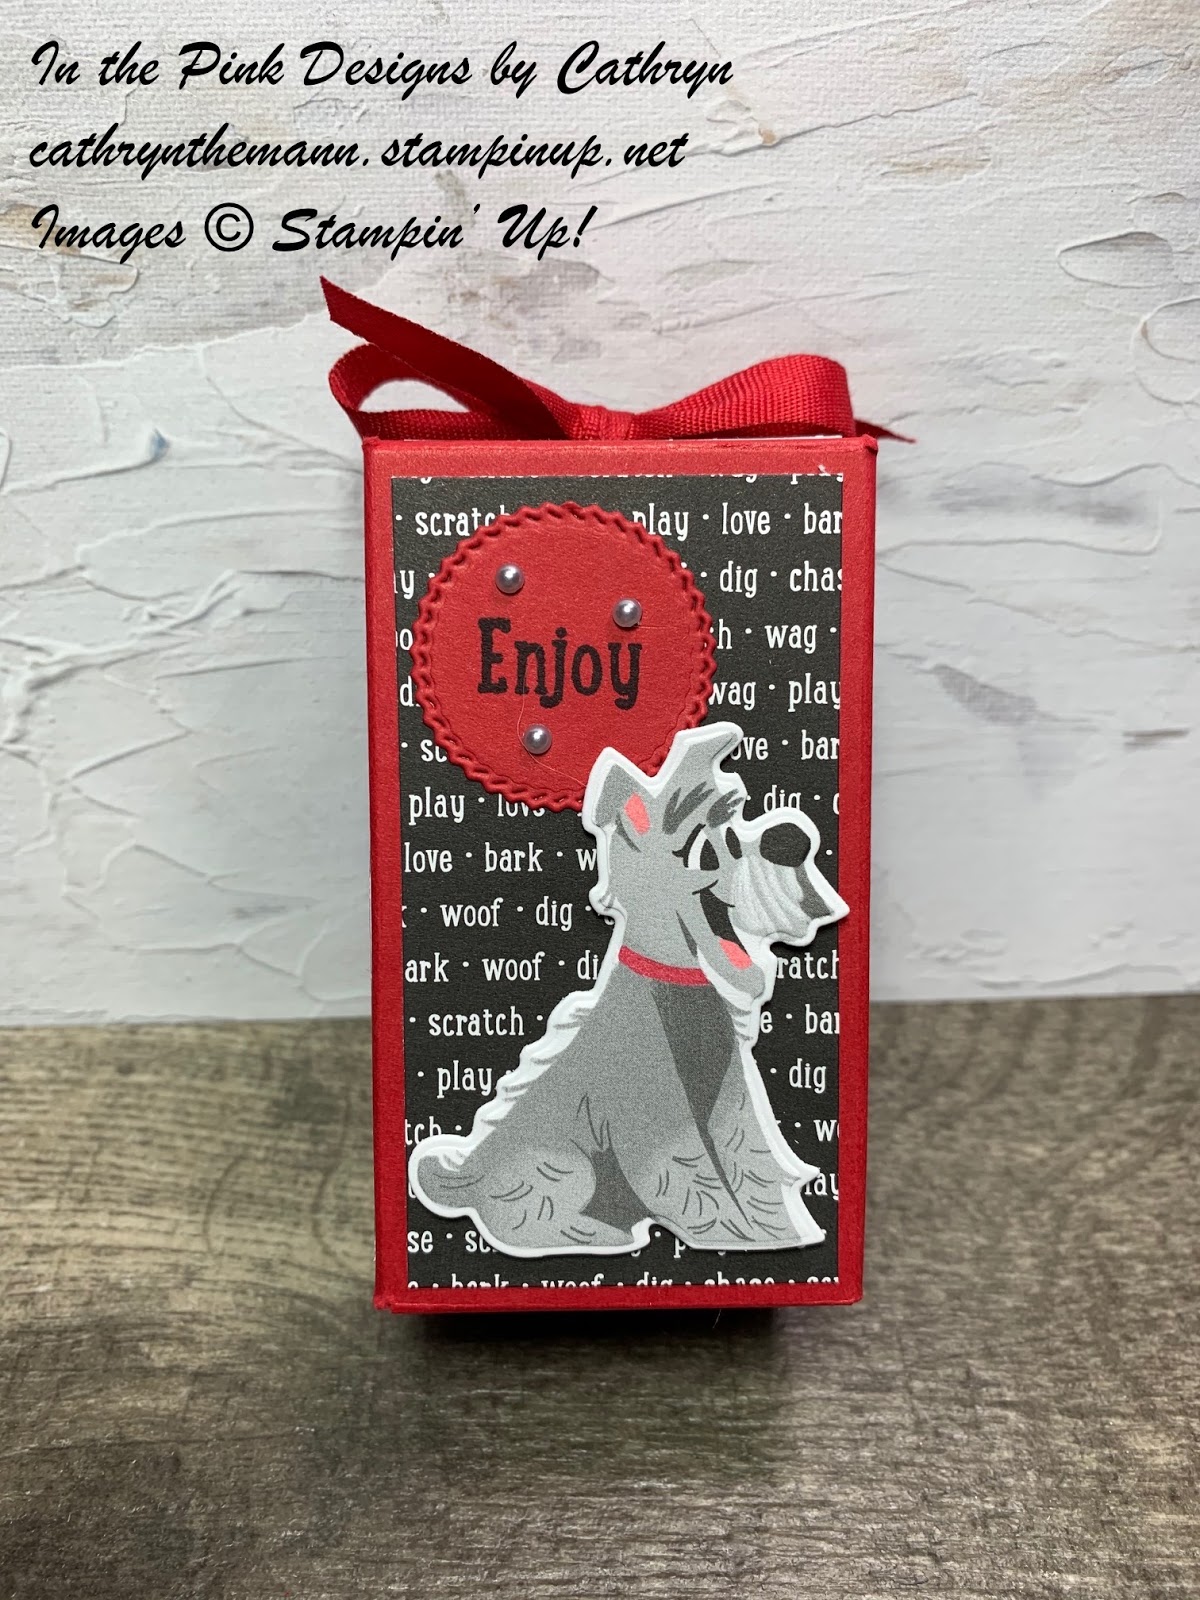
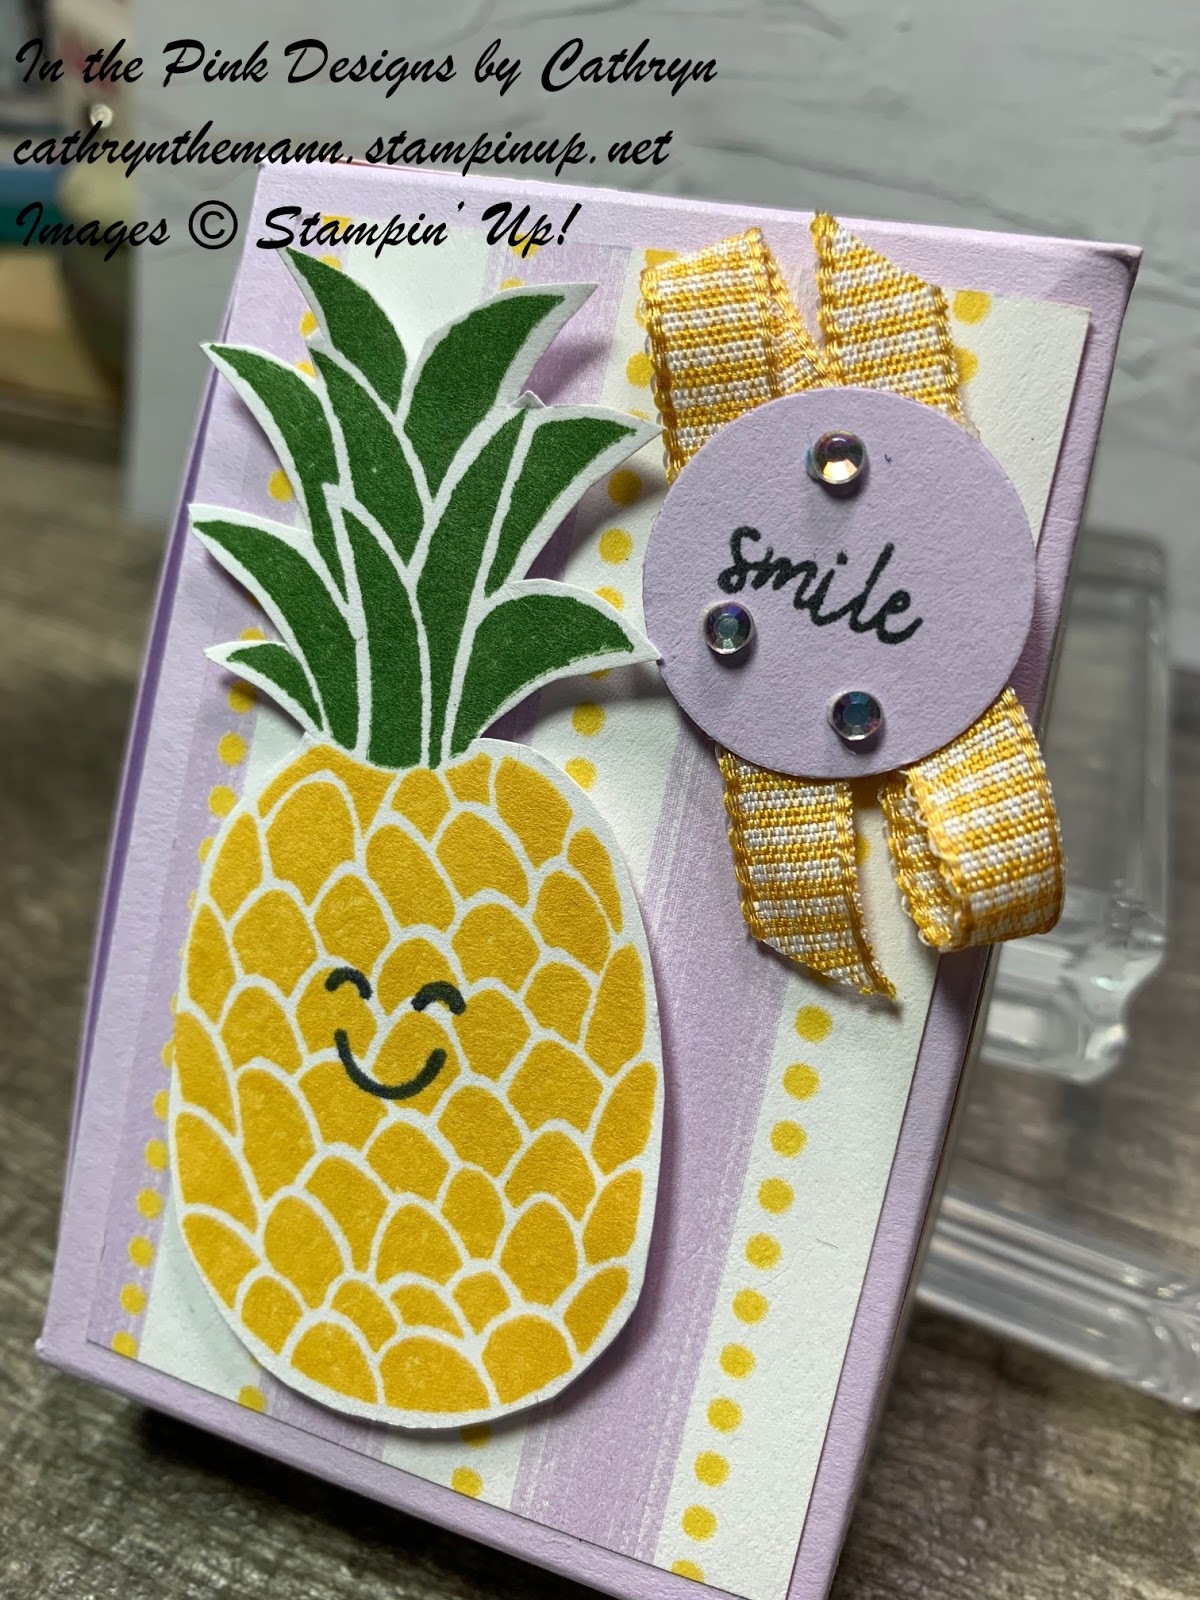
In one of the bags I tied Polka Dot Tulle Ribbon, in the other bag I tied Real Red Sheer Ribbon.


Stampin' Up Supplies:
Freezin' Fun stamp set - Available Aug. 4
Freezin' Friends die set - Available Aug. 4
Trimming the Town DSP - Available Aug. 4
Detail Trio Punch
Polka Dot Tulle Ribbon
Dark Smokey Slate Stampin' Blend
Light and Dark Real Red Stampin' Blend
Light and Dark Night of Navy Stampin' Blend
Dark Daffodil Delight Stampin' Blend
Light and Dark Mossy Meadow Stampin' Blend
Tuxedo Black Ink
Tear and Tape
Wink of Stella
Hershey Kisses

I hope you enjoyed my project today.
See you next time!

Wednesday, July 29, 2020

Wishes and Wonder 2 Piece Square Box - Stampin' Up!

Hi Friends!
My project today is a 4 x 4 x 1 1/2" Square Box.  I used the New Wishes & Wonder stamp set, North Pole Wonder dies and Heartwarming Hugs Designer Series Paper.  All of these products are from the Stampin' Up August - December Mini Catalogue.  They are available for purchase on August 4, 2020.


I started with a piece of Real Red for the top of the box sized  7 x 7".
I scored each side at 1 1/2" on all sides.
For the Bottom of the box I used a piece of Garden Green sized
6  15/16  x  6  15/16"
(just a little more than   6  7/8")
I also scored each side at 1  1/2" on all sides.
To cut and put the box together you can watch my video tutorial here.


I attached Heartwarming Hugs Designer Series Paper to the top of the box that was sized:
(1)  3 3/4  x  3 3/4"
(4)  3 3/4  x  1 1/4

Using the North Pole Wonder die set I cut out the back circle in Garden Green Cardstock and the Reindeer in Gold Foil Paper.
I stamped the Circle Image from Wishes and Wonder stamp set on Whisper White Cardstock with Real Red Ink.
I put the white circle on the green one with Dimensionals.


After I filled the box with a tin of candy I wound 1" Shaded Spruce ribbon, from the Wonder of the Season Ribbon Combo Pack, around the box and tied a knot on the side.
I used liquid adhesive to attach the reindeer to the back of the circles.
I put Dimensionals on the back of the circles and reindeer above and below where the ribbon would be so it would not stick the ribbon to the box.


For the final touch I added some Gold accents (Faceted Gems would be nice too) to the bottom right of the box.

I am a new Stampin' Up! Independent Demonstrator and I would love your business!

Stampin' Up! Supplies:
Wishes and Wonder stamp set - available Aug. 4
North Pole wonder die set - available Aug. 4
Heartwarming Hugs DSP - available Aug. 4
Gold Foil Sheets
Garden Green Cardstock
Real Red Cardstock
Whisper White Cardstock
Real Red Stampin' Pad
Wonders of the Season Ribbon Combo Pack
Gilded Gems
Dimensionals
Stampin' Seal
Stampin' Seal+

Thank you for visiting my blog today.
See you next time!

Monday, July 27, 2020

Holiday Cocktail Favor Box with Nothing's Better Than...stamp set

Hi Friends!
My project to day is another sneak peek of the Aug - December Mini Catalogue from Stampin' Up!
I use Tis' the Season  6 x 6  Designer Series Paper, Nothing's Better Than stamp set, Love you More then dies and the Rectangle Postage Stamp Punch to make an adorable "Adult" Favor Box to hold 2 mini Liquor Bottles.


I started with a  8 3/8  x  7  1/2" piece of Garden Green.
I scored the  8 3/8"  piece at:
2 3/4,  4,  6 3/4,  and  8"
I scored the  7"  piece at:
1 1/4,  5 1/2  and 6  3/4"
To cut the box please see my Video Tutorial Here.


Once you have cut the box you want to put the DSP on before you put it together.
I used Tis' the Season 6x6 DSP sized:
(2)  3  3/4  x  2  1/4"
(2)  1  1/4  x  2 1/4"
(1)  3  3/4  x  1  1/4"
When you have attached the paper you can punch the front window with the Rectangular Postage Stamp Punch.
Then I cut the word "Cocktail" from Garden Green Cardstock.
I embossed " Today is a" and "Kind of Day" with Versamark Ink and White Stampin' Embossing Powder.  Then I heated it up with my Heat Tool.
Now you can put the box together as in the Tutorial.


I stamped the cocktail glass with Tuxedo Black Ink and the inside with Garden Green Ink.
I colored the Umbrella with the Dark Real Red Stampin' Blend and the Lemon Slice with Dark and Light Daffodil Delight Stampin' Blends.
I attached the glass with Liquid Glue next to the right side of the window cut out.


I wrapped Real Red Sheer Ribbon around the opened lid, putting the bow on the top, for the Final Touch.
I really enjoyed creating this box.  It was a challenge put I loved it!


Supplies:
Tis' the Season 6x6 DSP  -  Available Aug. 4
Real Red Sheer Ribbon  -  Available Aug. 4
Nothing's Better Than stamp set
Love You More Than die set
Rectangular Postage Stamp Punch
Detail Trio Punch
Garden Green Cardstock
Whisper White Cardstock
Garden Green Stampin' Pad
Tuxedo Black stamp pad
Versamark Stamp Pad
White Stampin' Emboss Powder
Dark Real Red Stampin' Blend
Dark and Light Daffodil Delight Stampin' Blends
Tear and Tape
Stampin' Seal
Liquid Adhesive
2 Small Liquor Bottles

I hope you enjoyed my tutorial today.
See you next time!

Friday, July 24, 2020

Gift Bow Buider Punch Sneak Peak - NEW Stampin' Up! Mini Catalogue

Hi Friends!
I have a Sneak Peek of the new August - December Mini Catalogue!
Today I used the Gift Wrapped stamp setGift Bow Builder Punch and Heartwarming Hugs Designer Series Paper
You can order from the Mini Catalogue starting August 4.


To make this box I started with a  8 3/4 x 7" piece of Real Red Cardstock.
I scored the  8 3/4" side at:
2 1/2,  4,  6 1/2,  and  8"
I scored the 7" side at:
1 1/2  and  5 1/2"
To cut and put this box together you can see my Video Tutorial Here.


I stamped the bow images with Garden Green Ink and punched it out with the Gift Bow Builder Punch.
I colored the bow with Dark Real Red and Light Mossy Meadow Stampin' Blends.
I cut the tiny label with the punch and stamped the outline with Real Red Ink.  I stamped the holly leaves with Garden Green Ink and added Real Red Stampin' Blend for the Berries.


I used Heartwarming Hugs New Designer Series Paper sized:
(2)  3 3/4  x  2 1/4"
(2)  1 1/4  x  2 1/4"
(1)  3 3/4  x  1 1/4"


I cut another bow out of Real Red Cardstock and attached to the back of the 1st one with a little red showing on the bottom.
I attached gold cord from the new Wonder of the Season Ribbon Combo Pack to the back of the bows with glue dots.
I also attached the tiny tag to the back of the bow with a glue dot.
Finally, I attached the bow to the box with Dimensionals.


Supplies:
Gift Bow Builder Punch - Available Aug 4
Gift Bow Builder Punch - Available Aug 4
Heartwarming Hugs DSP - Available Aug 4
All the Trimmings Ribbon Combo Pack - Available Aug 4
Real Red Cardstock
Whisper White Cardstock
Garden Green Stampin' Pad
Real Red Stampin' Pad
Dark Real Red Stampin' Blend
Light Mossy Meadow Stampin' Blend
Whisper White Baker's Twine
Small Circle Punch

I hope you enjoyed this Sneak Peek of the new August - December Mini Catalogue!
Thank you for coming.
See you next time!

Wednesday, July 22, 2020

Moving Along Matchbook Party Favor - Stampin' Up!

Hi Friends!
I have a cute project today using Moving Along stamp set.  I made a cute Party Favor that can be used for a Children's Party.  The height and width can be adjusted to fit whatever little treat or gift you want to put in the Matchbook.


I started with a  3  x  9  5/8" piece of Granny Apple Green Cardstock.
I scored the  9  5/8" side at:
3/4  and  5  1/4" 


To see how I made the matchbook, please see my Video Tutorial Here.
I attached a piece of the Brights DSP in Granny Apple Green to the front cover.


I used a  2  3/4  x  1  3/4" piece of Whisper White to stamp on.
I stamped the Helicopter outline in Tuxedo Black Ink.
I stamped the Helicopter body with Pacific Point.
I stamped the Propeller with Real Red Ink.
The Clouds with Balmy Blue and the Road with Daffodil Delight Ink.


I mounted the stamped images on a  3" x  2" piece of Pacific Point and attached it to the front of the Matchbook.
I stamped the sentiment on a  3/8"  x  1 3/4" piece of Whisper White.  I mounted the sentiment piece on a scrap of Real Red and cut it to have a small border.


You can purchase Stampin' Up! supplies with Me Here.

Supplies:
Granny Apple Green Cardstock
Pacific Point Cardstock
Whisper White Cardstock
Real Red Cardstock
Brights 6x6 Designer Series Paper
Pacific Point Stampin' Pad
Real Red Stampin' Pad
Daffodil Delight Stampin' Pad
Balmy Blue Stampin' Pad
Daffodil Delight Dark Stampin' Blend
Daffodil Delight Ruched Ribbon
Stampin' Seal
Simply Score
Tuxedo Black Ink Pad
Stapler
Fun Dip Candy

I hope you enjoyed my project today.
See you next time!

Monday, July 20, 2020

Pampered Pets Cookie Box

Hi Friends!
My project for today is a box for some adorable Dog Cookies I found at the store.  I used the Pampered Pets stamp set, Playful Pets Designer Series Paper and Pet dies.


I started with a  8  1/2  x  7  1/2" piece of Real Red.
I scored the  8  1/2" side at:
1/2,  2 1/2,  4 1/2  and  6 1/2"
I scored the 7  1/2" side at:
2 and 5 1/2"


To cut and put this box together please see my Video Tutorial Here.
I used the Playful Pets Designer Series Paper sized:
(4)  3 1/4  x  1 3/4"
(1)  1 3/4  x  1 3/4"
I attached it to all for sides and the top with Stampin' Seal.


I used a 1/8" Hole Punch to put 2 holes in the lid.  I put pencil marks on the piece of Cardstock that folds underneath the lid and punched holes where the marks were.
I threaded Real Red Cotton Ribbon through the bottom of the lower holes,  ran it up through the bottom of the lid and tied a bow on the top of the box.


I wrapped some Pet cookies I found and put them in the box before I tied the ribbon.
I die cut the Puppy image from the Playful Pets Designer Series Paper using the Pet Dies.
I used the Tasteful Labels Small Circle die to cut a piece of Real Red Cardstock and stamped the sentiment on it.
I attached the Circle to the box with Liquid Adhesive and the Puppy with Dimensionals.


Supplies:
Pampered Pets stamp set
Playful Pets Designer Series Paper
Tasteful Label Dies
Real Red Cardstock
Tuxedo Black Ink
Metallic Pearls
Simply Score
Stampin' Seal
Stampin' Seal+
Dog Cookies

I hope you enjoyed my tutorial today.
See you soon!

Friday, July 17, 2020

Cute Fruit Hidden Gift Card Holder - Stampin' Up!

Hi Friends!
My project for today is a Gift Card Holder Box.  It is a resized version of last weeks Money Holder.  I made this box to fit a Gift Card in the bottom.
I used the Cute Fruit stamp set and Playing with Patterns Designer Series Paper.


I started with a piece of Purple Posy 11 x 5 1/4"
I scored the  11"  side:
7/8,  3  1/8,  4  flip to the other side of 11" side
continue scoring:
4  7/8,  7  1/8,  8,  10  1/4"
I scored the  5  1/4" side:
7/8,  4  3/8"


To cut and put this box together please see my video here.
I used the Playing with Patterns Designer Series Paper sized:
(2)  3 1/8  x  2"
(2)  3  1/8  x  1/2"
(2)  2  x  1/2"


I stamped the Pineapple Image from Cute Fruits stamp set with Daffodil Delight Ink.
I stamped the leaves with Garden Green Ink.
I stamped the face with Tuxedo Black Ink.
I cut a 7/8" circle out of Purple Posy Cardstock and stamped the Sentiment Smile on it.


I attached the Pineapple to the box with Dimensionals.
I put some Stampin' Seal on the back of the 7/8" circle, attached some Gingham Ribbon and put it on the box with a Dimensional.
For the final touch I added some Basic Rhinestones.


Supplies:
Cute Fruit stamp set
Playing with Patterns Designer Series Paper
Tasteful Label dies
Purple Posy Cardstock
Whisper White Cardstock
Daffodil Delight Stampin' Pad
Garden Green Stampin' Pad
Memento Tuxedo Black Ink
Bumblebee Gingham Ribbon
7/8" (or similar) Circle Punch

I hope you enjoyed my box today.
See you next time!

Wednesday, July 15, 2020

Friend Card with Jar of Flowers - Stampin' Up!

Hi Friends!
My post today is a Card I made with Jar of Flowers stamp set, Forever Fern stamp setFlowers for Every Season Designer Series Paper and Stitched so Sweetly die set.


I cut Whisper White Cardstock with the largest Scalloped Rectangle in the Stitched So Sweetly die set.
I stamped an images from Jar of Flowers stamp set in two corners.
I colored the flowers with Stampin' Blends Markers:
Daffodil Delight
Night of Navy
Mossy Meadow


I cut a piece of Misty Moonlight Cardstock with another die from the Stitched So Sweetly die set.
I stamped it with the sentiment from Forever Fern stamp set using Versamark Ink, White Stampin' Emboss powder and a Heat Tool.


I tied some Polka Dot Tulle Ribbon around the stamped panel and tied a bow on the left hand side.
I put attached the stamped panel to the Flowers for Every Season  DSP with Dimensionals and then to the card base with Stampin' Seal.
For the final touch I added some Noble Peacock Rhinestones.


Stampin' Up Supplies:
Jar of Flowers stamp set
Forever Fern stamp set
Stitched So Sweetly die set
Misty Moonlight Cardstock
Whisper White Cardstock
Polka Dot Tulle Ribbon
Stampin' Blends: Daffodil Delight, Mossy Meadow and Night of Navy
Versamark Ink
White Stampin' Emboss Powder
Rhinestones

Thank you for visiting my Blog today!
See you next time.

Monday, July 13, 2020

Wedding Card with Forever Flourishing Dies - Stampin' Up!

Hi Friends!
My project for today is a tutorial for a Wedding Card using Forever Flourishing dies, Hippo and Friends dies, Last a Lifetime stamp set, Vellum, and the Subtles Designer Series Paper. It is pretty quick and easy to put together once you have your die cuts ready.


I used a piece of Basic Grey  4 x 5  1/4" for the first background Layer on top of the card.
A piece of Subtles Designer Series Paper  3  3/4  x  5" on top of the Basic Grey.


I cut 2 of the Branches out of Vellum using the Forever Flourishing dies.  I attached then to the card with a few glue dots.


I made a bow with White Linen Ribbon and attached it to the top of the branches with 2 glue dots.


I cut a Labels from the Hippo and Friends dies out of Balmy Blue and Whisper White Cardstock.
I stamped the Sentiment from Last a Lifetime stamp set on the Balmy Blue label.
I attached the Blue label on top of the White Label with a little White showing at the bottom.
For the Final Touch I added Metallic Pearls to the Label and Branches.


Supplies:
Forever Flourishing dies
Hippo and Friends dies
Last a Lifetime stamp set
Subtles 6 x 6 Designer Series Paper
Basic Grey Cardstock
Whisper White Cardstock
Vellum
Ribbon from Flowers for Every Season Ribbon Combo Pack
Glue Dots
Stampin' Seal
Metallic Pearls

I hope you enjoyed my Wedding Card Today.
See You Next Time!