Monday, May 31, 2021

SWEET as a PEACH PEACH RINGS BOX with YOU'RE A PEACH - Stampin' Up!


Hi Friends!
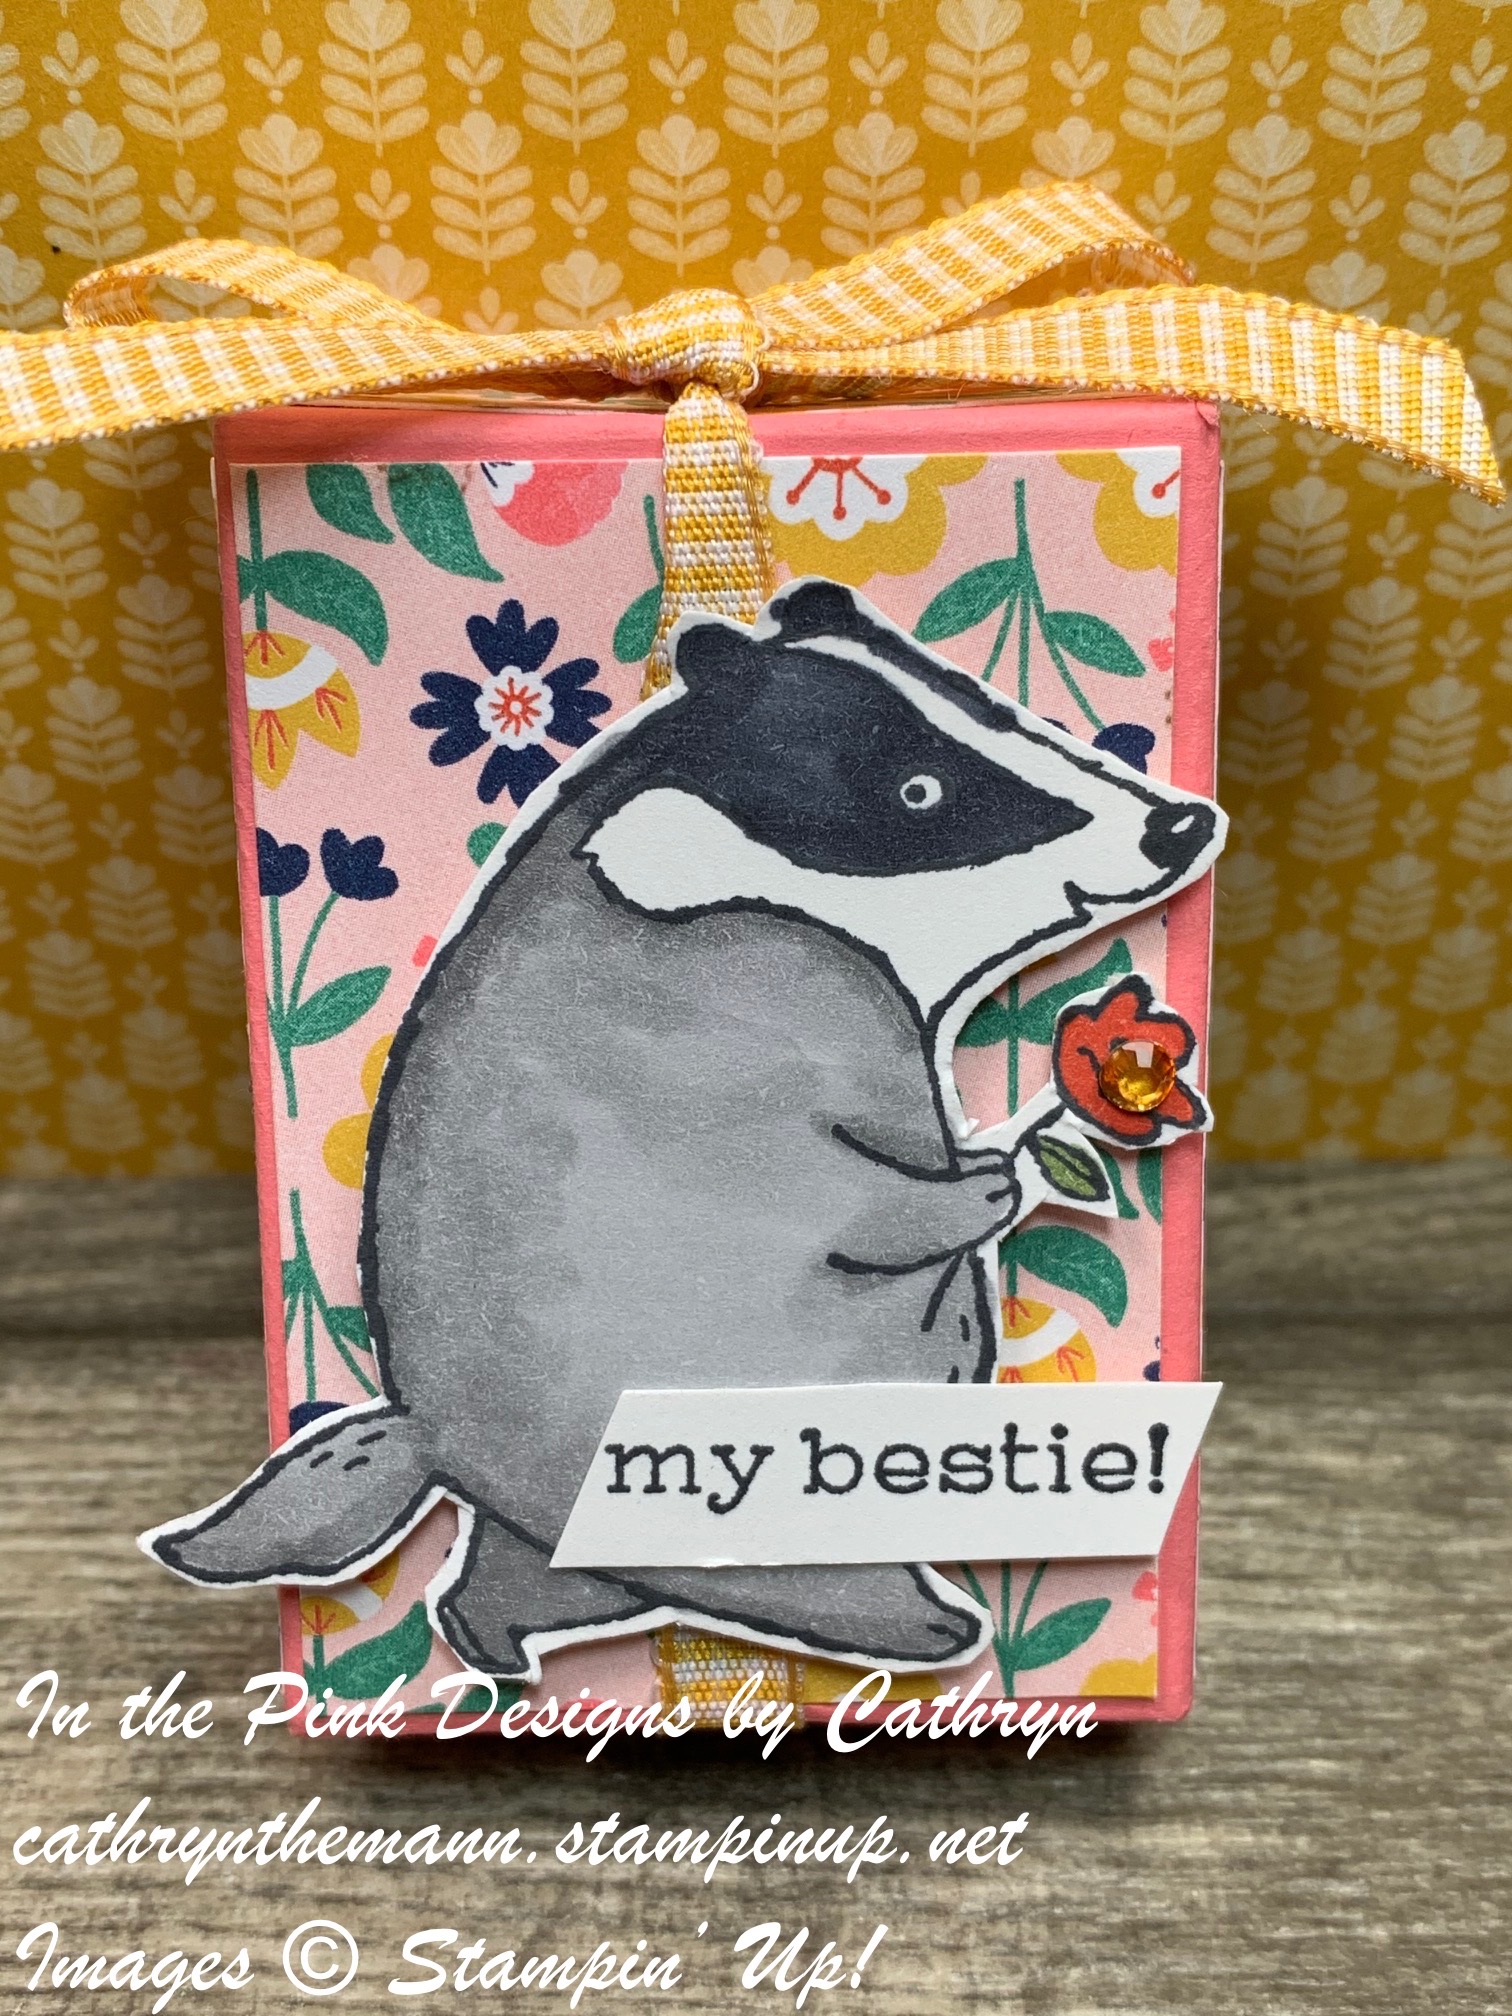
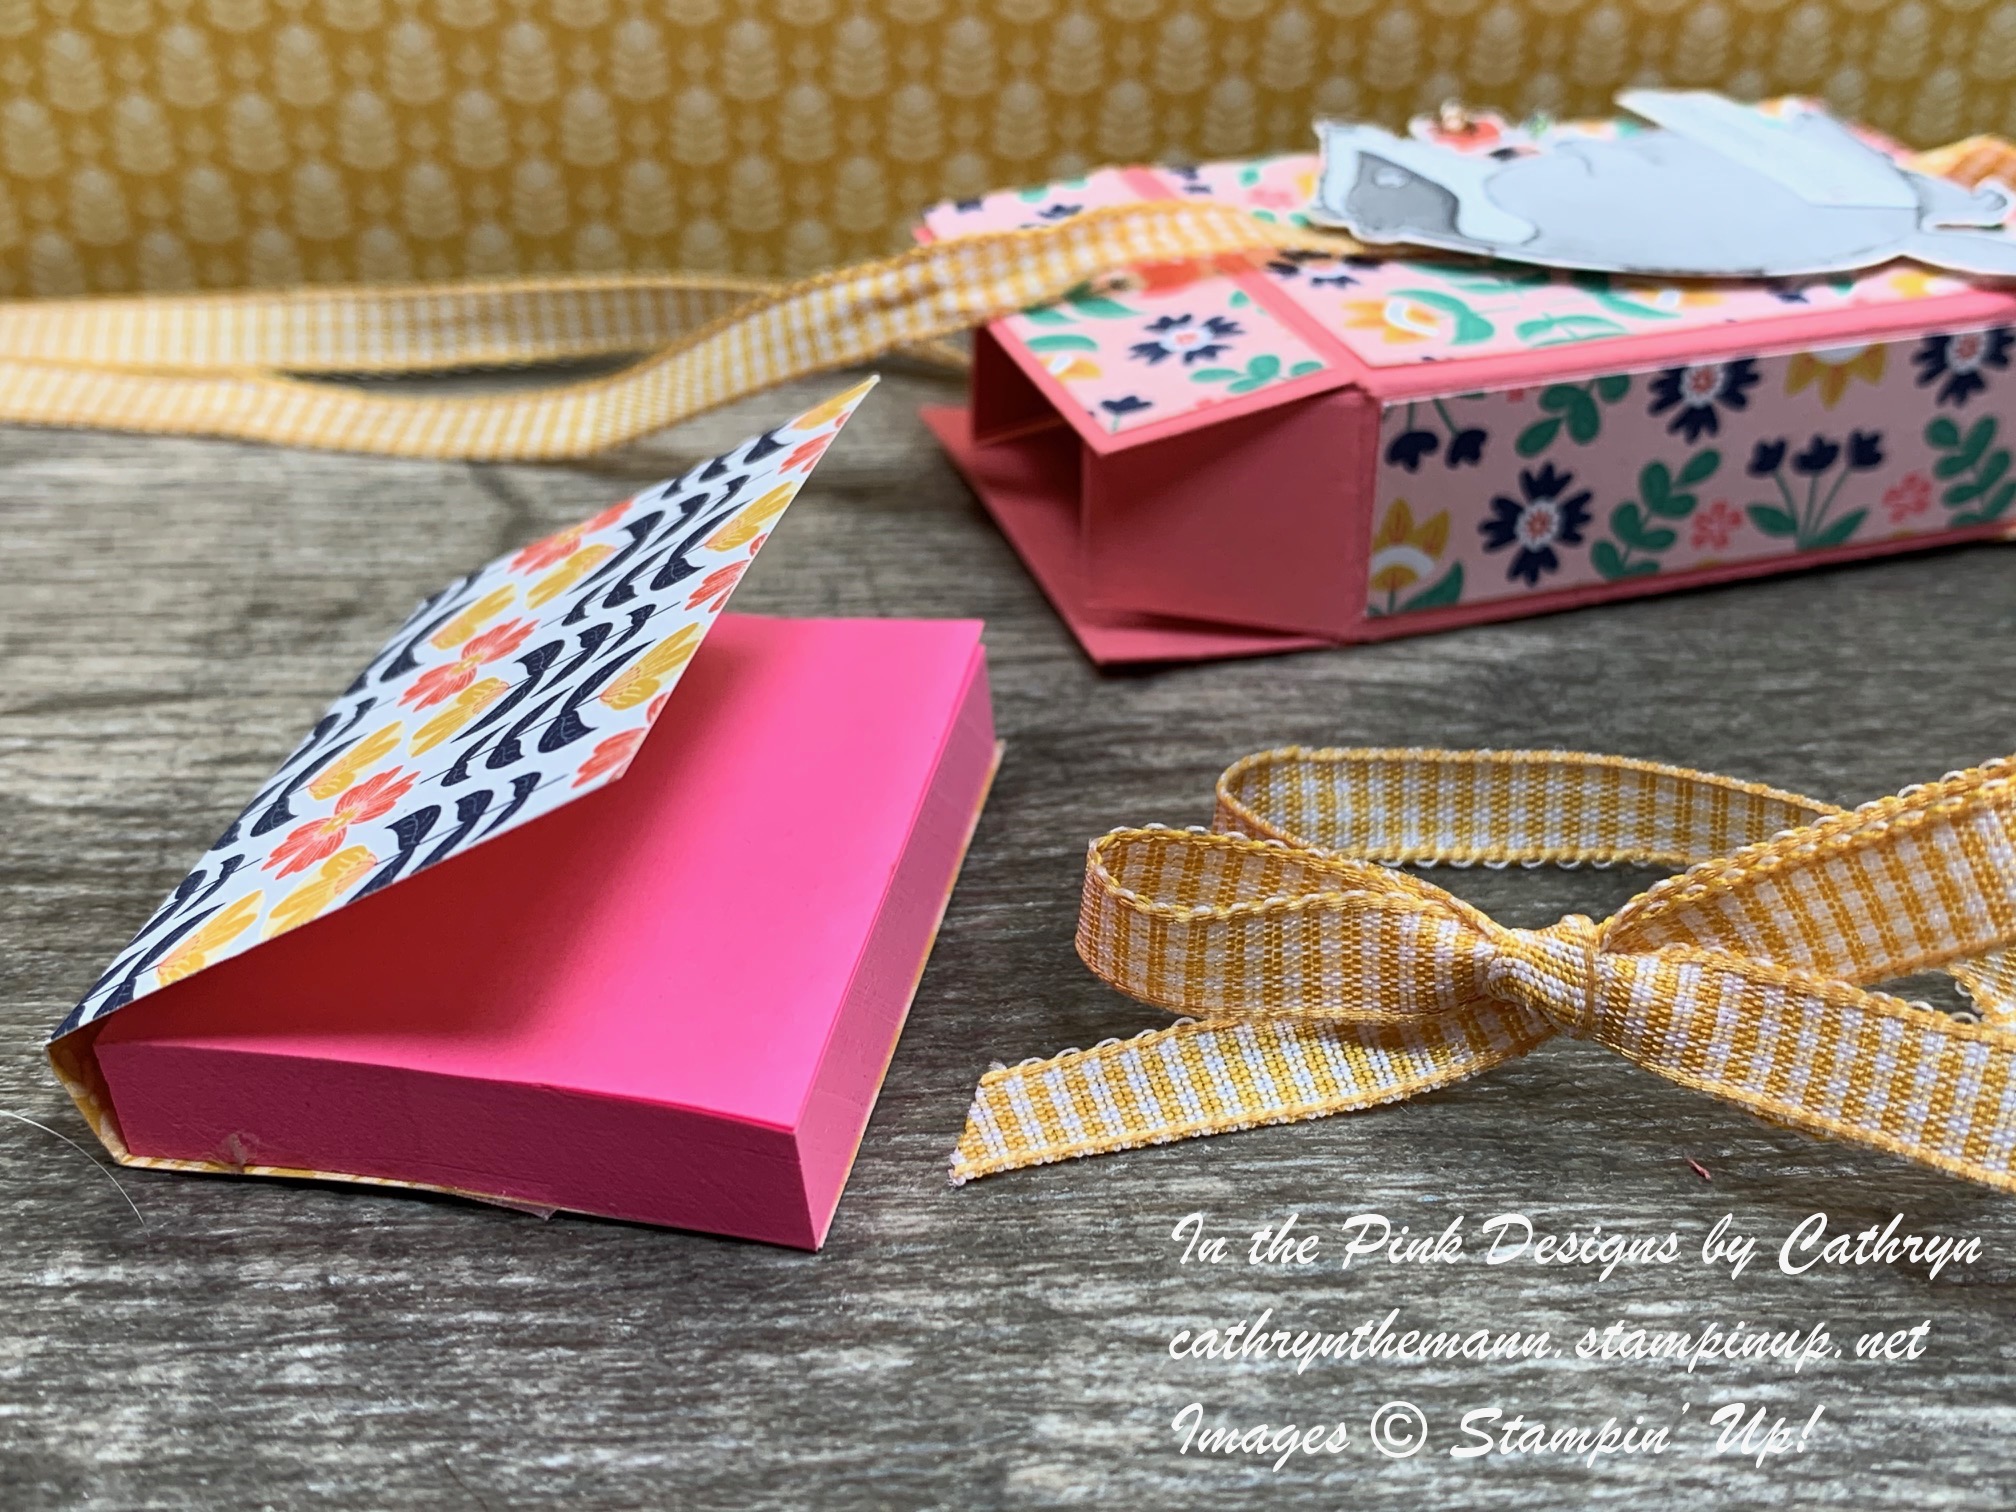
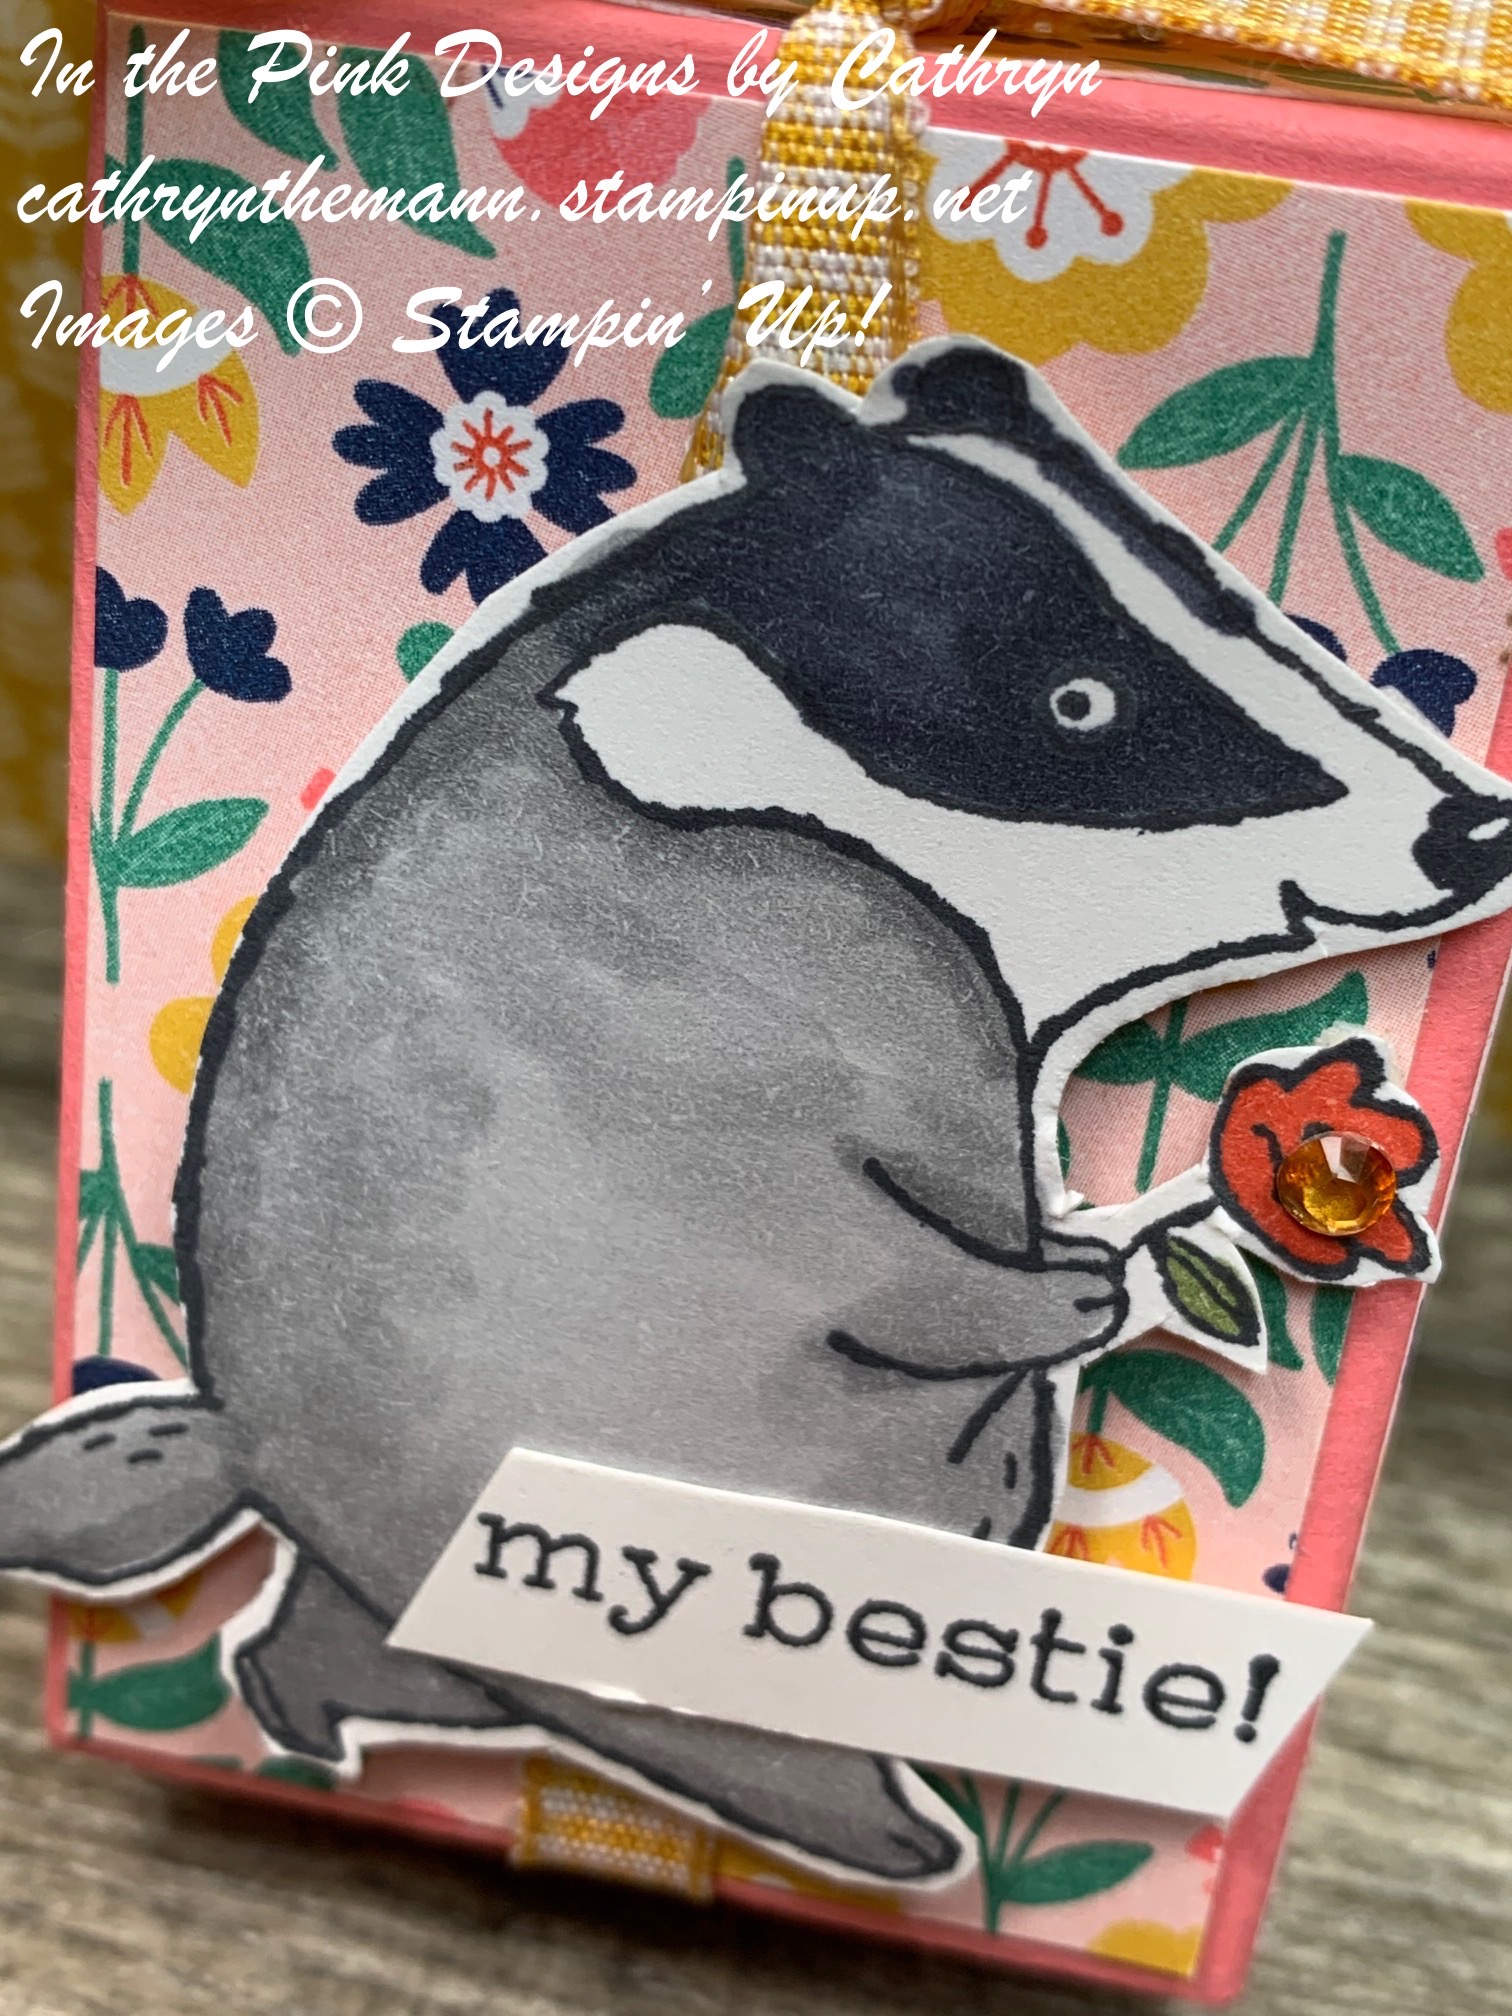
For my project today I made a box to fit some delicious Peach Rings Candy.  I used the Sweet as a Peach stamp set, Peach dies, You're a Peach Designer Series Paper, Layering Circles dies and the Messages die.  This box measures  3 1/2  x  2 1/2  x  1 1/4".  It is the perfect size for a little treat or gift.


I started with a piece of Pear Pizzazz Cardstock sized  9 x 6".
I scored the 9" side at:
2 1/2,  3 3/4,  6 1/4  and  7 1/2".
I scored the 6" side at:
1 1/4  and  4 3/4".
To cut and put the box together you can watch my Video Tutorial Here.


I attached several pieces of You're a Peach Designer Series paper in sizes:
(2)  3 1/4  x  2 1/4"  for the front and back
(2)  2 1/4  x  1"  for the sides
(1)  3 1/4  x  1  for the top
(1)  3 1/4  x  1 1/4 for the front flap which I rounded the bottom corners using Detail Trio Punch.
I attached the DSP to the box with Stampin' Seal.


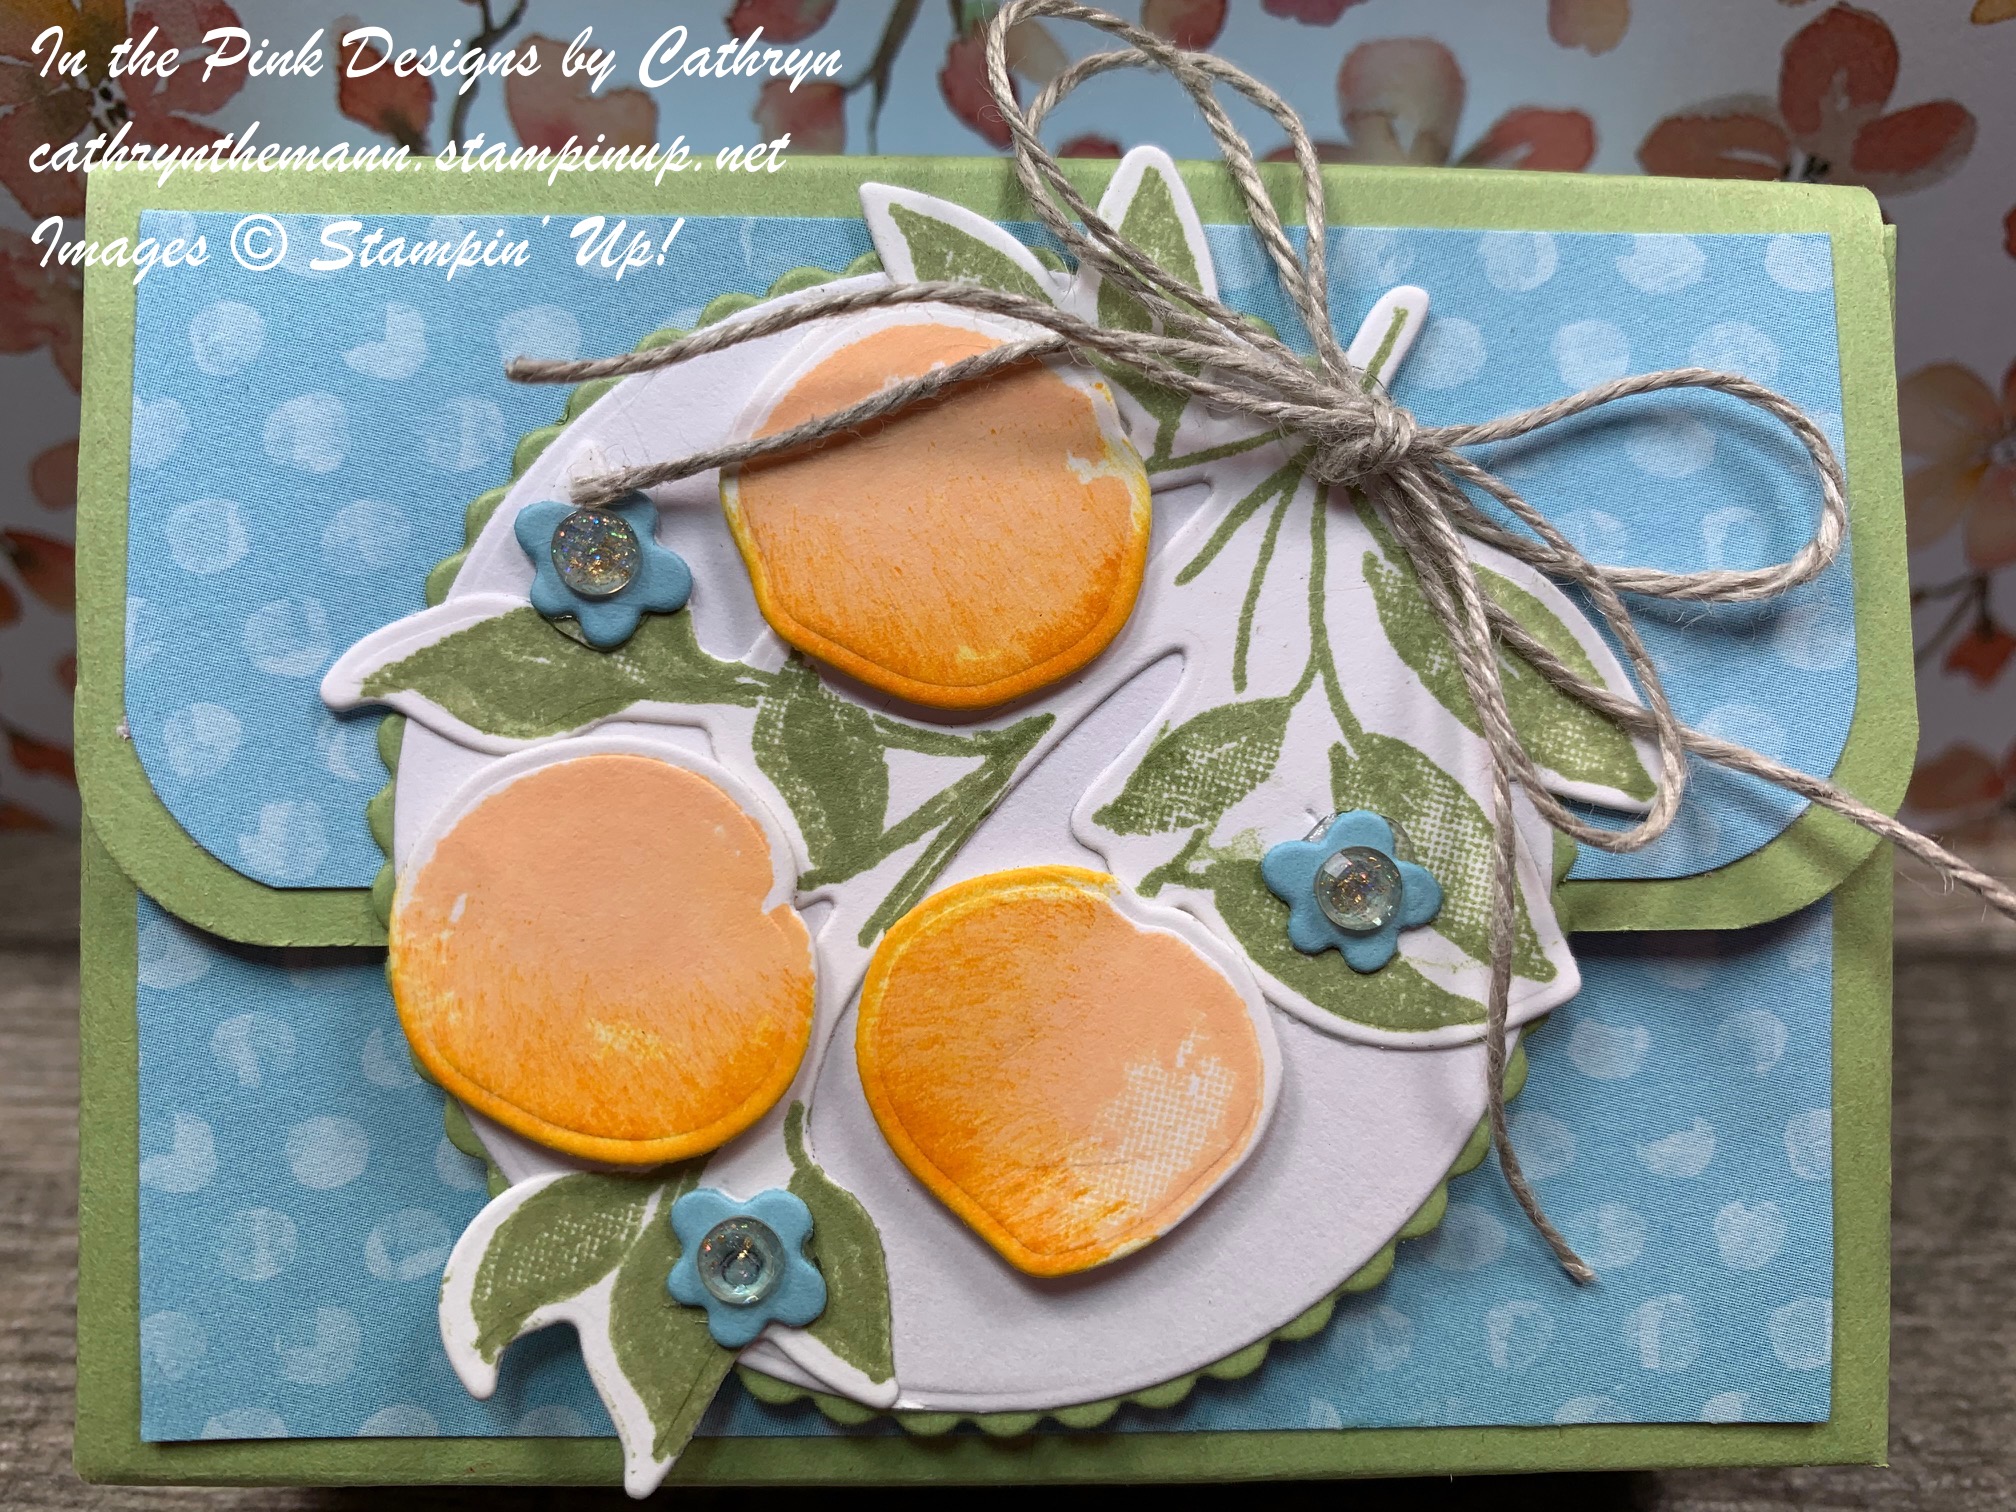
I stamped the leaves and peaches images from Sweet as a Peach stamp set onto Basic White Cardstock.
I stamped the leaves with Pear Pizzazz Ink.
I stamped the Peaches with Pale Papaya Ink and sponged one side of each peach with Mango Melody Ink.
I cut a scalloped circle from Pear Pizzazz and a smooth circle from Basic White Cardstocks using the Layering Circles dies.
I cut the peaches, Leaves and small flowers (from Balmy Blue Cardstock) using the Peach dies.


I attached the circles together with Liquid Glue.  I attached the leaves to the circles first with Liquid Glue and then the Peaches with Mini Dimensionals.
I attached the entire piece to the top flap of the box with Liquid Glue on the top of the circle only.
I attached a 5/8" Adhesive Velcro closure onto the flap and body of the box to keep it closed.


I cut a label out of Pale Papaya Cardstock using the Messages die.  I stamped the sentiment from Sweet as a Peach stamp set on the label with Balmy Blue Ink.
I attached the label inside the front flap of the box with Liquid Glue.
I tied a bow with a double strand of Linen Thread and attached it to the stem of the leaves with a Glue Dot.
I attached the small blue flowers around the peaches with Glue Dots.
For the final touch I added some Gilded Gems to the middles of the blue flowers.


Supplies:
5/8" Adhesive Velcro Dots from Walmart.com

Thank you for visiting my Blog today.  I hope you enjoyed my Peachy project!
See you next time.

Love and Hugs,
Cathryn


Thursday, May 27, 2021

ALL FOR BABY TEDDY BEAR BOX with SWEET as a PEACH - Stampin' Up!


Hi Friends!
My project today is a Teddy Bear Box that holds some kisses.  I used All For Baby stamp set, Baby Clothes dies, Sweet as a Peach stamp set, Peach dies and the Layering Circle dies.
The box measures  3  x  3 3/4  x  2".  It is perfect for a party favor, gift box or Gift Card with some candy added.  I love this Teddy Bear image it is very versatile and can be used for more than just baby themed projects.


I started with a piece of Crumb Cake Cardstock sized
9 1/2  x  5 1/4".
I scored the 9 1/2" side at:
1/2,  3 1/2,  5  and  8".
I scored the 5 1/4" side at:
1 1/2  and  3 3/4".
To cut and put the box together you can watch my Video Tutorial here.


I attached several piece of Balmy Blue Designer Series Paper from the Subtles 6x6 Collection in sizes:
(2)  2 3/4  x  2"
(2)  1 1/4  x  2"
(2)  2 3/4  x  1 1/4
I rounded the corners of the top flaps and the DSP that gets attached to them with the Detail Trio Punch.
Before putting the box together I cut a circle in the front flap using the Layering Circle dies.
I cut a larger Scalloped circle from Crumb Cake Cardstock and cut the same size circle as I put in the front flap into the middle of the scalloped circle.  This makes the pretty border around the opening.  I attached it with Liquid Glue.
I attached a piece of  2  x  2"  Window Sheet to the inside of the box with Glue Dots.  Then I put the box together using Tear and Tape.


I punched a hole in the top of each flap with a 5/8" circle punch.  I put my goodies inside and ran Fine Art Ribbon through the holes in the flaps and tied a bow at the front. (For the sample I used Balmy Blue Cardstock and Crinkled Seam Binding Ribbon).


I stamped the Teddy Bear image from All for Baby stamp set onto Basic White Cardstock with Crumb Cake Ink.
I stamped the leaves from Sweet as a Peach stamp set stamp set with Mint Macaron Ink.
I stamped the sentiment from Sweet as a Peach stamp set with Balmy Blue Ink onto a piece of Basic White Cardstock sized  1/2  x  2 3/4".
I punched a a hole in the tag and looped Linen Thread through the hole.  I tied it around the bow.


I cut the bear out using the Baby Clothes dies and the leaves and flowers with the Peach dies.  I attached the leaves to the box first with Liquid Glue, then the Bear with Dimensionals.
I attached the flowers around the bear with Glue Dots.
For the final touch I added some blue Holiday Rhinestone Basic Jewels to the middle of the flowers.


Supplies:
Small Circle Punch

Thank you for visiting my Blog today.  I hope you enjoyed my Teddy Bear Box.
See you next time!

Love and Hugs,
Cathryn


Monday, May 24, 2021

PEEKABOO FARM DEVIL DOG/TRUFFLE BOX with STAMPIN' BLENDS - Stampin' Up!


Hi Friends!
My project today is a tall square box that measures  1 1/2  x  1 1/2  x  5".  I used the adorable new stamp set Peekaboo Farm along with some of the Subtles 6x6 Designer Series Paper and Stampin' Blends.  This is the perfect box to use as a favor for a Devil Dog, Truffles or other goodies.

I am offering FREE SHIPPING (regular shipping) on all orders $30 and above from today until next Thursday, May 2, 2021.  I will refund your shipping as soon as the order goes through.  Be sure to allow me to see your information so I can mail your shipping refund to you.
Host Code  K7W7THYX


I started with a piece of Smokey Slate Cardstock sized
8 1/2  x  6 1/2".
I scored the 8 1/2" side at:
1 1/2,  6 1/2  and  8".
I scored the 6 1/2" side at:
1 1/2,  3,  4 1/2  and  6".
To cut and put the box together you can watch my Video Turtorial Here.


I attached pieces a Balmy Blue of the Subtles Designer Series Paper in sizes:
(4)  4 3/4  x  1 1/4"
(2)  1 1/4  x  1 1/4
I attached the DSP to the box with Stampin' Seal.


I stamped several images from the Peekaboo Farm stamp set with Tuxedo Black ink onto Basic White Cardstock.  I stamped 3 of the rock wall images together, 2 of each of the clouds, a horse, a pig, a lamb and a cow.
I colored the rock wall with Light and Dark Smokey Slate Stampin' Blends
I colored the horse with Light and Dark Soft Suede, Light and Dark Crumb Cake and Light Basic Black Stampin' Blends.
I colored the pig with Light and Dark Petal Pink Stampin' Blends.
I colored the Cow with Light and Dark Smokey Slate and Light Basic Black Stampin' Blends.
I colored the Lamb with Light and Dark Crumb Cake Stampin' Blends.


I attached the animals one at a time, with their hooves over the wall, to the back of the wall.  I glued each animal and its piece of the wall as I went around to the back where I over lapped the wall.
I used Liquid Glue to adhere everything to the box.


I tied Polished Pink Open Weave Ribbon around the lid and tied a bow at the top.
I cut a tag from Basic White Cardstock using the Messages die.  I stamped the sentiment "hello there" from Peekaboo Farm stamp set onto the tag with Tuxedo Black Ink.
I punched a 1/8" hole in the top of the tag.
I looped some Linen Thread into the top of the tag and tied it around the bow at the top of the box.
For the final touch I added some Loose Flower Flourishes to the animals heads and the tag.


Supplies:

Thank you for visiting my Blog today.  I hope you enjoyed my project using the Peekaboo Farm stamp set!  See you next time.

Love and Hugs,
Cathryn


Friday, May 21, 2021

BADGER BESTIES MINI POST IT NOTE BOX TUTORIAL with SWEET SYMMETRY - Stampin' Up!


Hi Friends!
For my project today I used Badger Besties stamp set and Sweet Symmetry Designer Series Paper.  I made an adorable little box along with some matching mini post it notes for the inside!  I also used Bumblebee Gingham Ribbon and Stampin' Blends.

I am offering FREE SHIPPING (regular shipping) on all orders $30 and above from today until next Thursday, May 2, 2021.  I will refund your shipping as soon as the order goes through.  Be sure to allow me to see your information so I can mail your shipping refund to you.
Host Code  K7W7THYX


I started with a piece of Flirty Flamingo Cardstock sized 5 1/2  x  4" for the box.
I scored the 5 1/2" side at:
3/4,  2 1/2,  3 1/4  and  5".
I scored the 4" side at:
3/4  and  3 1/4".
To cut and put the box together you can watch my Video Tutorial Here!


I attached Sweet Symmetry Designser Series Paper in sizes:
(2)  1 5/8  x  2 3/8"   for the front and back.
(2)  5/8  x  2 3/8"  for the sides
(2)  1 5/8  x  5/8"  for the top and bottom.
I attached the DSP to the box with Stampin' Seal.


I used a piece of Sweet Symmetry DSP sized  3 1/4  x  2"  for the Mini Post it Note Holder.
I scored the 3 1/4" side at:
1 1/2  and  1 3/4".
I added Stampin' Seal+ to the back of the Mini Post it Notes and attached it to the back of the DSP.
I tied Bumblebee Gingham Ribbon around the sides of the notes and tied a bow at the front.
I slid the notes inside of the box I made earlier.


I also tied the Bumblebee Gingham Ribbon around the front and back of the box and tied a bow at the top.
I stamped one of the Badger images from Badger Besties stamp set onto Basic White Cardstock with Tuxedo Black Ink.
I also stamped the sentiment and fussy cut just the words "my bestie".
I colored the badger with Stampin' Blends:
Light Basic Black for the turn around the eyes and ears.
Light and Dark Smokey Slate for the rest of the badger.
Dark Calypso Coral for the flower.
Dark Daffodil Delight for the middle of the flower.


I fussy cut the Badger and attached him onto the front of the box, over the ribbon, with Dimensionals.
I attached the sentiment to the bottom of the Badger with a Dimensional on the right side and a dot of Liquid Glue on the left.
For the final touch I added a rhinestone from Holiday Rhinestone Basic Jewels to the middle of the flower.


Supplies:

Thank you for visiting my Blog today.  I hope you enjoyed my project.
See you next time!

Love and Hugs,
Cathryn


Wednesday, May 19, 2021

ARTISTICALLY INKED FAVOR BOX with EXPRESSIONS IN INK - Stampin' Up!


Hi Friends!
For my project today I made a Favor Box that measures  3 1/2  x  2 1/2  x  1 1/4".  I used Artistically Inked stamp set, Artistic dies, Espressions in Ink Designer Series Paper and Penned Flowers dies.  This is the perfect favor for a shower or fancy party!  You can fit many things in this box, one of them being Lindor Truffles (about 4 will fit).


I started with a piece of Polished Pink Cardstock sized  9  x  6".
I scored the 9" side at:
1/2,  1 3/4,  4,  5 1/4  and  7 1/2".
I scored the 6" side at:
1 1/4  and  4 3/4".
Before putting the box together I used the scallop die from Penned Flowers dies to cut the top of the box.
To cut and put the box together you can watch my Video Tutorial Here.


I attached several pieces of Expressions in Ink Designer Series Paper to the box with Stampin' Seal in sizes:
(1)  3 1/4  x  2"  for the front
(2)  3 1/4  x  1" for the flap and sentiment piece
(2)  1  x  2" for the sides


I stamped the small flower image from Artistically Inked stamp set with Polished Pink Ink onto Basic White Cardstock.
I stamped the leaves with Pear Pizzazz Ink.
I cut the two stamped images out using the Artistic dies.
I also cut the gold leaves with the same dies using Gold Foil paper.
I stamped the sentiment on the 2nd piece of DSP, sized 3 1/4 x 1", with Versamark Ink.
I sprinkled the area with Gold Stampin' Emboss Powder and heated it up with my Heat Tool.
I attached the sentiment piece to the top of the box with Liquid Glue. 


I attached the flower first with Dimensionals.  I put Liquid Glue on the bottom only of the green leaves and slid them under the flower.
I cut 2 gold leaves off the die cut and glued them under the green leaves.
I put a Mini Dimensionals under the tips of the green leaves to secure them to the box.
For the final touch I added some Gilded gems to one of the leaves and another two on the left side of the box.


Supplies:
Polished Pink Cardstock
Basic White Cardstock
Gold Foil Paper
Polished Pink Ink
Pear Pizzazz Ink
Versamark Ink
Gold Stampin' Emboss Powder
Gilded Gems
Detail Trio Punch
Heat Tool
Simply Scored
Take Your Pick Tool
Dimensionals
Mini Dimensionals
Stampin' Seal
Liquid Glue

Thank you for visiting my Blog today.  I hope you enjoyed my Favor Box.
See you next time!

Love and Hugs,
Cathryn


Monday, May 17, 2021

PLENTIFUL PLANTS LARGE Tic Tac Box with BLOOM WHERE YOU'RE PLANTED - Stampin' Up!


Hi Friends!
For my project today I used Plentiful Plants stamp set to make a box to fit the Large Package of Tic Tags.  The box measures 2 1/4  x  4 3/4  x  1 1/2".  I also used Perfect Plants dies, Bloom Where You are Planted Designer Series Paper and Loose Flower Flourishes.


I started with a piece of Smokey Slate Cardstock sized  8  x  6 1/2".
I scored the 8" side at:
1/2,  2 3/4,  4 1/4  and  6 1/2".
I scored the 6 1/2" side at:
1 1/2,  5  and  6".
To cut and put the box together you can watch my Video Tutorial Here!


I attached several piece of Bloom Where You're Planted Designer Series Paper in sizes:
(2)  2  x  3 1/4"
(2)  1 1/4  x  3 1/4"
(2)  1 1/4  x  3/4"
I attached the DSP to the box with Liquid Glue.


I punched 2 holes in the middle of the top flaps with a 1/8" hole punch. I put Grey Granite Shimmer Ribbon through the holes and tied a bow at the front.


I stamped the large leaves image onto Basic White Cardstock with Tuxedo Black Ink.  I cut the image apart with 3 leaves on the left side and tow on the right.
I stamped the flower pot image with Smokey Slate Ink onto Basic White Cardstock.
I cut the leaves, flower pot and Macrame plant hanger out using the Perfect Plants dies.


I attached the flower pot to the back of the Macrame plant hanger first with Liquid Glue.
Then I attached the three leaves to the left side of the planter with 1 of the leaves tucked behind the left string of the plant hanger and the stem on the back.
I glued the remaining leaves on the left side of the hanger.


I attached the entire piece to the front of the box with Dimensionals.  I put a Mini Dimensional behind the circle at the top of the plant hanger.
I stamped the sentiment on a 1/2" piece of Smokey Slate Cardstock.  I cut it by hand and attached it to the front flap of the box with Liquid Glue.
For the final touch I added a Polished Pink flower from the Loose Flower Flourishes with a Glue Dot to one of the leaves.


Supplies:

Thank you for visiting my Blog today.  I hope you enjoyed my project.
See you soon!

Love and Hugs,
Cathryn


Friday, May 14, 2021

COUNT ON ME KANGAROO TISSUE BOX TUTORIAL with HAND-PENNED PETALS- Stampin' Up!


Hi Friends!
My project for today is a Kleenex Tissue box that measures
4 1/2  x  2 1/2  x 1".  I used the NEW Count on Me stamp set along with Hand-Penned Petals stamp set, Hand-Penned Designer Series Paper, Layering Circle dies and Highland Heather Grosgrain Ribbon.


I started with a piece of Highland Heather Cardstock sized
8  x  7 1/2".
I scored the 8" side at:
1,  3 1/2,  4 1/2  and  7".
I scored the 7 1/2" side at:
1/2,  1 1/2,  6  and  7".
To cut and put the box together you can watch my Video Tutorial Here.
I put the box together using Tear and Tape.
I added 3/8" Round Velcro Dots inside the side flap to keep the tissue box closed.


I added some of the Hand-Penned DSP to the box in sizes:
(1)  4 1/4  x  2 1/4  for the front of the box.
(2)  4 1/4  x  3/4"  for the long sides of the box.
I rounded the corners of one side of one of these pieces to attach to the side that opens.
(2)  2 1/4  x  3/4"  for the top and bottom.
I attached the pieces to the box with Liquid Glue.


I stamped the Kangaroo image from Count on Me stamp set onto Basic White Cardstock with Tuxedo Black Ink.
I fussy cut the image before coloring it.
I colored the image with Stampin' Blends:
Light and Dark Soft Suede for the Kangaroo body,
Light Crumb Cake for the Kangaroo Belly and inside ears,
Light Smokey Slate for the nose,
Light Highland Heather for the flower petals,
Dark Daffodil Delight for the flower middle and
Light Mossy Meadow for the leaf.


I cut out a Basic White Cardstock Circle and a Highland Heather Scalloped Circle using the Layering Circle dies.
I attached them together, Basic White on top, with Liquid Glue.
I decided where I wanted the sentiment, from Hand-Penned Petals stamp set, by placing the Kangaroo loosely in the area I wanted it.  Then I stamped the sentiment to the left with Tuxedo Black Ink.
I attached the Kangaroo image to the circle with Liquid Glue and attached the entire embellishment to the front of the box with Dimensionals.


I tied Highland Heather Grosgrain Ribbon around the bottom of the box and tied a bow at the front.
For the final touches I added Wink of Stella Glitter to the flower and 2021-2023 In Color Jewels around the Kangaroo.


Supplies:
2021-2023 In Color Jewels

Thank you for visiting my Blog today.  I hope you enjoyed my tutorial.
See you next time!

Love and Hugs,
Cathryn