Wednesday, June 29, 2022

BY MY SIDE SIMPLE BOX with GINGHAM COTTAGE DSP - Stampin' Up!


Hi Friends!
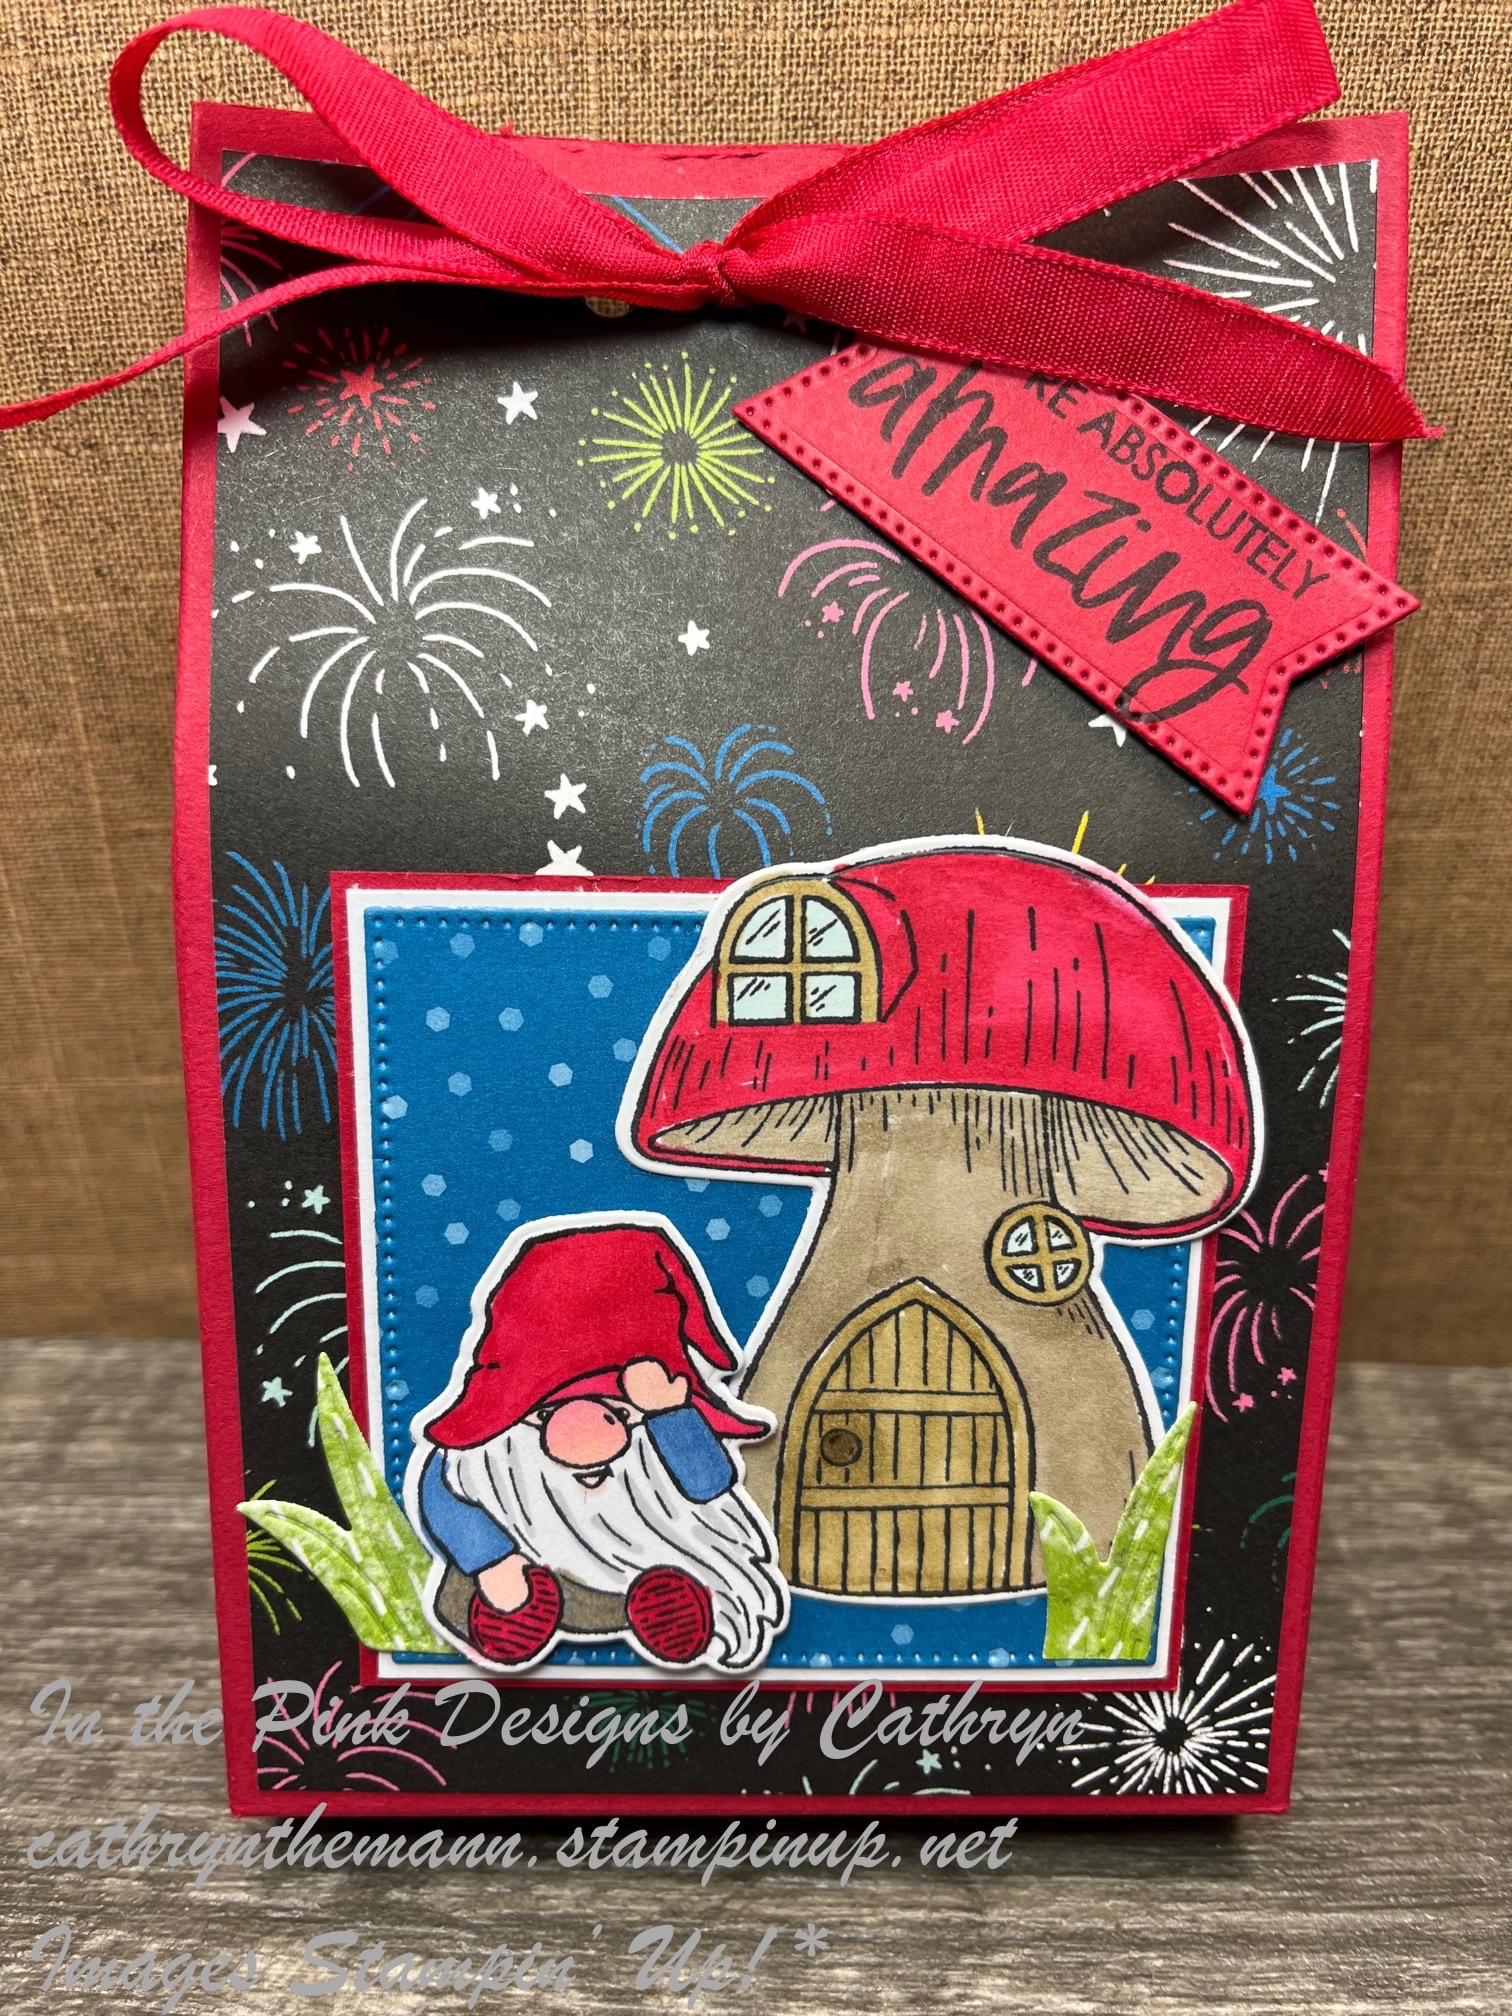
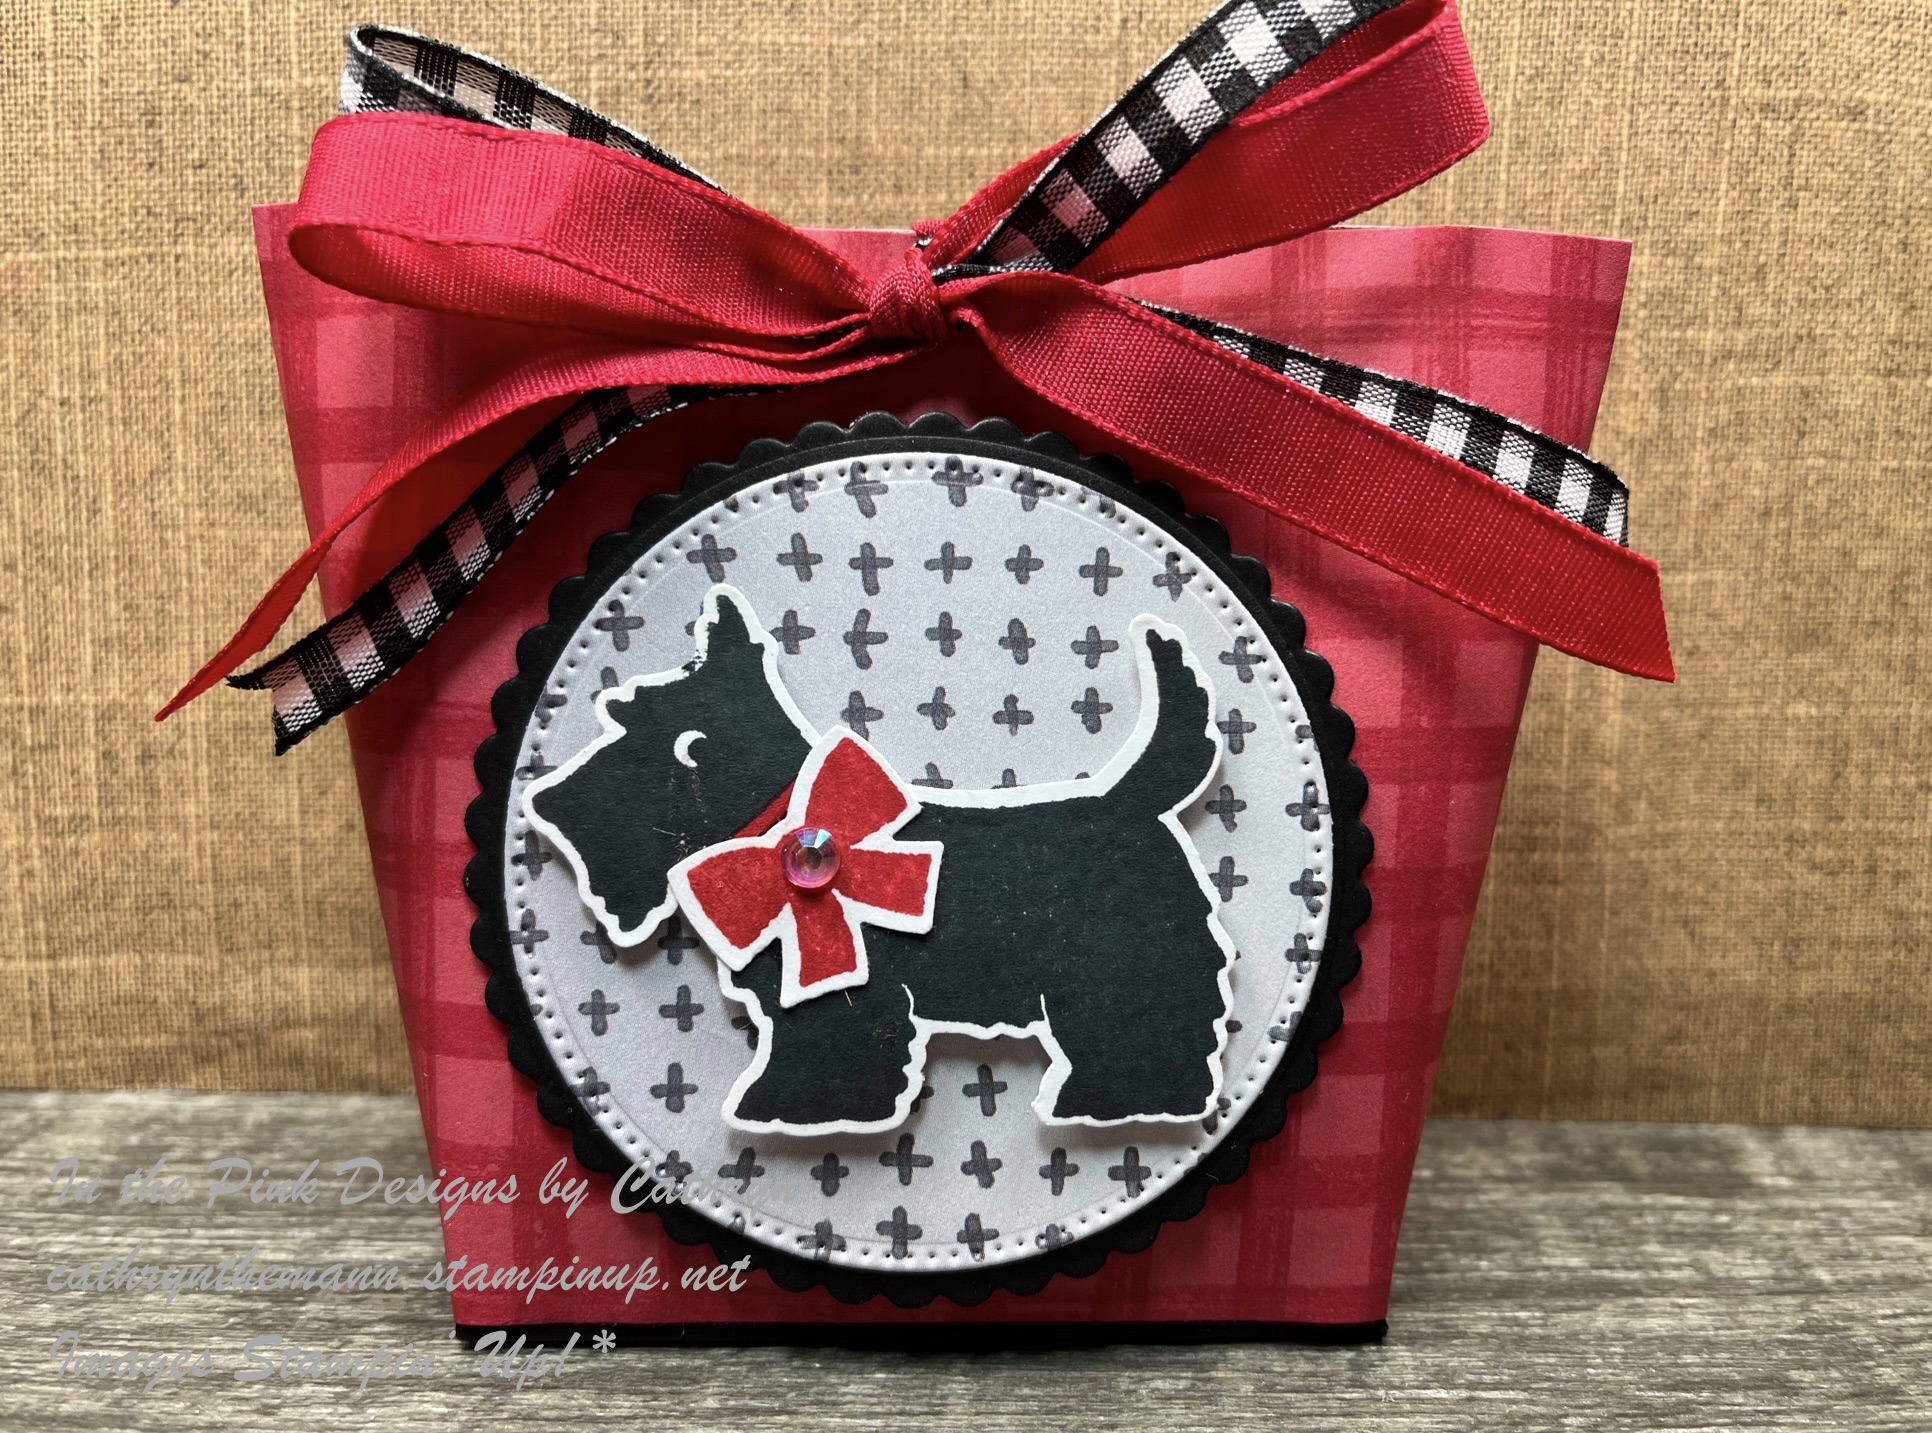
My project today is a two piece box that measures  4 1/4  x  3 1/4  x  3/4".  I used By My Side stamp set, the Rectangle Stitched dies, Gingham Cottage Designer Series Paper and Stampin' Blends.  You can fit a package of Snappers and 2 Nestle Crunch Mini Candy Bars inside.  A Memento Ink Pad or a Deck of cards will also fit.


I started with a piece of Night of Navy Cardstock sized
9 1/4  x  3 1/4".
I scored only the  9 1/4" side at:
4 1/4  and  5".
The Night of Navy Cardstock does not get cut at all.
Next,
I used a piece of Real Red Cardstock sized
5 1/2  x  4 1/4".
I scored all sides at 3/4".
To cut and put the box together you can watch my Video Tutorial Here.
Below is a picture of how your Cardstock should look after scoring and cutting.


I put the Real Red Cardstock together with Tear and Tape.  Then I attached it to the inside/back of the Night of Navy Cardstock, by lining the top of the box just below the scoreline, with Liquid Glue.
I attached 3 pieces of Gingham Cottage Designer Series Paper to the box.
(2)  4  x  3"  for the top and bottom of the box.
(1)  2 3/4  x  1/2"  for the spine of the box.
I attached the DSP to the box with Liquid Glue.


I stamped the sentiment, from By My Side stamp set, onto a piece of Basic White Cardstock with Tuxedo Black Ink.
I stamped the image right next to the sentiment, with the dog underneath, with Tuxedo Black Ink.
I cut them out with a die from the Rectangle Stitched dies making sure to put the stamped images to the left hand side.
After cutting the rectangle out I lined up the same die to cut the right side a bit shorter and ran it through my machine again.  The finished die cut measures about 2 7/8  x  2 1/4.
I colored the images with Stampin' Blends.


I attached the rectangle to a piece of Night of Navy Cardstock sized  3 1/4  x  2 1/2" with Liquid Glue.
I stamped just the Dog from the image in the bottom left corner of a piece of Basic White Cardstock sized  4 x 3 with Tuxedo Black Ink.
I attached the sheet inside the front cover of the box with Liquid Glue.


I tied Real Red Faux Linen Ribbon around the left side of the box and tied a bow at the top.
I attached the rectangles to the top of the box, over the ribbon, with Dimensionals.
For the final touch I added Red Rhinestone Basic Jewels around the images.


Supplies:
By My Side stamp set
Rectangle Stitched dies
Gingham Cottage Designer Series Paper (available July 1)
Night of Navy Cardstock
Real Red Cardstock
Basic White Cardstock
Tuxedo Black Ink
Real Red Faux Linen Ribbon
Red Rhinestone Basic Jewels
Stampin' Blends
Light Soft Suede for the Dogs
Dark Smokey Slate for the Dog's Nose and Boy's Feet
Light So Saffron  for the Hair
Light Flirty Flamingo for the Cheeks
Dark Petal Pink for the Face
Dark Real Red for the Shirt
Light Night of Navy for the Shorts
Light Pool Party for the Shadows
Tear and Tape
Liquid Glue
Dimensionals
Simply Scored
Take Your Pick Tool

Thank you for visiting my Blog today.  I hope you enjoyed my tutorial today.
See you next time!

Love and Hugs,
Cathryn

Tuesday, June 28, 2022

BEST WITCHES LARGE GOODY BOX with SCALLOPED CONTOURS DIES - Stampin' Up!


Hi Friends!
My project today is a large goody box that measures  5 1/4  x  4  x  1".  I used Best Witches stamp set, Scalloped Contours dies, Rectangle Stitched dies and Brights Designer Series Paper.


I started with a piece of Granny Apple Green Cardstock sized
11  x  8 1/4".
I scored the 11" side at:
1,  2,  6  and  7".
I scored the  8 1/4" side at:
1/2,  1 1/2,  6 3/4  and  7 3/4".
To cut and put the box together you can watch my Video Tutorial Here.
Below is a picture of how your Cardstock should look after scoring, cutting and rounding some of the corners.


I attached 5 pieces of Brights/Gorgeous Grape Designer Series Paper to the box.
(1)  3 3/4  x  5"  for the top.
(2)  3/4  x  5"  for the long sides.
(2)  3 3/4  x  3/4"  for the short sides.
I attached the DSP to the box with Liquid Glue.


I stamped the Witch image, from Best Witches stamp set, onto Basic White Cardstock with Tuxedo Black Ink.
I cut the image out with a  2 5/8  x  4"  rectangle from the Rectangle Stitched dies.
I stamped the Frog image onto Basic White Cardstock and also on the lower left corner of a  3 1/2  x  4 3/4"  piece of Basic White Cardstock.
I colored the images with Stampin' Blends.
Witch and Cauldron:
Light Basic Black for the Witch Hat.
Dark Highland Heather for the Hat Band, Cape and Tights.
Dark Pumpkin Pie for the Dress and right side of the Flames.
Dark So Saffron for the Hair.
Light Flirty Flamingo for the Cheeks.
Dark Petal Pink for the Face and Hands.
Dark Daffodil Delight for the Buckle and left side of the Flames.
Dark Smokey Slate for the Cauldron.
Light Soft Suede for the Logs.
Light Pumpkin Pie to blend out the Flames
Light Granny Apple Green for the Bubbles.
Frogs:
Light and Dark Granny Apple Green
I attached the piece of Basic White Cardstock with the Frog on it to the inside cover of the box with Liquid Glue.


I cut another of the same Stitched Rectangle from Pumpkin Pie Cardstock.
I stamped the sentiment on the lower left side with Tuxedo Black Ink.
I measured 1" from the bottom up on each side of the Pumpkin Pie Rectangle and made a small pencil mark.
I placed a Scalloped Rectangle die, from Scalloped Contours dies, with the inside of the top of the die at the pencil mark and put it through my die cutting machine.
I attached the sentiment section over the bottom of the Image Rectangle with Liquid Glue.
I would Black and White Gingham Ribbon around the bottom of the Rectangles, above the sentiment, and tied a bow on the left side.  I secured the ribbon with Glue Dots.
I fussy cut one of the Frogs and attached it next to the sentiment with a Dimensional.


I cut a  4 3/8  x  3" rectangle from Granny Apple Green Cardstock using the Rectangle Stitched dies.
I attached the image piece onto the Granny Apple Green Rectangle with Dimensionals.
Then I attached the entire piece to the top of the box with Dimensionals.


I attached 5/8" Adhesive Velcro Dots inside the front cover for a closure.
I added some Wink of Stella Glitter to the Witch Hat, Cape and Fire.  For the final touch I added 3 Gorgeous Grape Glossy Dots around the Witch.


Supplies:
Best Witches stamp set
Scalloped Contours dies
Rectangle Stitched dies
Brights Designer Series Paper
Granny Apple Green Cardstock
Pumpkin Pie Cardstock
Basic White Cardstock
Tuxedo Black Ink
Light Basic Black Stampin' Blend
Dark Smokey Slate Stampin' Blend
Light and Dark Pumpkin Pie Stampin' Blends
Light Flirty Flamingo Stampin' Blend
Dark Petal Pink Stampin' Blend
Dark Daffodil Delight Stampin' Blend
Dark So Saffron Stampin' Blend
Light Soft Suede Stampin' Blend
Dark Highland Heather Stampin' Blend
Light and Dark Granny Apple Green Stampin' Blends
Black and White Gingham Ribbon 
Glossy Dots Assortment
Tear and Tape
Liquid Glue
Glue Dots
Dimensionals
Simply Scored
Take Your Pick Tool
Corner Rounder
5/8" Adhesive Velcro Dots

Thank you for visiting my Blog today.  I hope you enjoyed my tutorial today.
See you next time!

Love and Hugs,
Cathryn

Friday, June 24, 2022

THIS BIRTHDAY PIGGY LARGE DIAGONAL SIDED BOX with FABULOUS FRAMES DIES - Stampin' Up!


Hi Friends!
My project today is a Large Diagonal sided box that measures
4 1/2  x  3 1/2  x  2".  I used This Birthday Piggy stamp set, Fabulous Frames dies, Gingham Cottage Designer Series Paper, Glossy Dots Assortment and Stampin' Blends.


I started with two pieces that measure  8 1/2  x  7 1/2".
(1)  Real Red Cardstock
(1)  Gingham Cottage Designer Series Paper
I scored them both the same.
I scored the  8 1/2" side at:
2  and  6 1/2".
I scored the 7 1/2" side at:
2  and  5 1/2".
To cut and put the box together you can watch my Video Tutorial Here.
Below are pictures of how your Cardstock and DSP should look like after scoring and cutting.
Note that the DSP is cut differently then the Cardstock.


I stamped the Pig image, from This Birthday Piggy stamp set, onto Basic White Cardstock with Tuxedo Black Ink.
I cut a rectangle around image using a frame die from the Fabulous Frames dies.
I colored the image using Stampin' Blends.
Light and Dark Petal Pink for the Pig.
Light Smokey Slate for the Feet.
Light and Dark Smokey Slate for the Wheels.
Light Night of Navy for the Scooter.
Dark Real Red for the Fenders and Seat.
Dark Daffodil Delight for the Flag.
Light Pool Party for the Head and Tail Lights.
Dark Granny Apple Green for the Grass.
I used a combo of all the colors for the Confetti.


I cut a Frame, that matches the image rectangle, from Pacific Point Cardstock, using the Fabulous Frames dies.
I attached the Frame to the top of the box with Liquid Glue.
Next, I attached the image rectangle inside the Frame with Liquid Glue also.


I stamped the sentiment, from This Birthday Piggy stamp set, onto Real Red Cardstock with Tuxedo Black Ink.
I cut out the sentiment using a label die from the Fabulous Frames dies.
I attached the label to the bottom right side of the image with Dimensionals.


I tied a bow with Real Red Faux Linen Ribbon.  I attached it to the upper left side of the top of the box with 2 Glue Dots.
For the final touch I added 2 Daffodil Delight Glossy Dots to the sides of the sentiment label.


Supplies:
Gingham Cottage Designer Series Paper
Real Red Cardstock
Pacific Point Cardstock
Basic White Cardstock
Tuxedo Black Ink
Real Red Faux Linen Ribbon
Light and Dark Petal Pink Stampin' Blends
Light and Dark Smokey Slate Stampin' Blends
Dark Real Red Stampin' Blend
Light Night of Navy Stampin' Blend
Light Granny Apple Green Stampin' Blend
Dark Daffodil Delight Stampin' Blend
Light Pool Party Stampin' Blend
Tear and Tape
Liquid Glue
Dimensionals
Glue Dots
Simply Scored
Take Your Pick Tool
Ruler

Thank You for visiting my Blog today.  I hope you enjoyed my Large Diagonal Sided Box.
See you next time!

Love and Hugs,
Cathryn

Wednesday, June 22, 2022

KINDEST GNOMES FIREWORKS GIFT BOX with CELEBRATE EVERYTHING - Stampin' Up!


Hi Friends!
My project today is a tall open topped gift box that measures  6  x  4  x  1 1/4".  I used Kindest Gnomes stamp set, the Gnome dies, Stylish Shapes dies, Color and Contour stamp set, Celebrate Everything Host Designer Series Paper and Stampin' Blends.


I started with a piece of Real Red Cardstock sized
11  x  7 1/4".
I scored the  11" side at:
1/2,  4 1/2,  5 3/4  and  9 3/4".
I scored the  7 1/4" side at:
1 1/4".
To cut and put the box together you can watch my Video Tutorial Here.
Below is a picture of how your Cardstock should look after scoring and cutting.


I attached Celebrate Everything Host Designer Series Paper to the box.
(2)  3 3/4  x  5 3/4" 
I attached the DSP to the box with Liquid Glue.
I punched 2 small holes in the middle of the top of the box, on both sides,  with a 1/4" hole punch.
I ran Real Red Faux Linen Ribbon through the holes and tied a bow at the front.


I stamped the Mushroom and Gnome images, from Kindest Gnome stamp set, onto Basic White Cardstock with Tuxedo Black Ink.
I colored the images with Stampin' Blends.
Mushroom:
Light Crumb Cake for underneath of the Mushroom top.
Dark Crumb Cake for the bottom of the Mushroom.
Dark Soft Suede for the Door Frame and Window Frames and Door Knob.
Light Soft Suede for the inside of the Door.
Dark Real Red for the top of the Mushroom.
Light Pool Party for the Window Panes.
Gnome:
Light Flirty Flamingo for the top of the Nose.
Dark Petal Pink to Blend out the Nose, Face, Mouth and Hands.
Light Real Red for inside the edge of the Hat.
Dark Real Red for the Hat and Shoes.
Light Night of Navy for the Sleeves.
Dark Soft Suede for the Pants.
Light Smokey Slate for the Beard.
I cut the images out using the Gnomes dies.


I cut a  2 3/4  x  2 3/4" square from Brights-Pacific Point Designer Series Paper using the Stylish Shapes dies.
I cut a  2 7/8  x  2 7/8" square from Basic White Cardstock.
I cut a  3 x 3"  square from Real Red Cardstock.
I attached the squares together, in size order, with Liquid Glue.
I cut 2 Clumps of Grass from Celebrate Everything Host Designer Series Paper using the Gnomes dies.


I attached the Mushroom first, then a piece of the grass to the left with Liquid Glue.
Next I attached the Gnome with Dimensionals.
I cut the second piece of Grass down and attached it to the right side with Liquid Glue.
I attached the entire piece to the front of the box with Liquid Glue.
I cut a label from Real Red Cardstock using the Stylish Shapes dies.
I stamped the sentiment, from Color and Contour stamp set, onto the label with Tuxedo Black Ink.
I attached the label under the bow with Dimensionals.
For the final touch I added Wink of Stella Glitter to the Gnome's Hat.


Supplies:
Kindest Gnomes stamp set (available July 1)
Gnomes dies (available July 1)
Celebrate Everything Host Designer Series Paper (available July 1)
Stylish Shapes dies
Color and Contour stamp set
Brights Designer Series Paper
Real Red Cardstock
Basic White Cardstock
Tuxedo Black Ink
Light and Dark Real Red Stampin' Blends
Light Smokey Slate Stampin' Blend
Light and Dark Soft Suede Stampin' Blends
Light and Dark Crumb Cake Stampin' Blends
Light Pool Party Stampin' Blends
Light Night of Navy Stampin' Blends
Light Flirty Flamingo Stampin' Blends
Dark Petal Pink Stampin' Blends
Tear and Tape
Liquid Glue
Dimensionals
Wink of Stella
Simply Scored
Take Your Pick Tool
Small Hole Punch

Thank you for visiting my Blog today.  I hope you enjoyed my Gnome Box.
See you next time!

Love and Hugs,
Cathryn

Tuesday, June 21, 2022

BEWITCHING DOUBLE FULL SIZED CANDY BAR GIFT BOX with WITCH HAT BUILDER PUNCH - Stampin' Up!


Hi Friends!
My project today is a Double Full Sized Candy Bar Gift Box that measures  5  x  3  x  1".  I used Bewitching stamp set, the Witch Hat Builder Punch, Gingham Cottage Designer Series Paper, Stylish Shapes dies, the Decorative Circle Punch and the Glossy Dots Assortment.


I started with a piece of Granny Apple Green Cardstock sized
9  x  7".
I scored the  9" side at:
1,  4,  5  and  8".
I scored the  7" side at:
1  and  6".
To cut and put the box together you can watch my Video Tutorial Here.
Below is a picture of how your Cardstock should look after scoring and cutting.


I attached several pieces of Gingham Cottage Designer Series Paper to the box.
(1)  4 3/4  x  2 3/4"  for the top.
(2)  4 3/4  x  3/4"  for the long sides.
(2)  2 3/4  x  3/4"  for the short sides.
I attached the DSP to the box with Liquid Glue.
I took a small circle punch and punched a partial circle in the bottom of the front side for a finger grip.


I stamped the Witch Hat, from Bewitching stamp set, onto Basic White Cardstock with Tuxedo Black Ink.
I colored the Hat with Stampin' Blends.
Dark Pumpkin Pie for the Hat Band and Dots.
Dark Granny Apple Green, Dark Daffodil Delight and Dark Highland Heather for the Dots.
I cut the Witch Hat out using the Witch Hat Builder Punch.


I cut a piece of Celebrate Everything Host Designer Series Paper using the Decorative Circle Punch.
I stamped the Spider and Web image onto the Decorative Circle with Tuxedo Black Ink.
I attached the Witch Hat to the Decorative Circle with Liquid Glue.
I attached the Decorative Circle to a  2 5/8" Highland Heather Cardstock circle, which I cut out using the Stylish Shapes dies, with Liquid Glue.
I cut a label from Granny Apple Green Cardstock using the Stylish Shapes dies.
I attached the circles on top of the label with Dimensionals.
I attached the entire piece to the top of the box with Dimensionals.


I stamped the sentiment, from Best Witches stamp set, onto Daffodil Delight Cardstock with Tuxedo Black Ink.
I cut the sentiment out and in half by hand and attached the 2 pieces to the right of the Witch Hat with Liquid Glue.
I tied about 24" of Black and White Gingham Ribbon around the left side of the box twice and tied a bow.
I added Wink of Stella Glitter to the Hat Band and for the final touch I added 3 Gorgeous Grape Glossy Dots around the top of the box.


Supplies:
Bewitching stamp set (Available July 1)
Witch Hat Builder Punch (Available July 1)
Gingham Cottage Designer Series Paper (Available July 1)
Celebrate Everything Host Designer Series Paper (Available July 1)
Stylish Shapes dies
Decorative Circle Punch
Granny Apple Green Cardstock
Highland Heather Cardstock
Daffodil Delight Cardstock
Basic White Cardstock
Tuxedo Black Ink
Dark Daffodil Delight Stampin' Blend
Dark Pumpkin Pie Stampin' Blend
Dark Granny Apple Green Stampin' Blend
Dark Highland Heather Stampin' Blend
Black and White Gingham Ribbon
Glossy Dots Assortment
Tear and Tape
Liquid Glue
Dimensionals
Simply Scored
Take Your Pick Tool

Thank you for visiting my Blog today.  I hope you enjoyed my Bewitching Gift Box.
See you next time!

Love and Hugs,
Cathryn

Friday, June 17, 2022

CHRISTMAS SCOTTIE WRAP AROUND GIFT BAG with SCOTTIE DOG PUNCH - Stampin' Up!


Hi Friends!
My project today is a Wrap a Round Gift Bag that measures  3 1/2  x  3  x  1 1/2".  I used Christmas Scottie stamp set, the Scottie Dog Builder Punch, Gingham Cottage Designer Series Paper and Happy Forest Friends Designer Series Paper.  The stamp set and Punch bundle  and Gingham DSP go on sale starting July 1, 2022.


I started with a piece of Basic Black Cardstock sized:
4  x  2 1/2".
I scored all four sides at 1/2".
Below is a picture of how your Cardstock should look after scoring and cutting.
I used Tear and Tape to attached the tabs to the sides.


I cut a piece of Gingham Cottage Designer Series Paper to be  9 1/2  x  3 1/2".
I attached Tear and Tape to the bottom and one of the short sides of the wrong side of the paper.
I started in the middle of one of the long sides of the Basic Black Tray.
I attached the DSP, with about 1/16 showing on the bottom, around the tray and overlapped the ends in the back.
If you would like to see me put the box together you can watch my Video Tutorial Here.


I put my gift inside and pinched the sides together ONLY at the top.
I punched a 1/4" hole in the middle of the top of the bag.
I ran Black and White Gingham Ribbon and Real Red Faux Linen Ribbon through the holes and tied a bow at the front.


I stamped the Scottie Dog image, from Christmas Scottie stamp set,  onto Basic White Cardstock with Tuxedo Black Ink.
I stamped the Bow with Real Red Ink.
I cut the images out with the Scottie Dog Punch.


I cut a 2 5/8" smooth circle from Happy Forest Friends Designer Series Paper using the Stylish Shapes dies.
I cut a 2 7/8" scalloped circle from Basic Black Cardstock using the Layering Circle dies.
I attached them together with Liquid Glue.
I attached the Scottie Dog onto the circles with Mini and Regular Dimensionals.
I attached the entire piece to the front of the bag with Dimensionals.
For the final touch I added an Iridescent Rhinestone Basic Jewel to the middle of the bow.


Supplies:
Christmas Scottie stamp set (available July 1)
Scottie Dog Builder Punch (available July 1)
Gingham Cottage Designer Series Paper (available July 1)
Happy Forest Friends Designer Series Paper
Stylish Shapes dies
Layering Circle dies
Basic Black Cardstock
Basic White Cardstock
Tuxedo Black Ink
Real Red Ink
Real Fed Faux Linen Ribbon
Black and White Gingham Ribbon
Iridescent Rhinestone Basic Jewels
Mini and Regular Dimensionals
Tear and Tape
Liquid Glue
Stampin' Pierce Mat
Simply Scored
Take Your Pick Tool
Small Hole punch

Thank you for visiting my Blog today.  I hope you enjoyed my Scottie Dog project.
See you next time!

Love and Hugs,
Cathryn