Wednesday, October 30, 2024

TRIANGLE TREAT HOLDER with CHRISTMAS FRIENDS - Stampin' Up!


Shop Stampin' Up! Here

Hi Friends!
My project today is a treat holder that measures  3 1/4  x  3 1/4  x  1 1/4".  I used the Christmas Friends stamp set & dies Bundle, Stylish Shapes dies and Take a Bow Designer Series Paper.

You can watch my Video Tutorial Here!


I started with a piece of Garden Green Cardstock sized
9 1/2  x  7 3/4"
I scored the  9 1/2" side at:
1/2,  3 3/4,  5  and  8 1/4"
I scored the  7 3/4" side at:
1 1/4  and  4 1/2"
To cut and put the box together you can watch my Video Tutorial Here.
Below is a picture of how your Cardstock should look when you are finished.


I attached 4 pieces of Take A Bow Designer Series Paper to the box.
(4)  3  x  3"
front and back of flap and inside and back of box.


I stamped the Polar Bear and Tree Images, from Christmas Friends stamp set, onto Basic White Cardstock with Tuxedo Black Ink.
I cut the images out with the matching dies.

I colored the images with Stampin' Blends.
Light Smokey Slate  -  shading on Polar Bear
Dark Real Red  -  Berries and Bow
Dark Old Olive  -  Wreath and Tree Needles
Dark Pecan Pie  -  Tree Trunk


I cut a  2 3/8" square from Take a Bow DSP using the Stylish Shapes dies.
I attached the Polar Bear to the right side, slightly hanging off, with Dimensionals.
I attached the right side of the tree to the square with Liquid Glue.


I attached the square to the front of the box with Dimensionals.
I stamped the sentiment onto Basic White Cardstock with Real Red Ink.
I cut the sentiment out by hand and attached it to the box with a Dimensional and some Liquid Glue.


I tied a bow with some Frayed Edge Ribbon and attached it to the upper right of the square with a Glue Dot and Liquid Glue.
I cut a Star from Daffodil Delight Cardstock using the Christmas Friends dies.
I attached it to the top of the Tree with Liquid Glue.


For the final touch I added a Rhinestone Basic Jewel to the middle of the Star.


Supplies:
Christmas Friends stamp set & dies Bundle
Stylish Shapes dies
Take a Bow Designer Series Paper
Garden Green Cardstock
Basic White Cardstock
Tuxedo Black Ink
Real Red Ink
Stampin' Blends
Frayed Grosgrain Ribbon
Rhinestone Basic Jewels
Tear & Tape
Liquid Glue
Dimensionals
Glue Dots
Tools
Simply Scored
Take Your Pick Tool

Thank you for visiting my Blog today.  I hope you enjoyed my project today.
See you next time!

Love & Hugs,
Cathryn

Tuesday, October 29, 2024

HALLOWEEN TAG TREAT HOLDER with POTIONS & SPELLS - Stampin' Up!


Shop Stampin' Up! Here

Hi Friends!
My project today is a Treat Box that measures  2 1/2  x  3 3/4  x  1".  I used the Potions & Spells stamp set & dies Bundle,  Greetings of the Season dies and Halloween Spells Designer Series Paper.

You can watch my Video Tutorial Here!


I started with a piece of Granny Apple Green Cardstock sized
7 1/2  x  2 3/4"
I scored the  7 1/2" side at:
1/2,  3,  4  and  6 1/2"
I scored the  2 3/4" side at:
1"
To cut and put the box together you an watch my Video Tutorial Here.


I cut  (2)  2 1/2  x  3 3/4" labels from the Halloween Spells Designer Series Paper using the Greetings of the Season dies.
I stamped the sentiment onto the top of one of the tags with Versamark Ink.
I sprinkled Black Stampin' Emboss Powder onto the image and spilled off the excess.
I heated the image using my Heat Tool.
I attached a label on either side of the box using Liquid Glue.


I attached (2)  3/4  x  1 1/2" pieces of Halloween Spells Designer Series Paper to the sides of the inside box with Liquid Glue.
I ran a double piece of Peach Pie Bordered Ribbon through the holes and tied it up with some Linen Thread.


I stamped the Cauldron onto Basic Black Cardstock with Versamark Ink.
I sprinkled the image with White Stampin' Emboss Powder.
Next I heated the image using my Heat Tool.
I cut the image out using the matching dies.


I cut the Drips and 5 Bubbles out of Old Olive Glimmer Paper using the Potions & Spells dies.
I added a strip of Stampin' Seal+ onto the top/back of the Cauldron.
I added the bubble to the tape, glitter towards the right side, Large in the middle, a medium on each side and small ones on the ends.
I attached the drips to the front with Liquid Glue.
I added Dimensionals to the back of the Cauldron and attached it to the front of the box.


I cut the bottles from Highland Heather and Pumpkin Pie Cardstocks.
I cut the inside of the bottles from Halloween Spells Designer Series Paper.
I attached them together and then to the front of the box with Liquid Glue.


For the final touch I added 3 Gorgerous Grape Shimmer Gems around the front of the box.


Supplies:
Potions & Spells stamp set & dies Bundle
Greetings of the Season dies
Halloween Spells Designer Series Paper
Old Olive Glimmer Paper
Granny Apple Green Cardstock
Pumpkin Pie Cardstock
Highland Heather Cardstock
Tuxedo Black Ink
Versamark Ink
White Stampin' Emboss Powder
Black Stampin' Emboss Powder
Peach Pie Bordered Ribbon
Linen Thread
Purple Shimmer Gems
Stampin' Seal+
Liquid Glue
Dimensionals
Tools
Simply Scored
Take Your Pick Tool
Heat Tool

Thank you for visiting my Blog today.  I hope you enjoyed my Halloween Projects this year.
See you next time!

Love and Hugs,
Cathryn

Tuesday, October 22, 2024

QUICK & EASY HALLOWEEN TREAT BOX with POTIONS & SPELLS - Stampin' Up!


Shop Stampin' Up! Here

Hi Everyone!
My project today is a Treat Box that is quick and easy to make.  It measures  2 1/2  x  3 1/2  x  1".  I used the Potions & Spells stamp set & dies Bundle, Stylish Shapes dies and Halloween Spells Designer Series Paper.

You can watch my Video Tutorial Here!


I started with a piece of Halloween Spells Designer Series Paper sized
7 1/2  x  5 1/2"
I scored the  7 1/2" side at:
1,  3 1/2,  4 1/2  and  7"
I scored the  5 1/2" side at:
1  and  4 1/2
To got and put the box together you can watch my video tutorial here.


I stamped the Cat image, from Potions & Spells stamp set, onto Smokey Slate Cardstock with Versamark Ink.
I sprinkled the images with Black Stampin' Emboss Powder, poured off the excess and heated with image with my Heat Tool.
I colored the Cats eyes with a Light Granny Apple Green Stampin' Blend.
I cut the image out using the matching dies.


I cut a 2 1/8" circle from Daffodil Delight Cardstock using the Stylish Shapes dies.
I stamped the sentiment onto the top of the circle with Tuxedo Black Ink.


I stamped the Books image onto Basic White Cardstock with Tuxedo Black Ink.
I colored the Books with Light & Dark Pumpkin Pie Stampin' Blends.
I cut the image out with the matching die.


I tied Peach Pie Bordered Ribbon around the long side of the box and tied a bow at the top.
I attached the "Moon" the the upper part of the front with Dimensionals.
I attached the Cats feet to the top book with Liquid Glue.
Next I attached the Cat and Books to the front of the box with Dimensionals.


Supplies:
Potions & Spells stamp set & dies Bundle
Stylish Shapes dies
Halloween Spells Designer Series Paper
Smokey Slate Cardstock
Daffodil Delight Cardstock
Basic White Cardsdtock
Versamark Ink
Tuxedo Black Ink
Black Stampin' Emboss Powder
Peach Pie Bordered Ribbon
Stampin' Blends
Green Gems from my Stash
Tear & Tape
Liquid Glue
Dimensionals
Tools
Simply Scored
Take Your Pick Tool
Heat Tool
Corner Rounder

Thank you for visiting my Blog today.  I hope you enjoyed my Treat Box.
See you next time!

Love & Hugs,
Cathryn

Friday, October 18, 2024

2 FROM 1 SHEET GHIRARDELLI TREAT BOX with HUMBLE HOME - Stampin' Up!


Shop Stampin' Up! Here

Hi Friends!
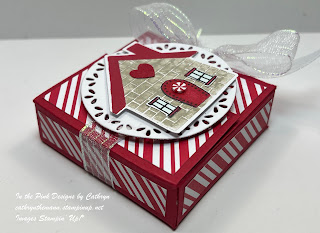
My project today is a Treat Box that measures  2 1/2  x  2 1/2  x  3/4".  You can get 2 of these boxes from 1 sheet of Cardstock.  I used the Humble Home Bundle, Spotlight on Nature dies and Take a Bow Designer Series Paper.

You can watch my Video Tutorial Here!


I started with a piece of Real Red Cardstock sized
8  x  5 1/2"
I scored the  8" side at:
1 1/2,  2 1/4,  4 3/4  and  5 1/2"
I scored the  5 1/2" side at:
3/4,  1 1/2,  4  and  4 3/4"
To cut and put the box together you can watch My Video Tutorial Here.
Below is a picture of my template (sorry I forgot to take a pic of the Cardstock).


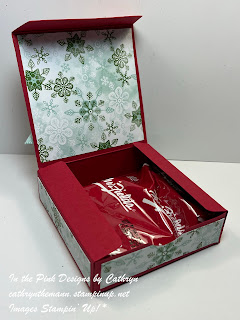
I attached several pieces of Take a Bow Designer Series Paper to the box.
(2)  2 1/4  x  2 1/4"  large flaps
(2)  1 1/4  x  2 1/4"  short flaps
(4)  1/2  x   2 1/4"  sides


I stamped the "Brick" House onto Basic White Cardstock using Crumb Cake Ink.
I cut the bottom of the house out using the Humble Home Builder Punch.
I stamped the top of the house on top of the bottom with Real Red Ink.


I stamped the Gingerbread House image onto Basic White Cardstock with Tuxedo Black Ink.
I fussy cut the Windows and Door out by hand.
I colored the Window Sashes and Door with a Dark Real Red Stampin' Blend.
I colored the Window Panes with a Light Pool Party Stampin' Blend.
I attached the pieces onto the "Brick" house with Liquid Glue.


I cut a  2 1/8"  circle from Basic White Cardstock using the Spotlight on Nature dies.
I attached the House to the circle with Dimensionals.


I tied Iridescent Striped Ribbon around the box, short flap on top, and tied a bow on the right side.
I attached the left side of the circle to the small flap, over the ribbon, with Dimensionals.


I cut a Heart from Real Red Cardstock and attached it to the top of the House under the Roof.
I added some Wink of Stella Glitter to the Heart, Windows and Door.


For the final touch I added a Peppermint Embellishment to the Door.


Supplies:
Humble Home Stamp Set & Humble Home Builder Punch
Spotlight on Nature dies
Take a Bow Designer Series Paper
Real Red Cardstock
Basic White Cardstock
Crumb Cake Ink
Real Red Ink
Tuxedo Black Ink
Stampin' Blends
Iridescent Striped Ribbon
Peppermint Embellishments
Stampin' Seal+
Liquid Glue
Dimensionals
Tools:
Simply Scored
Take Your Pick Tool
Corner Rounder
Small Circle Punch

Thank you for visiting my Blog today.  I hope you enjoyed my Treat Box.
See you next time!

Love & Hugs,
Cathryn

Wednesday, October 16, 2024

GINGERBREAD HOUSE TREAT BOX with HUMBLE HOME - Stampin' Up!


Shop Stampin' Up! Here

Hi Friends!
My project today is a treat box that measures  3 1/2  x  3 1/2  x  1".   I used the Humble Home stamp set & Punch Bundle, Spotlight on Nature dies, Stylish Shapes dies and Take A Bow & Snowy Scenes Designer Series Papers.

You can watch my Video Tutorial Here!


I started with a piece of Real Red Cardstock sized
10  x  7"
I scored the  10" side at:
1,  4 1/2,  5 1/2  and  9"
I scored the  7" side at:
3/4,  1 3/4,  5 1/4  and  6 1/4"
To cut and put the box together you can watch my Video Tutorial Here.
Below is a picture of how your Cardstock should look when you are done.


I attached several pieces of Snowy Scenes Designer Series Paper to the box.
(2)  3 1/4  x  3 1/4"  top and bottom of flap
(4)  3/4  x  3 1/4"  sides


I stamped the Gingerbread House, from Humble Home stamp set, onto Pecan Pie Cardstock with Versamark Ink.
I sprinkled White Stampin' Emboss Powder over the image and tapped of the excess.
I heated the image with my Heat Tool.
I cut the House out using the Humble Home Builder Punch.


I cut a  3 3/4" circle from Take a Bow DSP using the Spotlight on Nature dies.
I cut a  3" circle from Pool Party Cardstock using the Stylish Shapes dies.
I attached the circles together with Liquid Glue.


I wound Pool Party Grosgrain around the circles and tied a bow on the left side.
Pool Party Grosgrain Ribbon is retired now so you can use Summer Splash Bordered Ribbon instead.
I attached the circles to the box, opening on the right, with Dimensionals.


I stamped the sentiment "Merry Christmas" onto Basic White Cardstock with Pool Party Ink.
I cut the words apart and attached them to the upper left of the circles with Liquid Glue.


For the final touch I added a Peppermint Embellishment to the Door of the Gingerbread House.


Supplies:
Humble Home stamp set & Punch Bundle
Spotlight on Nature dies
Stylish Shapes dies
Take a Bow Designer Series Paper
Snowy Scenes Designer Series Paper
Real Red Cardstock
Pool Party Cardstock
Pecan Pie Cardstock
Basic White Cardstock
Versamark Ink
Pool Party Ink
White Stampin' Emboss Powder
Peppermint Embellishments
Pool Party Grosgrain Ribbon (Retired)
Stampin' Seal+
Liquid Glue
Dimensionals
Tools
Simply Scored
Take Your Pick Tool
Heat Tool
Corner Rounder
Small Circle Punch

Thank you for visiting my Blog today.  I hope you enjoy my Treat Box.
See you next time!

Love & Hugs,
Cathryn

Tuesday, October 15, 2024

3 FROM 1 SHEET TREAT BOX with HUMBLE HOME - Stampin' Up!


Shop Stampin' Up! Here

Hi Friends!
My project today is a treat box that measures  2 1/2  x  3  x  1/2".  You can get 3 boxes from one sheet of Cardstock.  I used the Humble Home stamp set & Humble Home Builder Punch Bundle, Spotlight on Nature dies, Perennial Postage diesTake A Bow Designer Series Paper and the 2 3/8" Circle Punch.

You can watch my Video Tutorial Here!


I started with a piece of Shaded Spruce Cardstock sized
8 1/2  x  3 1/2"
I scored the  8 1/2" side at:
1 1/2,  2,  5  and  5 1/2"
I scored the  3 1/2" side at:
1 1/2 and  3"
Next I turned the Cardstock back to the 8 1/2" side (with the 1 1/2" strip on the left) and scored TO THE FIRST SCORELINE ONLY AT  3 1/2"
I turned the Cardstock to the other 8 1/2" side (1 1/2" strip on the right) and
Scored TO THE FIRST SCORELINE ONLY AT  5".
To cut and put the box together you can watch my Video Tutorial Here.
Below is a picture of how your Cardstock should look when you are done.


I attached pieces of Take a Bow Designer Series Paper to the box.
(2)  2 1/4  x  2 3/4"  front and back of flap
(1)  2 1/4  x  1 1/4"  inside front of box


I stamped the House onto Pecan Pie Cardstock using Versamark Ink.
I sprinkled the image with White Stampin' Emboss Powder and shook off the excess.
I heated up the image with my Heat Tool then cut it out using the Humble Home Builder Punch.


I stamped the Wreath onto Basic White Cardstock with Tuxedo Black Ink.
I fussy cut the Wreath out and colored it with Stampin' Blends.
Bow  -  Dark Real Red
Wreath  -  Dark Shaded Spruce


I cut a  2 1/8" circle from Basic White Cardstock using the Spotlight on Nature dies.
I cut a 2 3/8" circle from Shaded Spruce Cardstock using the 2 3/8" Circle Punch.
I attached the circles together with Liquid Glue.


I attached the House to the middle of the circles with Dimensionals.
I attached the Wreath to the top of the Roof with a half of a Dimensional.


I cut a  1 3/8  x  5/8" label from Basic White Cardstock using the Perennial Postage dies.
I stamped the sentiment "Merry Christmas" onto the label with Real Red Ink.
I attached the label to the lower part of the inside of the box with Liquid Glue.


I tied Shaded Spruce Satin and Sheer Ribbon around the long side of the box and tied a bow at the top.
I attached the circles to the front of the box, over the ribbon, with Dimensionals.
For the final touch I added 3 Rhinestone Basic Jewels to the upper left of the box front.


Supplies:
Humble Home stamp set & Punch Bundle
Spotlight on Nature dies
Perennial Postage dies
2 3/8" Circle Punch
Take a Bow Designer Series Paper
Shaded Spruce Cardstock
Basic White Cardstock
Pecan Pie Cardstock
Versamark Ink
Real Red Ink
Tuxedo Black Ink
White Stampin' Emboss Powder
Stampin' Blends
Shaded Spruce Satin & Sheer Ribbon
Rhinestone Basic Jewels
Liquid Glue
Dimensionals
Tools
Simply Scored
Take Your Pick Tool
Heat Tool

Thank you for visiting my Blog today.  I hope you enjoyed my Treat Box.
See you next time!

Love & Hugs,
Cathryn