

Hi Friends!
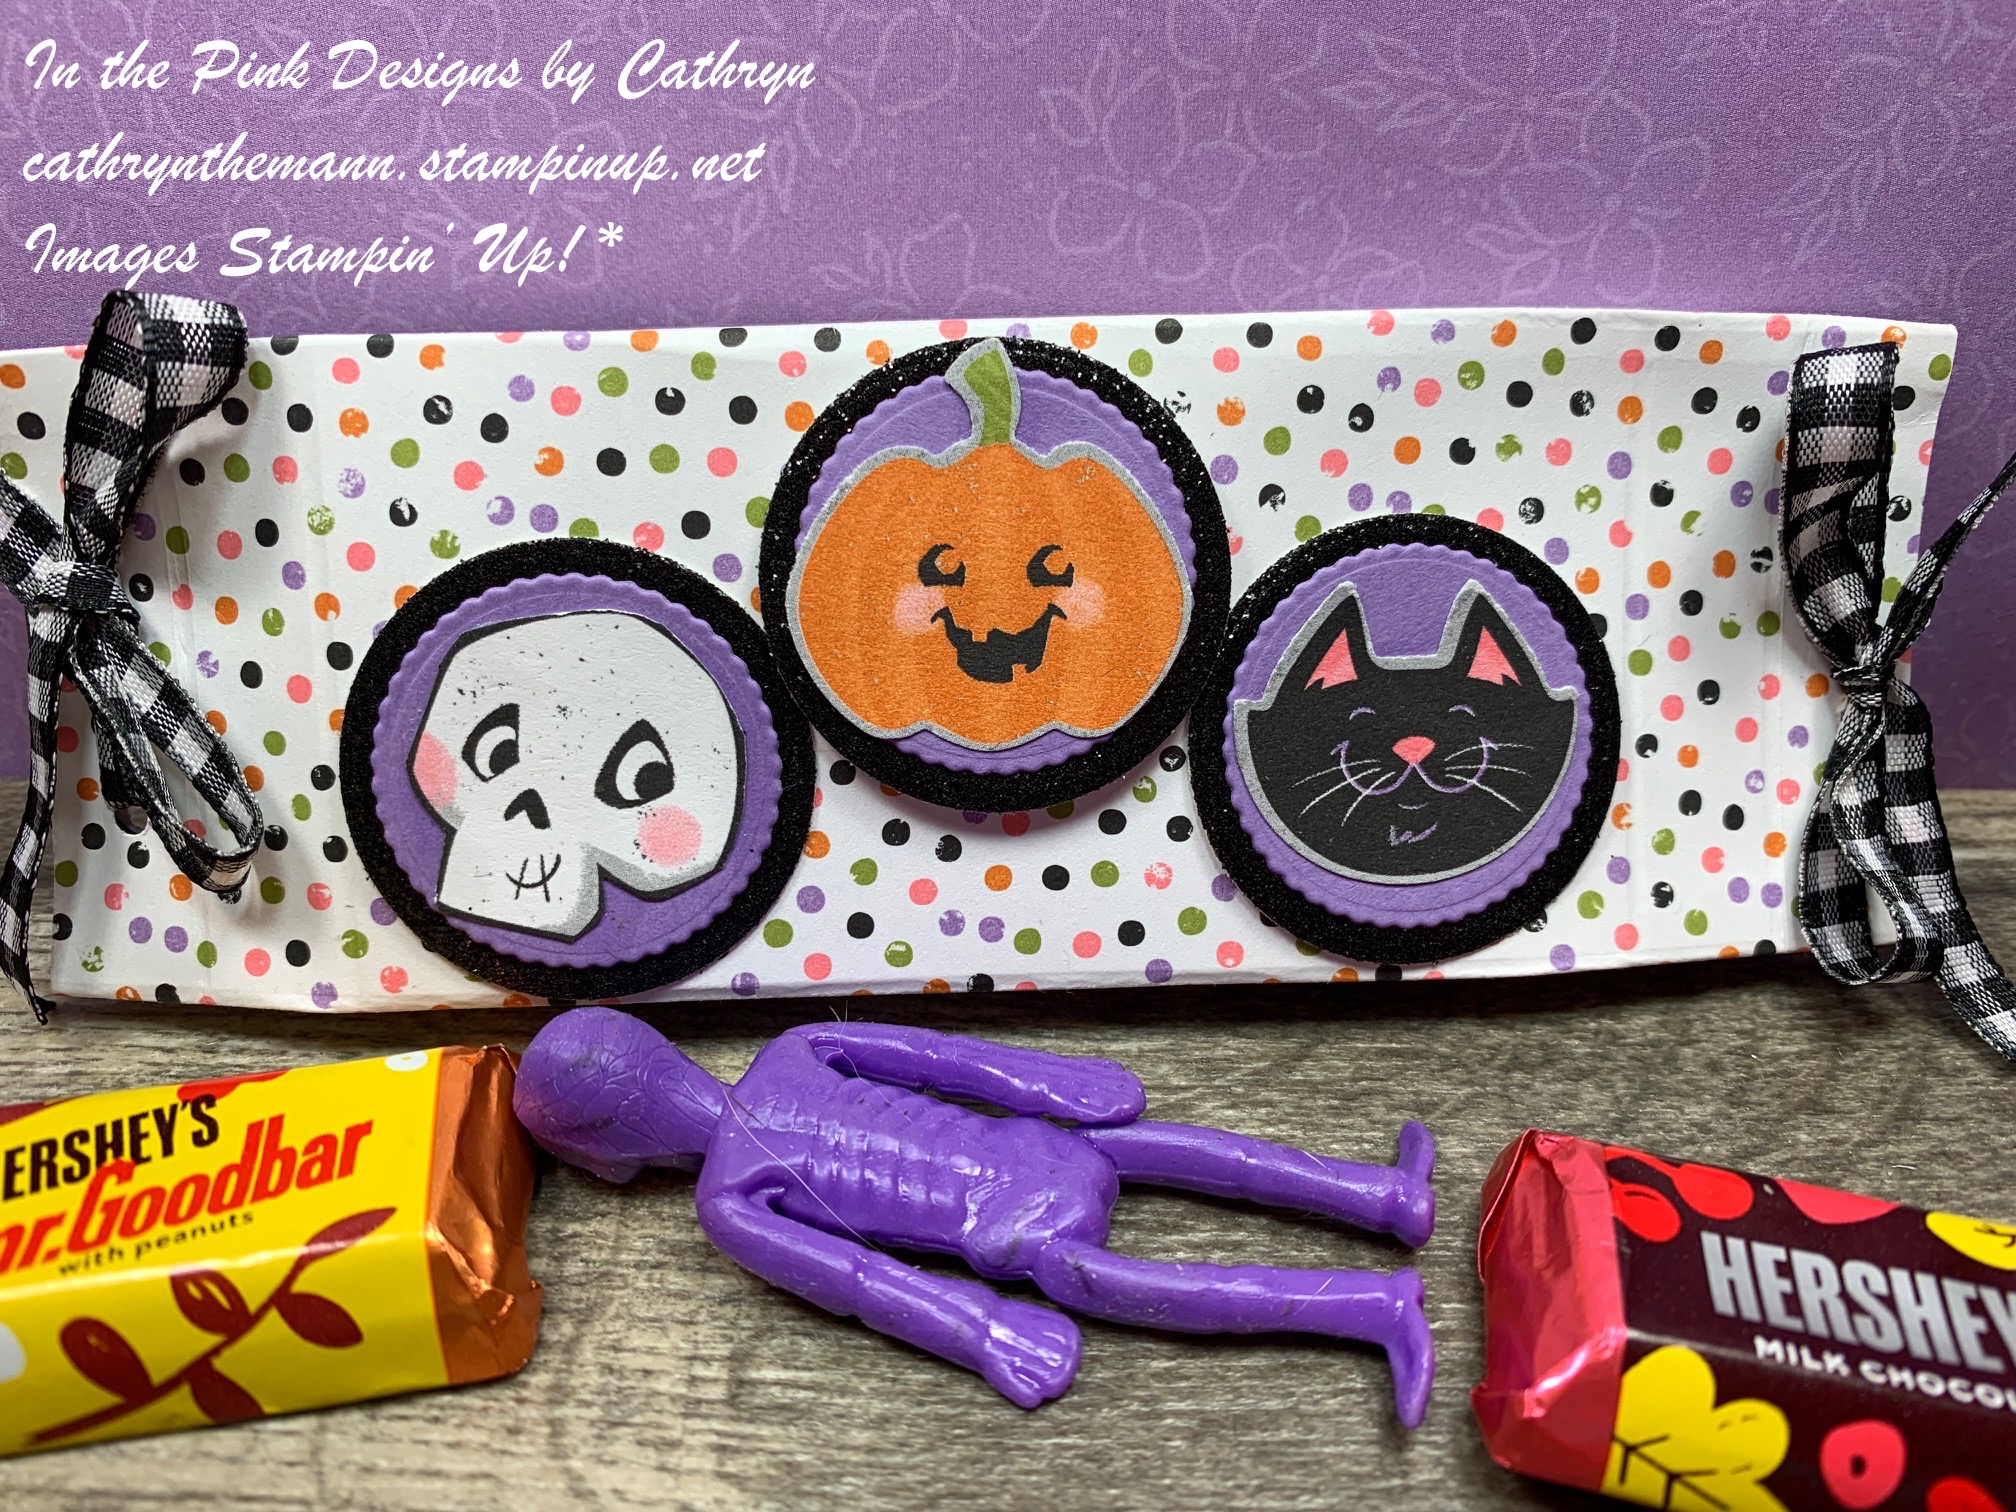
My project today is an Easy No Cut Halloween treat box I made from one piece of 6x6 Cute Halloween Designer Series Paper. I also used the Halloween punch, Layering Circle dies and Black and White Gingham Ribbon.
I started with a piece of Cute Halloween Designer Series Paper sized 6 x 5 1/2".
I scored the 6" side at:
1/2, 1, 5 and 5 1/2".
I scored the 5 1/2" side at:
1/2, 2 1/2, 3 and 5".
To put the box together you can watch my Video Tutorial Here.

I cut (3) 1 3/8" circles from Black Glitter Paper and (3) 1 1/8" scalloped circles from Highland Heather Cardstock using the Layering Circle dies.
I attached the Highland Heather circles on top of the Black Glitter ones with Liquid Glue.
I cut a pumpkin and cat from the Cute Halloween Designer Series Paper using the Halloween Punch.
I fussy cut a skull from the DSP by hand.
I attached the 3 images on top of the Highland Heather circles with Liquid Glue.

I attached the skull and cat circles all the way to the left and right front of the box with Liquid Glue.
I attached the pumpkin in the middle at the top fo the box with Dimensionals.
I punched 2 holes on each side of the end flaps and ran Black and White Gingham Ribbon through them, tying a bow on top.

Supplies:
Cute Halloween Designer Series Paper
Halloween Punch
Layering Circle dies
Black Glitter Paper
Highland Heather Cardstock
Black and White Gingham Ribbon
Liquid Glue
Dimensionals
Tear and Tape
Simply Scored
Take Your Pick Tool
Thank you for visiting my Blog today! I hope you enjoyed my Halloween Project.
See you next time!
Love and Hugs,
Cathryn


1 comment:
Great project!
Post a Comment