Friday, June 11, 2021

ADORABLE BEAR BOX with COUNT ON ME stamp set - Stampin' Up!

Shop Stampin' Up! Here

Hi Friends!
For my project today I made a box that is much wider on the bottom than the top.  It is perfect for Father's Day or any other gift giving occasion.  I used Count on Me stamp set, Well Suited Designer Series Paper and Hippo and Friends dies.
The box measures  2 3/4  x  2 1/2  x  4 1/2".


I started with a piece of Night of Navy Cardstock sized  11  x  6".
I scored the 11" side at:
2 3/4,  5 1/4,  8  and  10 1/2".
I scored the 6" side at:
1 3/4".
To cut and put the box together you can watch my Video Tutorial Here.
Below is a picture of the box when it has been scored and cut.
I put the box together with Tear and Tape.


I attached 2 pieces of Well Suited Designer Series Paper in sizes:
(2)   2 1/2  x  4".
I attached the DSP to the front and back of the box with Liquid Glue.


I stamped the Bear from Count on Me stamp set onto Basic White Cardstock with Tuxedo Black Ink.
I colored the bear with Light and Dark Crumb Cake Stampin' Blends and the heart with a Dark Poppy Parade Stampin' Blend.  I cut a label out of Well Suited DSP using the Hippo and Friends dies.  I fussy cut the bear out and attached it to the label with Dimensionals.


I stamped the sentiment from Count on Me stamp set onto a 3/8" strip of Basic White Cardstock.
I cut the the sentiment strip down to 2" after stamping it.
I attached the sentiment strip onto a   2 1/4  x  1/2"  piece of Night of Navy Cardstock with Liquid Glue.
I attached the sentiment to the front-bottom of the box with Dimensionals.
I attached the Bear Label to the front of the box (with Dimensionals) with the bottom edge under the sentiment piece.


I closed the top of the bow with a Clever Clasp.
I cut 2 pieces of White Twine and 2 Pieces of Night of Navy Twine to 11".  I tied all the pieces together, into a bow.
I rolled a glue dot up, put it on the back of the bow and attached it to the middle of the Clever Clasp.
For the final touch I added two Resin Heart Embellishments to either side of the sentiment.


Supplies:
Well Suited Designer Series Paper - Sold Out

I hope you enjoyed my project today.  Thank you for visiting my Blog today.
See you next time!

Love and Hugs,
Cathryn


Wednesday, June 9, 2021

GARDEN BIRDHOUSE GIFT BOX for TEACHERS GIFTS with WATERCOLOR SHAPES - Stampin' Up!


Hi Friends!
I made my project today for some Teachers Gifts.  My twins are graduating High School this month and they need a few gifts for some special people.  This gift Box measures 3 x 3 x 1 1/2".  I used Garden Birdhouses stamp set, Watercolor Shapes stamp set, Fine Art Floral Designer Series Paper and the Layering Circle dies.


I started with a piece of Balmy Blue Cardstock sized  9 3/4  x  7".
I scored the 9 3/4" side at:
1 1/2,  4 1/2,  6  and  9".
I scored the 7" side at:
1/2,  2,  5  and  6 1/2".
To cut and put the box together you can watch my Video Tutorial Here.
Below is a picture of what the scored and cut box looks like.
I put the box together with Tear and Tape.


I attached pieces of the Fine Art Floral Designer Series Paper to the box in sizes:
(1)  2 3/4  x  2 3/4"  for the top.
(4)  2 3/4  x  1 1/4"  for the sides.
I attached the DSP to the box with Liquid Glue.


I stamped the birdhouse image from Garden Birdhouses stamp set onto Basic White Cardstock with Tuxedo Black Ink.
I colored the Birdhouse with Stampin' Blends:
Light and Dark Balmy Blue
Dark So Saffron


I stamped the large circle image from Watercolor Shapes stamp set onto Basic White Cardstock with So Saffron Ink then cut it out using the 2 3/8" circle from Layering Circle dies.
I cut a larger Scalloped Circle from Blushing Bride using the same dies.
I attached the smooth circle on top of the scalloped circle with Liquid Glue.


I fussy cut the Birdhouse out and attached it to the middle of the circles with Dimensionals.
I attached the entire embellished piece to the top of the box with Dimensionals also.


I cut a 13" piece of Bumblebee Gingham Ribbon, folded it in half and tied a knot in the folded end.
I cut a circle in the top flap, with a 1/8" hole punch,  and a matching one in the body of the box.  I ran the ribbon from the inside of the body of the box to the outside and then to the underside of the lid.
After pulling the ribbon through I tied a bow at the front.
For the final touch I added some Holiday Rhinestone Basic Jewels around the Birdhouse.


Supplies:

Thank you for visiting my Blog today.  I hope you enjoyed my gift box tutorial.
See you next time!

Love and Hugs,
Cathryn


Tuesday, June 8, 2021

TRIANGLE FOLD OVER FATHER'S DAY BOX with HATS OFF - Stampin' Up!


Shop Stampin' with Me here

Hi Friends!
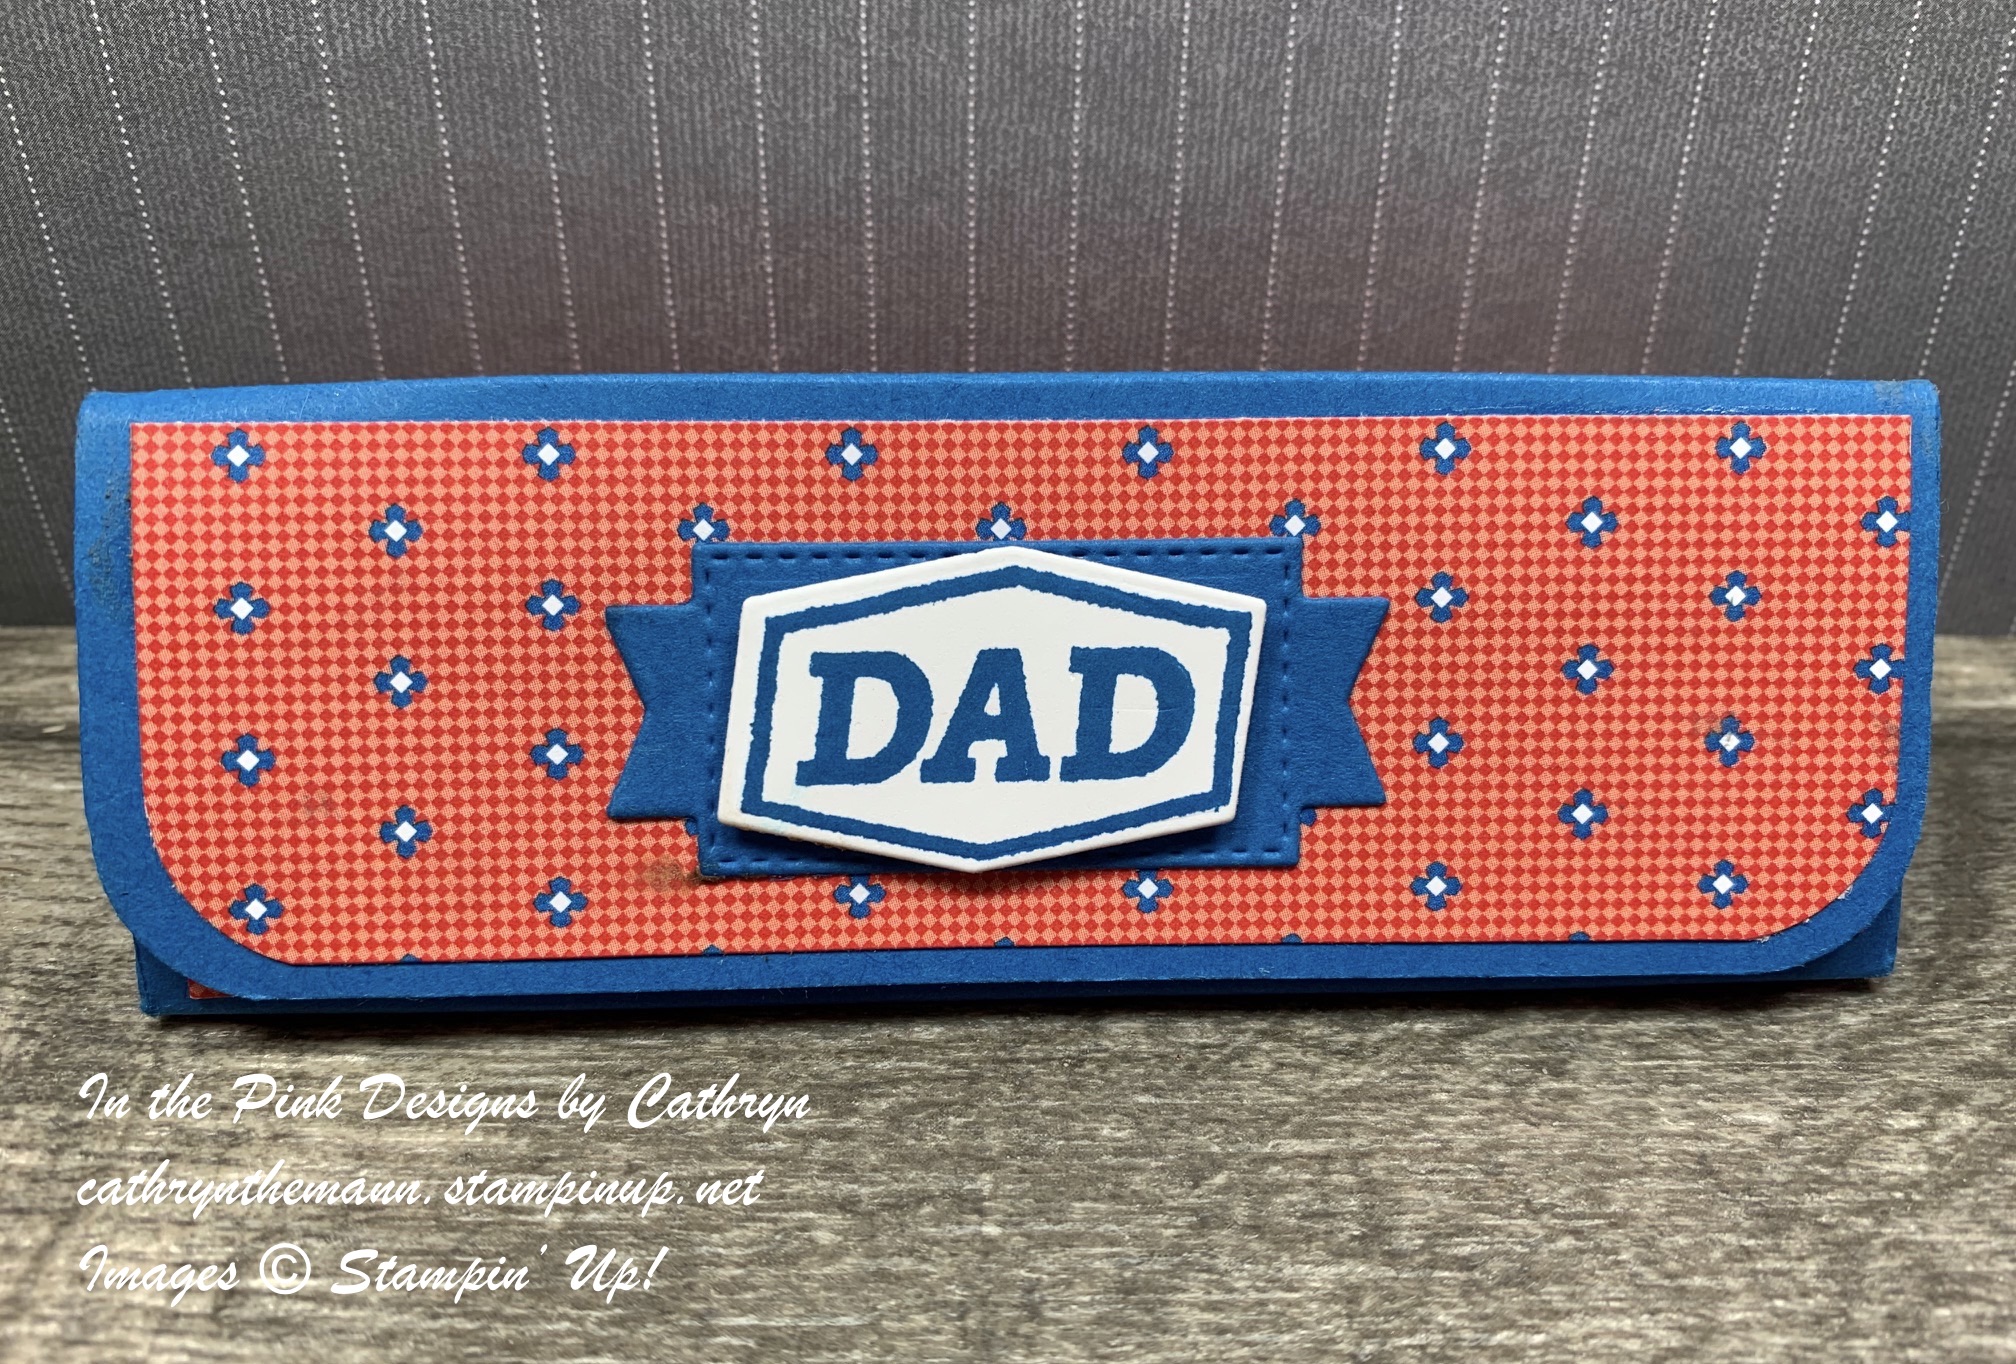
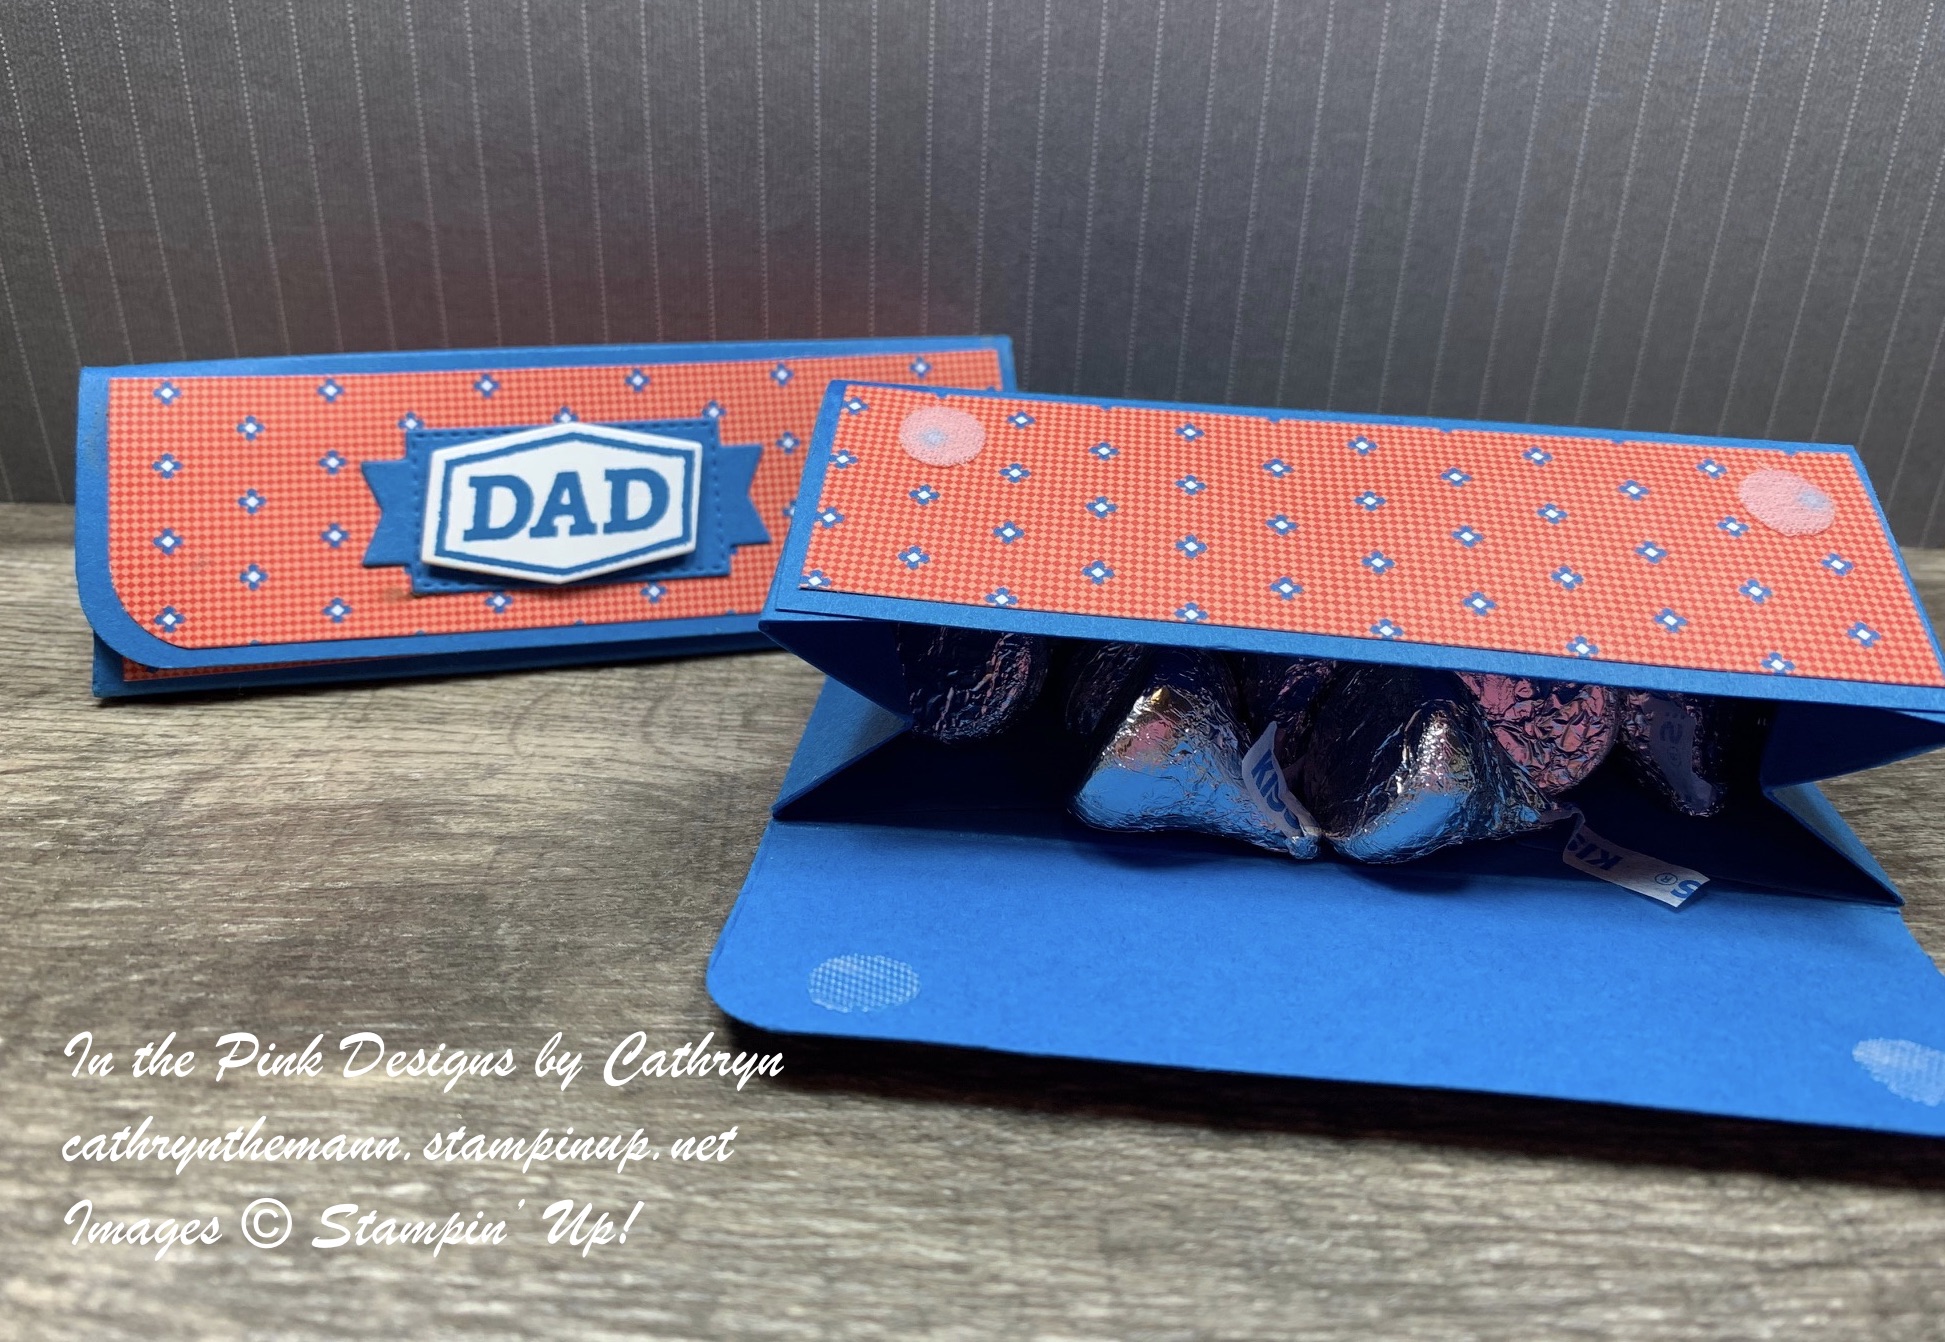
Today I made a triangle fold over box for Father's Day.  I used Hats Off stamp set, Hat Builder dies, Messages die and Well Suited Designer Series Paper.  I filled my boxes with Mini Slim Jims in one and Hershey's Kisses in the other.


I started with a piece of Pacific Point Cardstock sized  7 1/2  x  6".
I scored the 7 1/2" side at:
1 1/2  and  6".
I scored the 6" side at:
1 1/2,  3  and  4 1/2".
I also made a mark on both sides of the 6" side.
On one side made a mark at 2 1/4".
On the other side I made a mark at 3 3/4".
I made a triangle in each of the marked squares by connecting the mark I made with the bottom corners of the square it is located in.
To cut and put the box together you can watch my Video Tutorial Here.
Below is a picture of what your box should look like after scoring and cutting.
I used Liquid Glue to put the box together.


Above is a picture of what your box should look like after scoring and cutting.
I used Liquid Glue to put the box together.


I attached pieces of Well Suited Designer Series Paper to the box.
(3)  4 1/4  x  1 1/4".
I attached them to the box with Liquid Glue.


I attached two 3/8" Adhesive Velcro Dots to the inside front of the box for the box closure.
I stamped the DAD image from Hats Off stamp set onto Basic White Cardstock with Pacific Point Ink.
I cut the image out using the Hat Builder dies.
I cut a label from Pacific Point Cardstock using the Messages die.


I attached the stamped image to the Pacific Point label with Dimensionals.
I attached the entire embellishment piece to the front flap of the box with Liquid Glue.


Supplies:

Thank you for visiting my Blog today.  I hope you enjoyed my Triangle Box.
See you next time!

Love and Hugs,
Cathryn


Monday, June 7, 2021

Make a Father's Day Card with Hats Off - Stampin' Up!


Hi Friends!
My project today is a Father's Day card.  I made this card for a challenge I am participating in for my Stampin' Up! team.  I used Hats Off stamp set, Hat Builder dies, Well Suited Designer Series Paper, the Old World Paper 3D Embossing Folder and Rectangle Stitched dies.


I used Pacific Point Cardstock for the card base which measures
5 1/2  x  8 1/4".
I folded the cardstock in half to make the card base.
I cut out 5 small hats using the Hat Builder dies, 3 from Night of Navy Cardstock and 2 from Pacific Point Cardstock.
I used 2 pieces of Basic White Cardstock
One that measures  5 1/4  x  4" for the inside of the card and one  that is  1 3/8  x  5 1/4 for a layer of the card.


I attached a piece of  4  x  5 1/4" Well Suited Designer Series Paper to the front of the card with Stampin' Seal.
I cut a piece of Smokey Slate Cardstock sized  1 1/4  x  5 3/8.  I embossed this piece with the Old World Paper 3D Embossing Folder.
I attached the embossed piece on top of the Basic White Cardstock strip with Liquid Glue.
I attached the strip about 1/2" from the right side of the card with Stampin' Seal.


I attached the 5 hats to the strip of Smokey Slate Cardstock, with Liquid Glue, spacing them evenly apart.
I cut 2 rectangles using the Rectangle Stitched dies.  One from Basic White Cardstock and one from Poppy Parade Cardstock.
I stamped the 2 sentiments from Hat's Off stamp set onto the Basic White Cardstock with Tuxedo Black Ink.
I attached the White rectangle on top of the Poppy Parade rectangle, slightly below and to the right, with Stampin' Seal.
I attached the Rectangles to the card, as shown above, with Dimensionals.


Supplies:
Old World Paper 3D Embossing Folder

I hope you enjoyed my Card today.  Thank you for visiting my Blog.
See you next time!

Love and Hugs,
Cathryn


Friday, June 4, 2021

DOUBLE TREAT BOX with COUNT ON ME - Stampin' Up!


Hi Friends!
My project today is a Double Treat Box that holds 2 treats, one in each side!  I got my inspiration from a package of gum I found at the store.  It will fit a fun sized candy in each side of the box.  I used Count on Me stamp set, Pansy Petals Designer Series Paper, Tasteful Label dies, Hydrangea Haven stamp set, Hydrangea dies and the 2021-2023 In Color Designer Series Paper.


I started with a piece of Fresh Freesia Cardstock sized
8 5/8  x  6 1/2".
I scored the 8 5/8" side at:
1,  1 1/2,  3 3/4,  4 7/8,  7 1/8  and  7 5/8".
I scored the 6 1/2" side at:
1,  1 1/2,  4 1/2  and  5 1/2".
To cut and put the box together you can watch my Video Tutorial Here.
Below is a picture of the Template.


I attached pieces of Pansy Petals Designer Series Paper in sizes:
(2)  2  x  2 3/4"
(2)  7/8  x  2 3/4"
(4)  2  x  3/4"
I used the Detail Trio Punch to round the corners on a few pieces of the DSP before attaching it to the box.
I used Liquid Glue and Stampin' Seal to attach the DSP.


I cut out 2 labels using the Tasteful Label dies.  1 from Fresh Freesia Cardstock and 1 from Pale Papaya DSP.
I stamped the Penguin Image from Count on Me stamp set onto the Pale Papaya label and Basic White Cardstock using Tuxedo Black Ink.
I colored the Penguin on the Basic White Cardstock using Stampin' Blends.
Light Basic Black for the outside of the penguin.
Light and Dark Pumpkin Pie for the Beak and Feet.
Light and Dark Fresh Freesia for the Balloon.
I fussy cut the Penguin and Balloon out separately then attached them, with Liquid Gluy, over the Pale Papaya Label images so that the Balloon string shows on the Pale Papaya.
I attached the Pale Papaya, with the image, onto of the Fresh Freesia label with Stampin' Seal.


I attached a  3/8" Adhesive Velcro Dot to the bottom/inside of the box as shown in the above picture.
I attached the Penguin embellishment to the front of the box, with Dimensionals, so that the top flap would slip behind the top of the label.


I tied some Pale Papaya Open Weave ribbon around the the inside of the top flap and tied a bow at the top.
I cut a small label from the Pale Papaya DSP using the Hydrangea dies.  I stamped the sentiment from Hydrangea Haven stamp set onto the label with Tuxedo Black Ink.
I attached the small label to the bow with White Baker's Twine.


For the final touches I added 3 Fresh Freesia Gems around the Penguin and some Wink of Stella to the Balloon.


Supplies:
Count on Me stamp set
Pansy Petals Designer Series Paper
Tasteful Label dies
Hydrangea Haven stamp set
Hydrangea dies
2021-2023 In Color Designer Series Paper
Fresh Freesia Cardstock
Basic White Cardstock
Tuxedo Black Ink
Light Basic Black Stampin' Blend
Light and Dark Pumpkin Pie Stampin' Blend
Light and Dark Fresh Freesia Stampin' Blend
Detail Trio Punch
Pale Papaya Open Weave Riubbon
2021-2023 In Color Gems
White Baker's Twine
Dimensionals
Liquid Glue
3/8" Velcro Dots from Walmart.com

I hope you enjoyed my project today.  Thank you for visiting my Blog.
See you next time!

Love and Hugs,
Cathryn


Wednesday, June 2, 2021

CADBURY CHOCOLATE BAR BOX with HAND-PENNED PETALS - Stampin' Up!


Hi Friends!
For my project today I made a long skinny box to fit a Cadbury Chocolate Bar.  It measures  6 1/2  x  3  x  1/2".  I used Hand-Penned Petals stamp set, Penned Flowers dies, Color and Contour stamp set, Scalloped Contours dies, Rectangle Stitched dies and Hand-Penned Designer Series Paper.


I started with a piece of Mint Macaron Cardstock sized
8 1/2  x  7 1/2".
I scored the 8 1/2" side at:
1/2,  1,  7 1/2  and  8"
I scored the 7 1/2" side at:
3,  3 1/2,  6 1/2  and  7".
To cut and put the box together you can watch my Video Tutorial Here.  Below is a picture of the box after I cut it and rounded the corners with the Detail Trio Punch and put the box together with Tear and Tape.


I cut a piece of the Hand-Penned DSP  6 1/4  x  3".  I cut a scalloped edge in the right side of the paper using the Scalloped Contours dies.  Once I cut the side of the DSP I cut the width of it to 2 3/4".
I attached it to the front flap of the box with Liquid Glue.


I cut a Mint Macaron Rectangle using the Stitched Rectangle dies.  I cut a smaller Basic White Scalloped Rectangle using the Scalloped Contours dies.
I stamped the sentiment from Color and Contour stamp set on the top of the White Rectangle with Tuxedo Black Ink.  Next I used the speckled stamp, from the Color and Contour stamp set,  to stamp and "stamp off" Pale Papaya Ink all around the Basic White Rectangle.
I attached the 2 Rectangles together with Liquid Glue.


I stamped the large bunch of flowers image from Hand-Penned Petals stamp set onto Basic White Cardstock with Tuxedo Black Ink.  I stamped the inside of the larger flowers with Pale Papaya Ink.  I stamped the small flowers with Blushing Bride Ink.  I stamped and "stamped off" the leaves with Mint Macaron Ink.
I fussy cut the flowers apart except I left the small single leaf attached to the largest flower.  I attached the small pieces to the 2 rectangles, as shown in the photos, with Liquid Glue.
I attached the Largest Flower on top of the other pieces with Dimensionals.


I tied Pale Papaya and Soft Succulent Open Weave Ribbon around the box together and tied a bow at the side.
I attached the embellished piece on top of the ribbons with Dimensionals.
For the final touch I added some Genial Gems to the middle of the flowers.


Supplies:
Dimensionals
Liquid Glue
Simply Scored
Take Your Pick Tool

Thank you for visiting my Blog today.  I hope you enjoyed my Chocolate Bar Box.
See you next time!

Love and Hugs,
Cathryn


Monday, May 31, 2021

SWEET as a PEACH PEACH RINGS BOX with YOU'RE A PEACH - Stampin' Up!


Hi Friends!
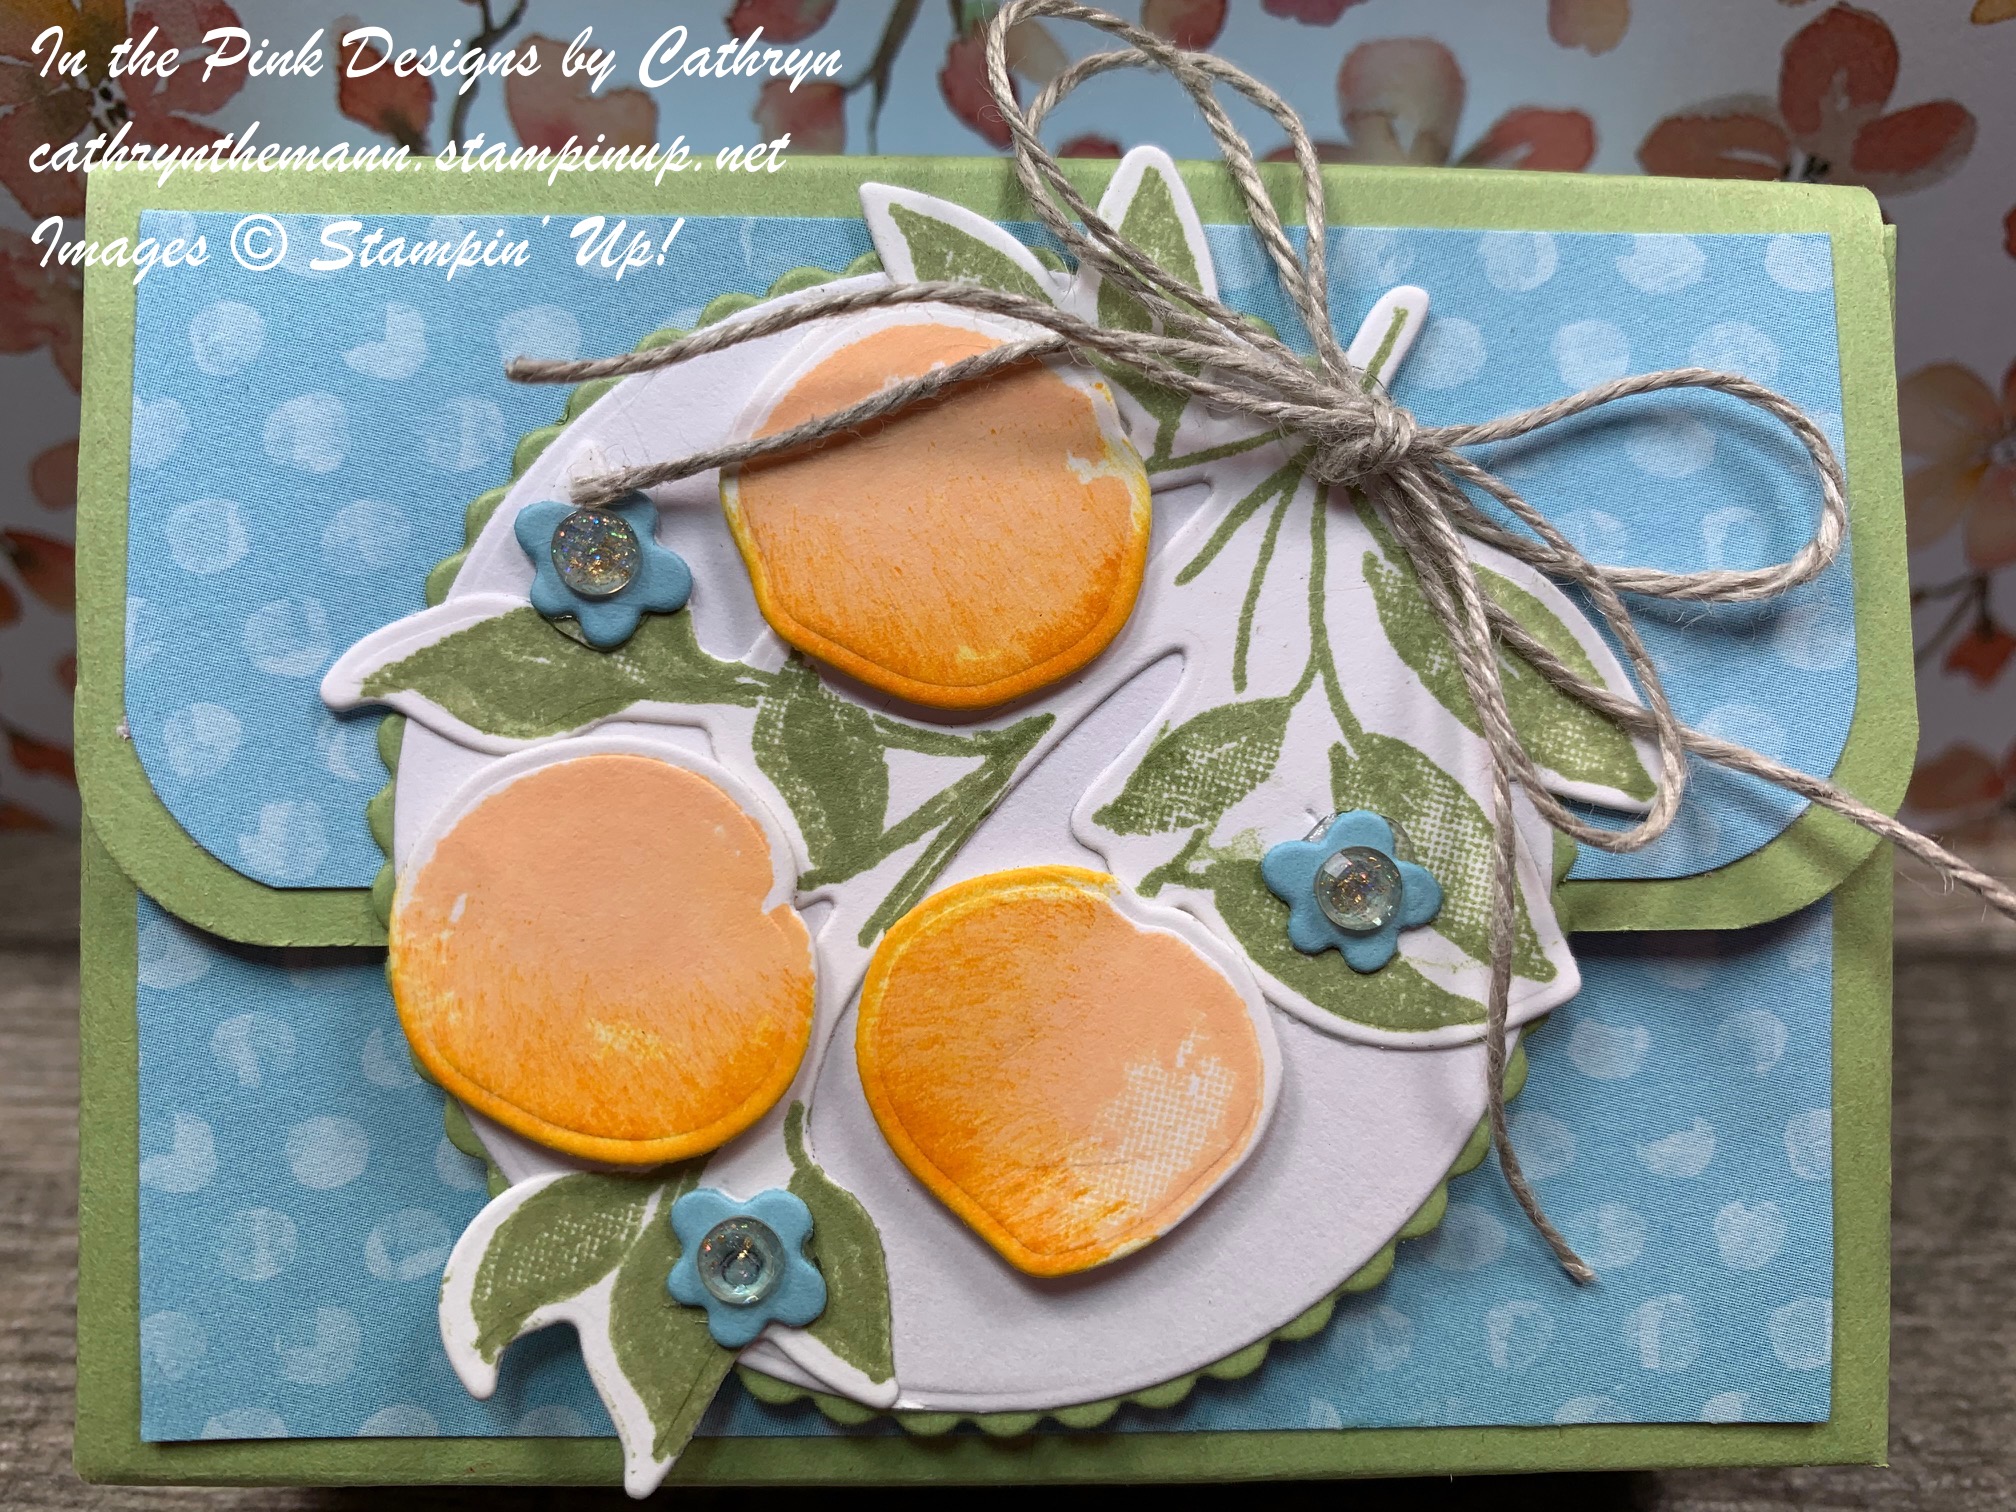
For my project today I made a box to fit some delicious Peach Rings Candy.  I used the Sweet as a Peach stamp set, Peach dies, You're a Peach Designer Series Paper, Layering Circles dies and the Messages die.  This box measures  3 1/2  x  2 1/2  x  1 1/4".  It is the perfect size for a little treat or gift.


I started with a piece of Pear Pizzazz Cardstock sized  9 x 6".
I scored the 9" side at:
2 1/2,  3 3/4,  6 1/4  and  7 1/2".
I scored the 6" side at:
1 1/4  and  4 3/4".
To cut and put the box together you can watch my Video Tutorial Here.


I attached several pieces of You're a Peach Designer Series paper in sizes:
(2)  3 1/4  x  2 1/4"  for the front and back
(2)  2 1/4  x  1"  for the sides
(1)  3 1/4  x  1  for the top
(1)  3 1/4  x  1 1/4 for the front flap which I rounded the bottom corners using Detail Trio Punch.
I attached the DSP to the box with Stampin' Seal.


I stamped the leaves and peaches images from Sweet as a Peach stamp set onto Basic White Cardstock.
I stamped the leaves with Pear Pizzazz Ink.
I stamped the Peaches with Pale Papaya Ink and sponged one side of each peach with Mango Melody Ink.
I cut a scalloped circle from Pear Pizzazz and a smooth circle from Basic White Cardstocks using the Layering Circles dies.
I cut the peaches, Leaves and small flowers (from Balmy Blue Cardstock) using the Peach dies.


I attached the circles together with Liquid Glue.  I attached the leaves to the circles first with Liquid Glue and then the Peaches with Mini Dimensionals.
I attached the entire piece to the top flap of the box with Liquid Glue on the top of the circle only.
I attached a 5/8" Adhesive Velcro closure onto the flap and body of the box to keep it closed.


I cut a label out of Pale Papaya Cardstock using the Messages die.  I stamped the sentiment from Sweet as a Peach stamp set on the label with Balmy Blue Ink.
I attached the label inside the front flap of the box with Liquid Glue.
I tied a bow with a double strand of Linen Thread and attached it to the stem of the leaves with a Glue Dot.
I attached the small blue flowers around the peaches with Glue Dots.
For the final touch I added some Gilded Gems to the middles of the blue flowers.


Supplies:
5/8" Adhesive Velcro Dots from Walmart.com

Thank you for visiting my Blog today.  I hope you enjoyed my Peachy project!
See you next time.

Love and Hugs,
Cathryn